.png)

 4219
4219
The Accounting Transaction Export makes it easy for you to export the journal entries created in GrowthZone for import into your accounting software. While this option is available, GrowthZone highly recommends that you simply enter summary information from GrowthZone into your accounting software. See Strategies for Efficient Accounts Receivable Tracking for more information.
There are four options available for export:
- QuickBooks IIF export (only available for QuickBooks Desktop, not QuickBooks Online)
- CSV (generic export option, not targeted to a specific software)
- Sage 50 (CSV with targets to specific software)
- Great Plains Dynamics
- Columns exported are Account Code, Amount, Description, TrxDate in a tab-delimited format
- The export has a daily single total for each account* for whatever date range is selected. (*This is not a detailed export of each transaction, but a summary of the account totals for each day.)
|
|
IMPORTANT: The IIF export is only available for import to QuickBooks Desktop, NOT QuickBooks Online. |

Deposits must manually entered into your accounting software, therefore, best practice is to complete this task daily. Deposits should include your credit card deposits, as well as your cash/check deposits.
Generate/Record GrowthZone Pay Deposits
Best Practice: We recommend checking for deposits every day and creating the appropriate journal entry accordingly.
With GrowthZone Pay, Credit Card/ACH payments begin processing on the day they are entered but the money is not deposited in the bank until a day to two later or sometimes longer. That is why best practice is to have your fee items be setup to go first into an account called Undeposited Funds, a holding account until the money is deposited into the bank. At that time, a journal entry can be made that takes the money from Undeposited Funds and records it as a deposit in your bank account. This also gives opportunity to record the processing fees that are immediately subtracted from the amount collected. With GrowthZone pay, you will use the GZ Pay Transfers Details Report report to view the deposit and associated fees. You will create your journal entry for each deposit.
To generate the report:
- Select Reports > GZ Pay Transfers Details Report.
- Select the Date Range for the time frame for which you are checking for deposits.
- In the Fields to Display select “Payment Gateway”. (This is important if you have multiple payment gateways)
- Select Summarize By “Transfer ID”
- Click Run Report.
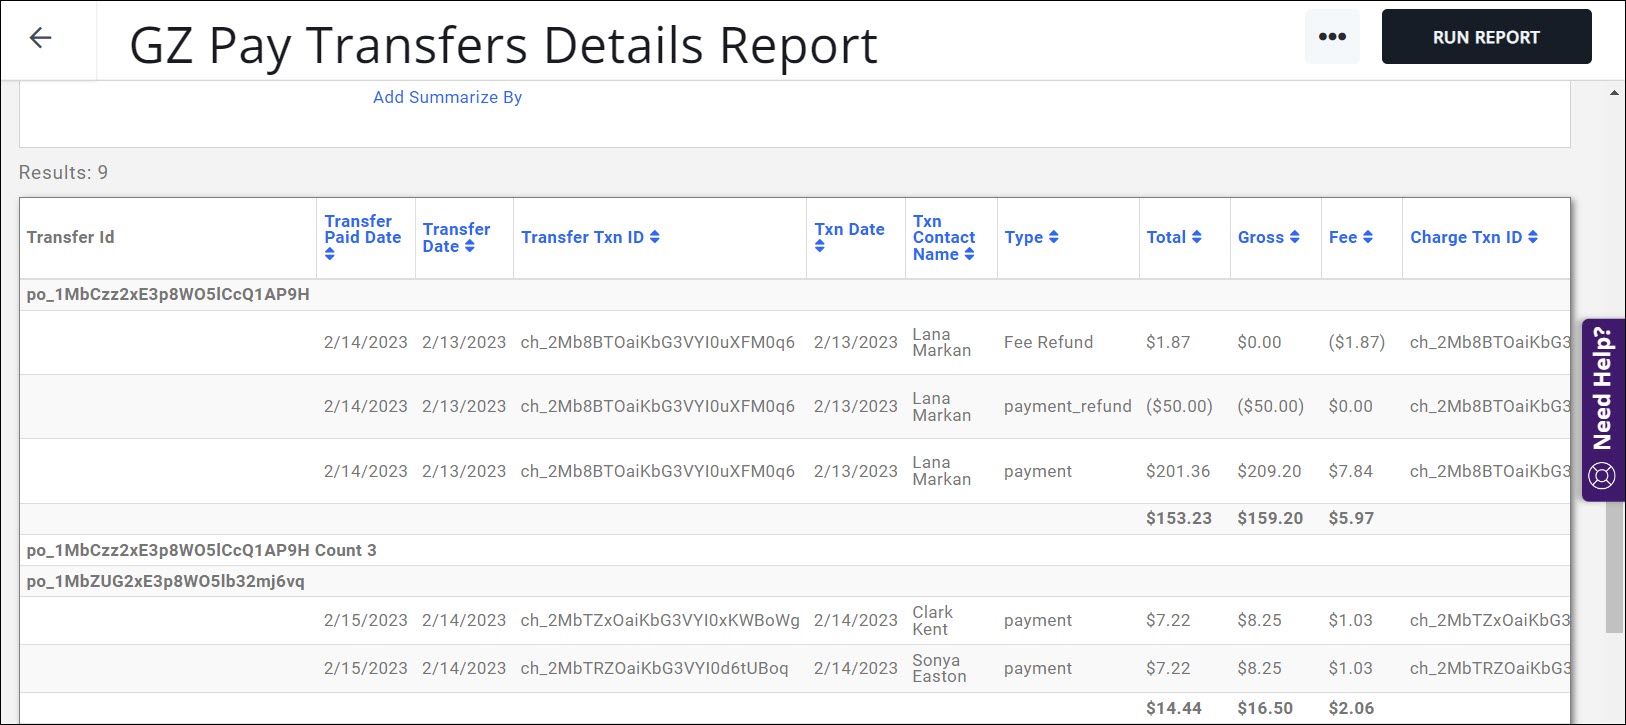
Find the summary totals for each transfer ID and use those numbers to create your journal entry. The journal entry date will be the Transfer Paid Date column. This is the date that the deposit was made to your bank. Example: Journal entries you would make from the above report on 8/1/2019.

Record GrowthZone Pay Refunds
Generate the GZ Pay Transfers Details Report as described above. Look for refunds in the Type column.

If there are refunds, this must be reflected in your accounting software.
-
- Example A: Journal Entry to show the details of where numbers come from

-
- Example B: Journal Entry with the totals combined - see how the numbers are easily found on the Refund report.

Either Example A or Example B are correct; choose whichever example fits best with how your accountant wants to see the amounts entered.
Create & Record Cash/Check Deposits
- Reports > Deposit Details report.
- Select the Date Range for the time frame you are checking for deposits.
- Select Summarize By “Deposit ID” and click Run Report.
- Look for (or filter to) the deposits that are not the automatic deposits for GrowthZone Pay because those are recorded in the GrowthZone Pay Transfers Details report.
- Find the summary totals for each Deposit ID and use those numbers to create your journal entry in QuickBooks.
Create/Record Authorize.NET Payments
With Authorize.net, credit card/ACH payments typically reach the bank on the next day after they are processed (might be after a certain cutoff time). Because the money is not directly entered into the bank on the day the payment is excepted (usually the day after), our best practice (see Prerequisites above) is to have your fee items be setup to go first into an account called “Undeposited Funds”, a holding account until the money is deposited into the bank. At that time, a journal entry can be made that takes the money from Undeposited Funds and records it as a deposit in your bank account. This also gives opportunity to record the name of the batch that the deposit is associated with. With Authorize.net as your processor, you will use your batch report from Authorize.net to view the deposit. From the Authorize.net batch you will create the Deposit in GrowthZone You will create your journal entry for each deposit.
- Best Practice: We recommend checking for deposits every day and creating the appropriate journal entry accordingly.
Create an Authorize.net Deposit:
- Select Billing in the left-hand navigation panel.
- Click the Deposits tab.
- Create Deposit
- Review your deposit report from Authorize.Net to know what was deposited on a particular day and find those deposits on the Add Deposit screen.
- Select the desired payments that were deposited on a particular day. TIP: Clicking the Type column will sort the deposits by Credit Card or Check which might help get your deposit amounts grouped together better.
- Enter the Deposit Date.
- (Optional) Enter any Notes to help you recall what this deposit was for – anything special included etc.
- Click Done.
Create the Journal Entry for the deposit in your QuickBooks software.

