.png)
Add a Free Registration Type

May 01, 2024
 1828
1828
For events where you simply wish people to register but are not charging a fee, you will select the Free Registration Type.
- On the event Attendee Setup tab, click the Actions button in the Registration Types section.
- Click Add Free Registration Type.

- Configure the following:
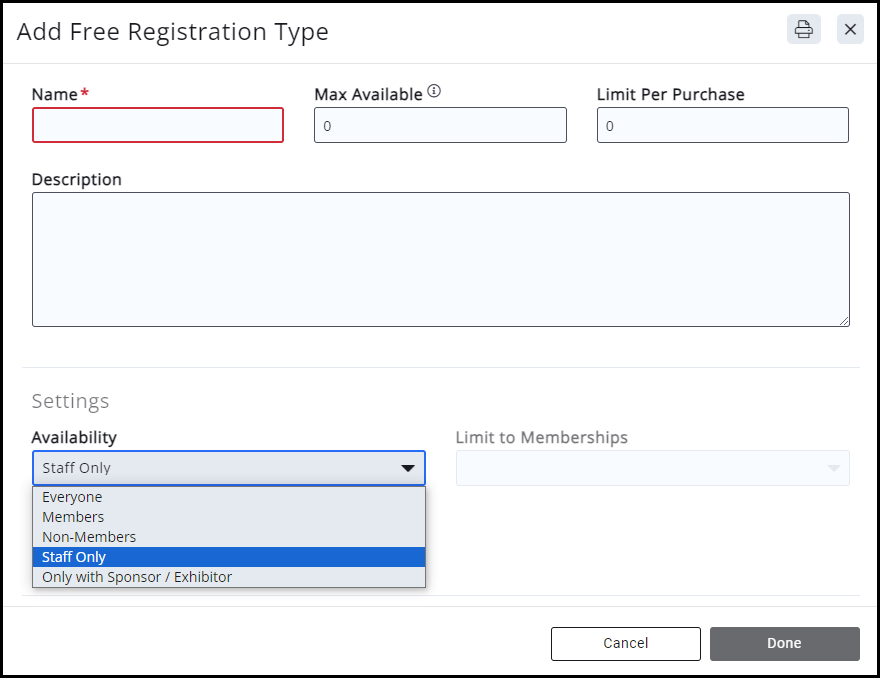
- Enter a Name for the Registration Type.
- Max Available. This option will limit the number of registrations available, and will not allow registration with this type when the limit has been met. NOTE: If the Max Attendees setting is being used as well, that setting will override this setting (if Max Attendees is set to 100, and this is set to 120, once the total number of registrations reaches 100, no more registrations will be available.) 0 is unlimited.
- Limit Per Purchase**: Specify the number of registrations of this type available to purchase in a single registration. For example, if your members may only purchase a single ticket of this type for this event, enter "1" here. 0 is unlimited.**
- Enter a Description for this registration type. Registrants will be able to view the description of the fee item by clicking on the fee item link on the registration page.
5. Availability - these settings allow you to define which users can register with this type of registration. This would also display the registration types on your public page.
|
6. Click Done.

