 8294
8294
It is a best practice to send invoices prior to auto-charging a member's payment profile. By doing so, you are reminding the member that they have agreed to an auto-charge for recurring fees. Additionally, this gives the member ample time to ensure they have enough money in their bank account (or credit limit on their credit card) to pay, change their profile, or cancel their payment.
Getting Started
Enable Invoice Before Autopayment under Setup > Finance > General Settings.

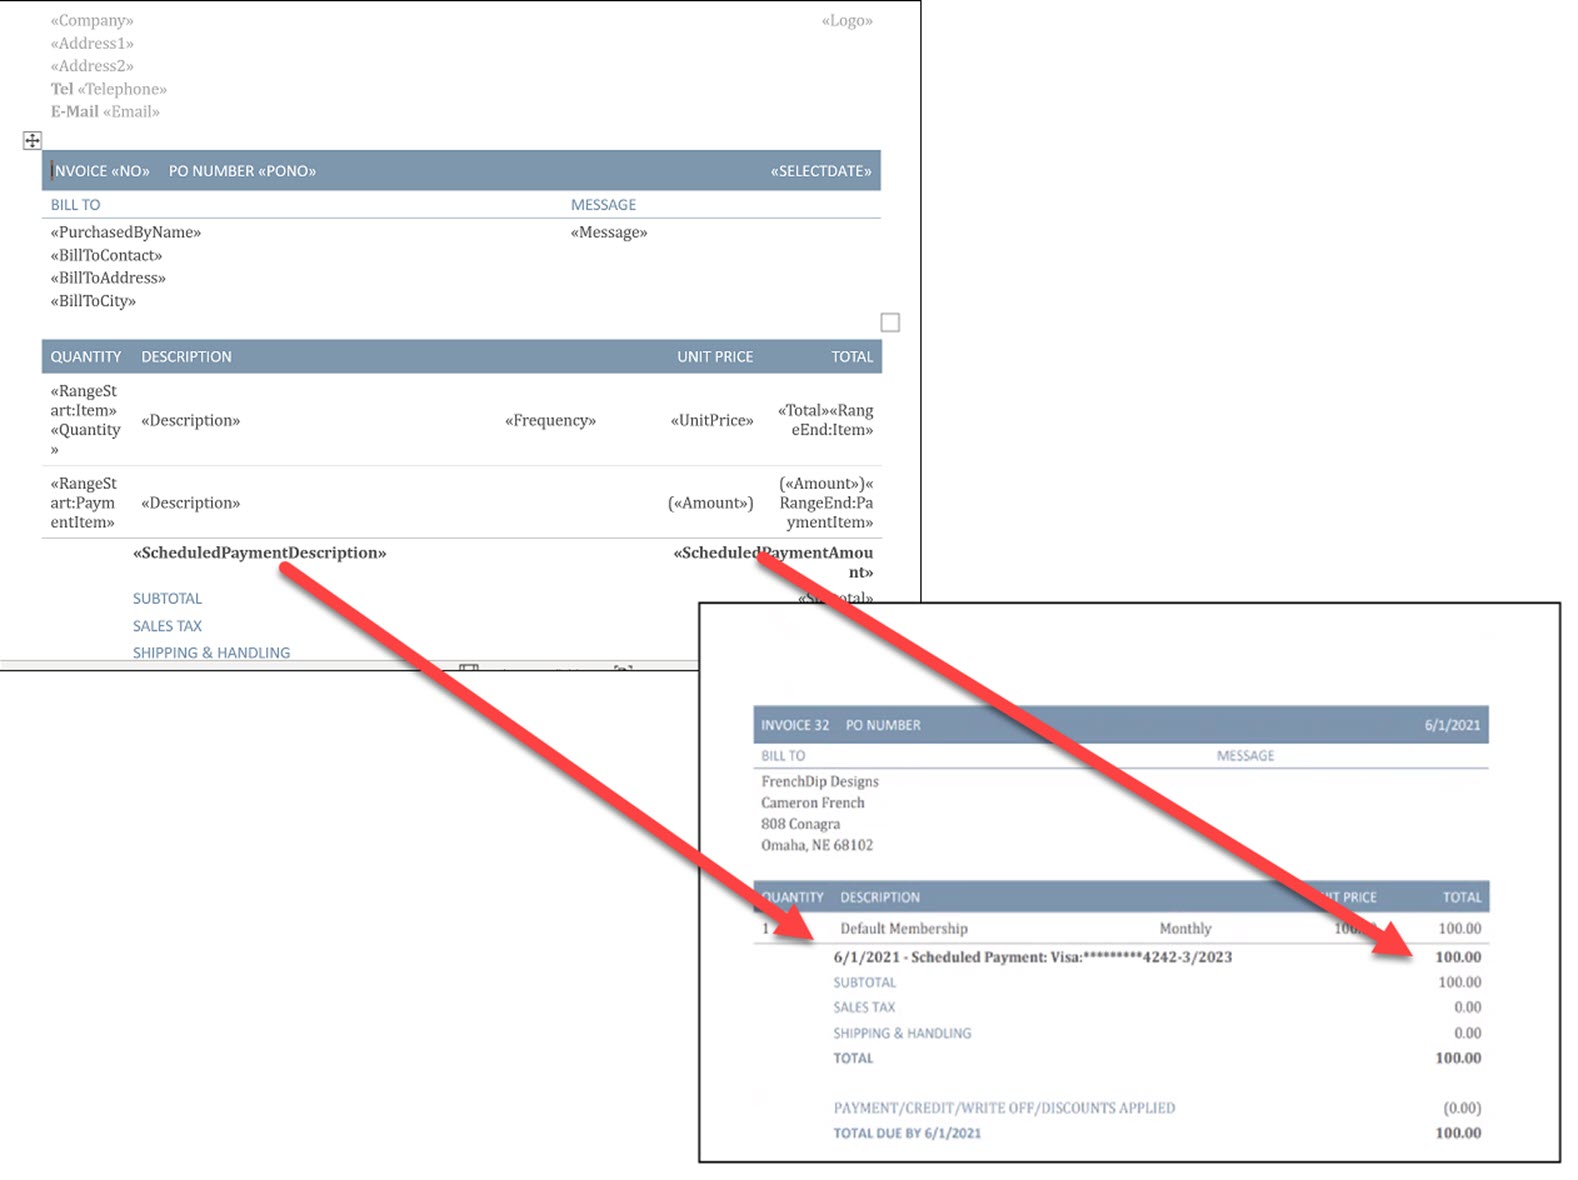
Verify your Invoice Template. An invoice template has been provided, within the database, which includes merge fields that will note that the invoice is scheduled to be paid on the next bill date, and the amount that is scheduled to be charged. You can use this template as it is designed, or customize to suit your needs. NOTE: If the invoice does not have a scheduled payment, the merge fields will simply not be populated, so you can use the same invoice template for both non auto-charge and auto-charge. The PaymentHyper link merge field is also included in the template, but for an invoice that is set for auto-charge, the link will state 'Invoice is Scheduled to be Paid'.

Update the default invoice template under Setup > Finance > General Settings.
How it Works
- If Automated Scheduled Billing is enabled, your system will automatically generate all invoices (not just those without a payment profile) at 5:30 am daily. Invoices created will be those that have a next bill date x days from the current date. X is the lead time days you have set in under Finance > General Settings. When you first enable Invoice Before Autopayment, the system will "catch up" and create any invoices for next bill dates that are less than the lead time days.
- If Automated Scheduled Billing is not enabled, when you manually generate invoices, invoices for autopay can also be generated.
- The invoice template used will be the one set as the default under Finance > General Settings.
- Invoices will be logged on the Billing > Pending Delivery tab. You will deliver these invoices as you have in the past. See Deliver Invoices Pending Delivery for further instructions.
- When your member receives the invoice, it will provide indication that the invoice is scheduled to be paid and no action is required on their part.
- On the Next Bill Date, the system will automatically charge the members' stored payment profiles.
Edit a Payment Profile on an Advance Invoice
If you are generating invoices for auto-charged members ahead of the charge date, there may be times that a member contacts you and wishes to update their profile. In this scenario you will be able to edit the scheduled payment. See Edit a Payment Profile on and Advance Invoice for instructions.
Member View of Advance Invoices
The default invoice template includes fields that indicate to the member that the invoice is set to be auto-charged, when it will be auto-paid, and how much will be paid. No action is required by the member, however, a link on the invoice, Invoice is Scheduled to be Paid, allows the member to access the payment screen, shown below.

From this payment page, the member can:
- Cancel the auto-payment by clearing the check-box for the advance invoice.
- Pay the advance invoice immediately, by clicking the Pay Now button.
- Pay the advance invoice with a different credit card or bank account. Enter the profile information and click Pay Now.
- Store a new card or bank account. Enter card/bank information and check 'Securely and conveniently store card' for future use.
- Update the profile used for future scheduled billing. Enter card/bank information and check Use for existing scheduled payments. IMPORTANT: This will NOT update the profile associated to the advance invoice. If the member wishes to pay the advance invoice with the new profile, see #2 above.
Invoice Scheduled to be Paid Report
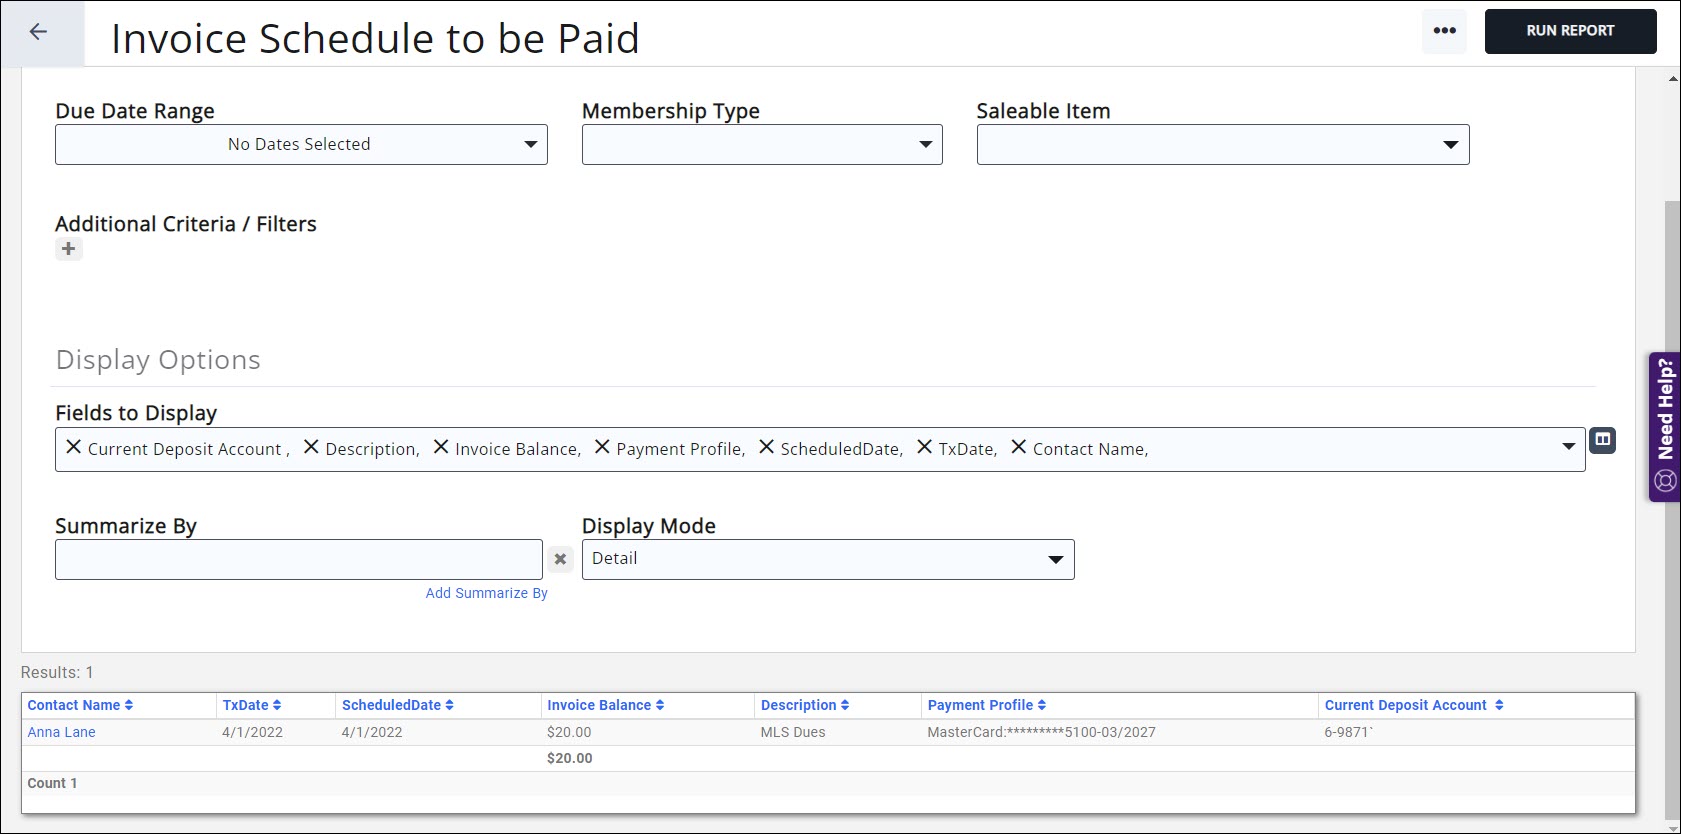
The Invoice Scheduled to be Paid Report provides a way to review and report on all the upcoming payments scheduled to run automatically.
- Click Reports in the left-hand navigation panel
- Select Invoice Scheduled to be Paid
- Enter desired filtering criteria
- Click Run Report


