.png)
Register Exhibitors- Online

Jun 10, 2025
 1021
1021
When registrants access the Exhibitor registration via the Exhibitor Registration Link OR via the Exhibitor Registration button on the Event Details page, the process is the same as if you used the Register (As Non-Staff) option from the back office.
- Using either a link or the Exhibitor Registration button, open the exhibitor registration page. The exhibitor who wishes to register can enter their email and click GO.
IMPORTANT! If you are logged into GrowthZone and use the Exhibitor Registration link or the Exhibitor Registration button on the Event Details page, the system MAY RECOGNIZE YOUR STAFF CREDENTIALS. If you as staff have used either of these options, and you see your name in the Contact Information section, the registration page recognizes that you are staff and will override most settings for exhibitor registration. See Register Exhibitors- Back Office for more information.
A known contact, verified by clicking the Go button.
The system may prompt the registrant for more information if they are not known (i.e. does not have a contact record in GrowthZone).
Click Continue. - Select the desired Exhibitor registration option. The Attendee Registration Options will display with the number of included attendees as soon as the Exhibitor Registration Type is indicated. Add or remove attendees as needed and click Continue.

Exhibitor registration options - In the Registration Information, select the exhibitor from the dropdown. There is a <Someone Else> option if the person making the registration is NOT associated to the company purchasing the exhibitor booth. Exhibitors are designed to be associated to businesses, however, if you have an individual purchasing an exhibitor booth, you can enter their name in the Exhibitor/Display Name field. If a Directory is attached to your exhibitor registration type, you can modify the Display Name there as well.
Any additional items configured for the Exhibitor registration will appear here for selection. Enter the Primary Contact and any attendees as needed. If there are additional items configured as "For Attendee", you will be able to select them here.Click Continue.
Registration information including optional additional items for sale. - If there are any additional items available that are configured as "For Overall Registration", you can select them at this point and click Continue.

More optional additional items- these were configured as "For Overall Registration" - In the Complete Registration section, you may enter a Promo Code if one was set up for the event; you can enter credit card information to pay for the registration; or you can select the "Pay by Invoice" option if invoicing is enabled for the exhibitors. You may also need to select the Bill To contact from the dropdown.

Completing the registration, displaying the credit card information fields and the "Pay Now" button. - Click the Pay Now or Submit button (depending on if a credit card is being used vs an invoice being created) to complete the registration.
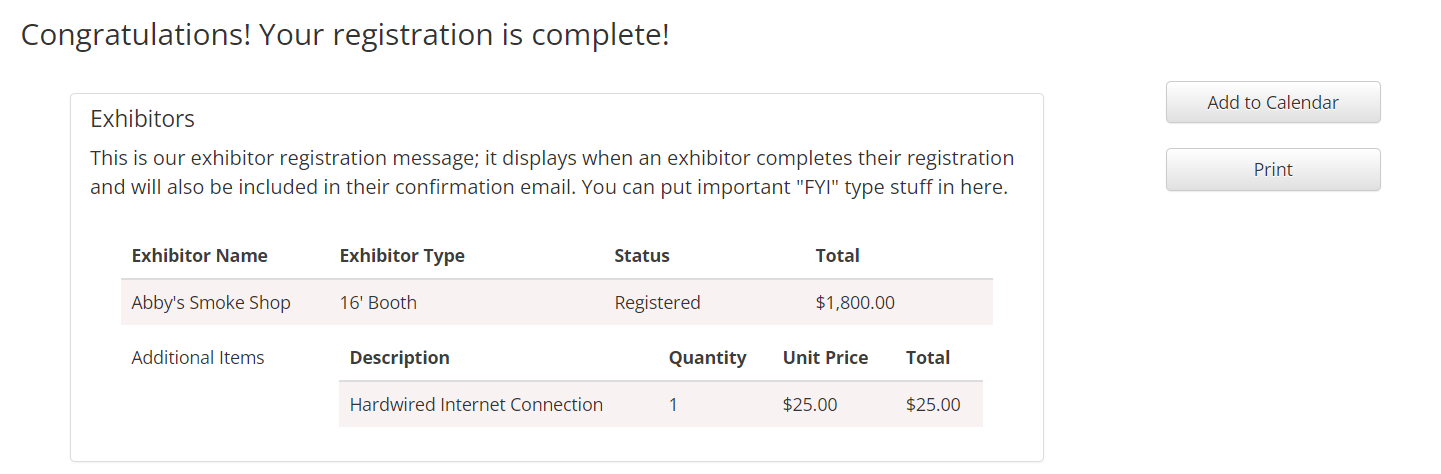
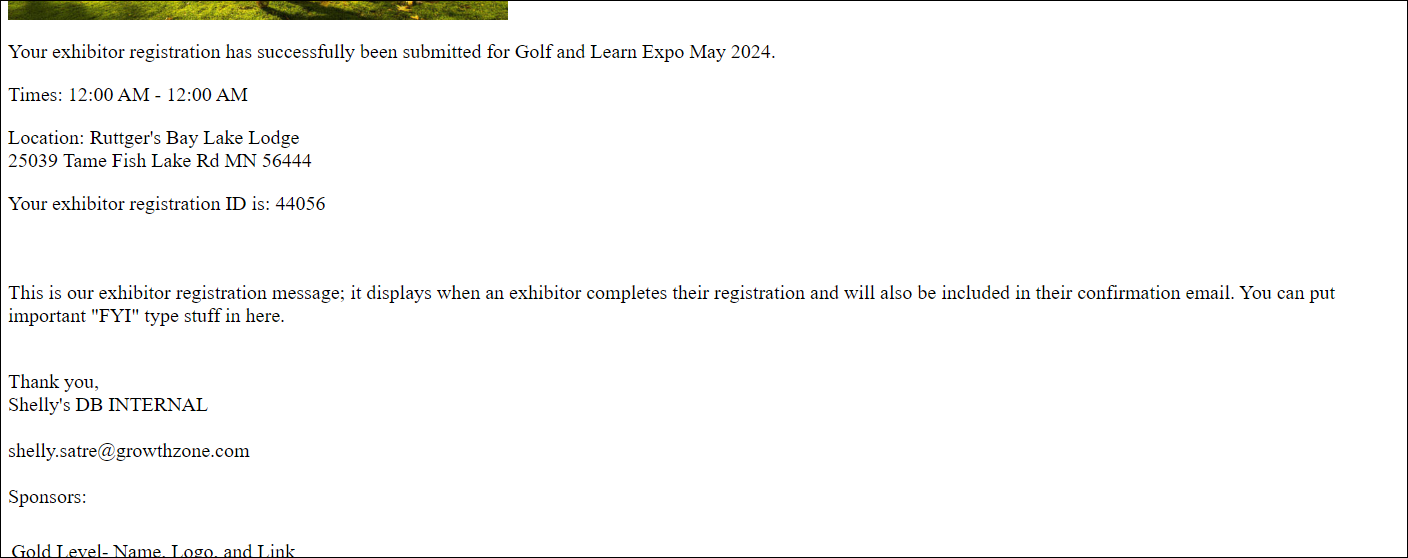
Exhibitors will be shown a confirmation page and will also receive a confirmation email containing the details of the confirmation page as well.