.png)

 1858
1858
Using your GrowthZone software you will be able to easily display contacts of a list/committee publicly. Perhaps you want to display your staff or board of directors. By using the List/Committee functionality you will be able to do so and, when changes are needed, simply make those changes in one location (the back office).
In the video below we will show how to do so, using Board of Directors as an example.
You can use the list/committee functionality to create a webpage of any contact list in your database. In this example, we'll talk about publishing a page that contains our current Board of Directors.
Setting up the List for Display
First, review the contacts that will be on the list. You may want to adjust certain options in their contact record, depending on which/how much information you wish to display. For example:
- By default, publishing the list to the website will include photos of the contacts. If you're going to publish, be sure that all contacts on the list have photos uploaded to their contact record! The contacts may be able to add these photos themselves via the Info Hub. Note: photos will be contained to a certain size, but if you want to be sure all photos are the same you may want to have list members submit them via email and then resize them to a consistent size before uploading.

A Contact with a photo added in the back office. 
A member managing their own photo in the Info Hub. - Contacts may not wish to have their emails or phone numbers displayed publicly. Use the "For Internal Use Only" option for any contact information you wish to retain in your database but not display on the website. Note: if your board member is also an association member and has a directory listing related to their individual contact record, enabling this option will affect their directory listings as well.

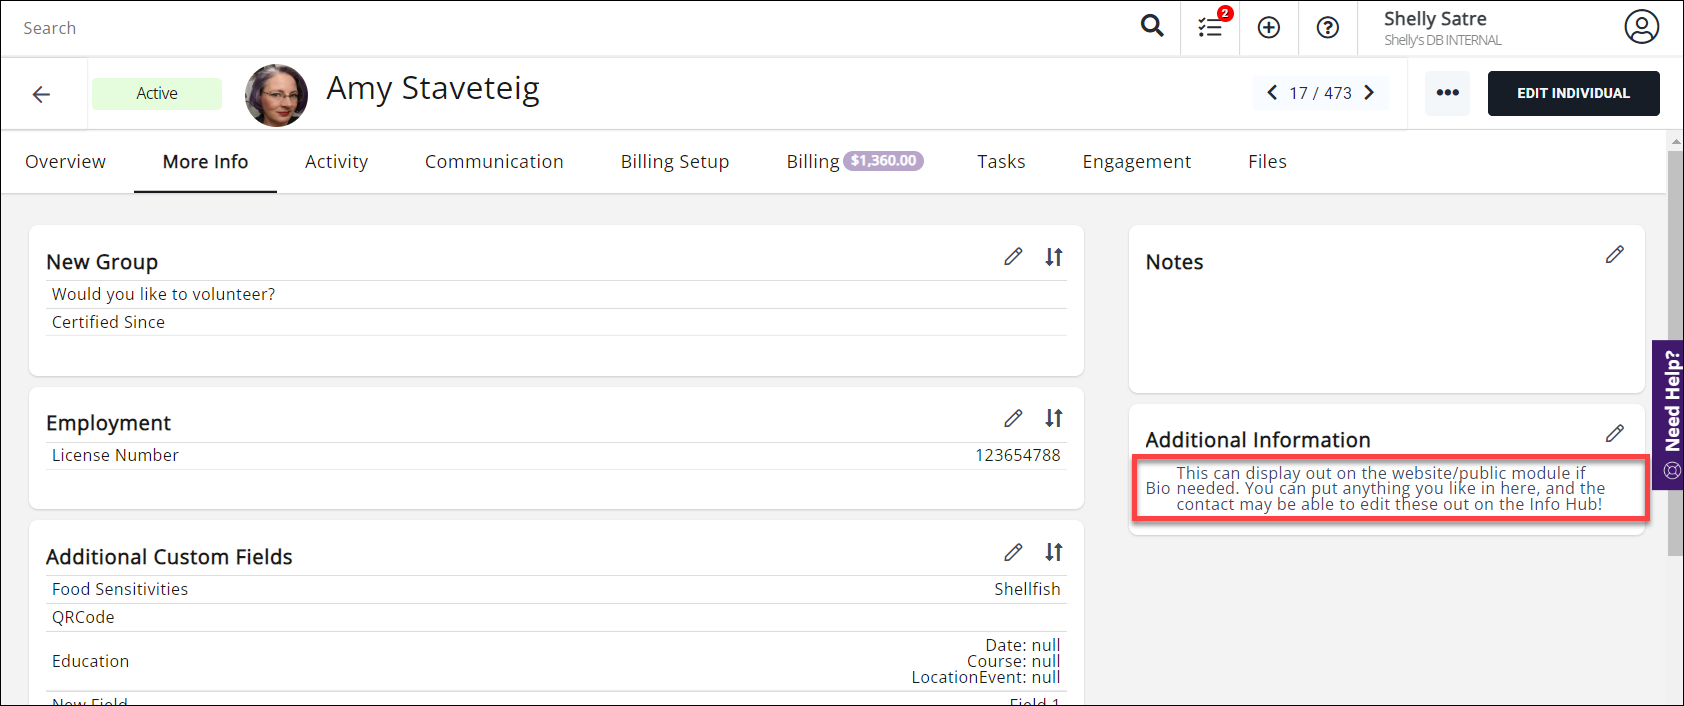
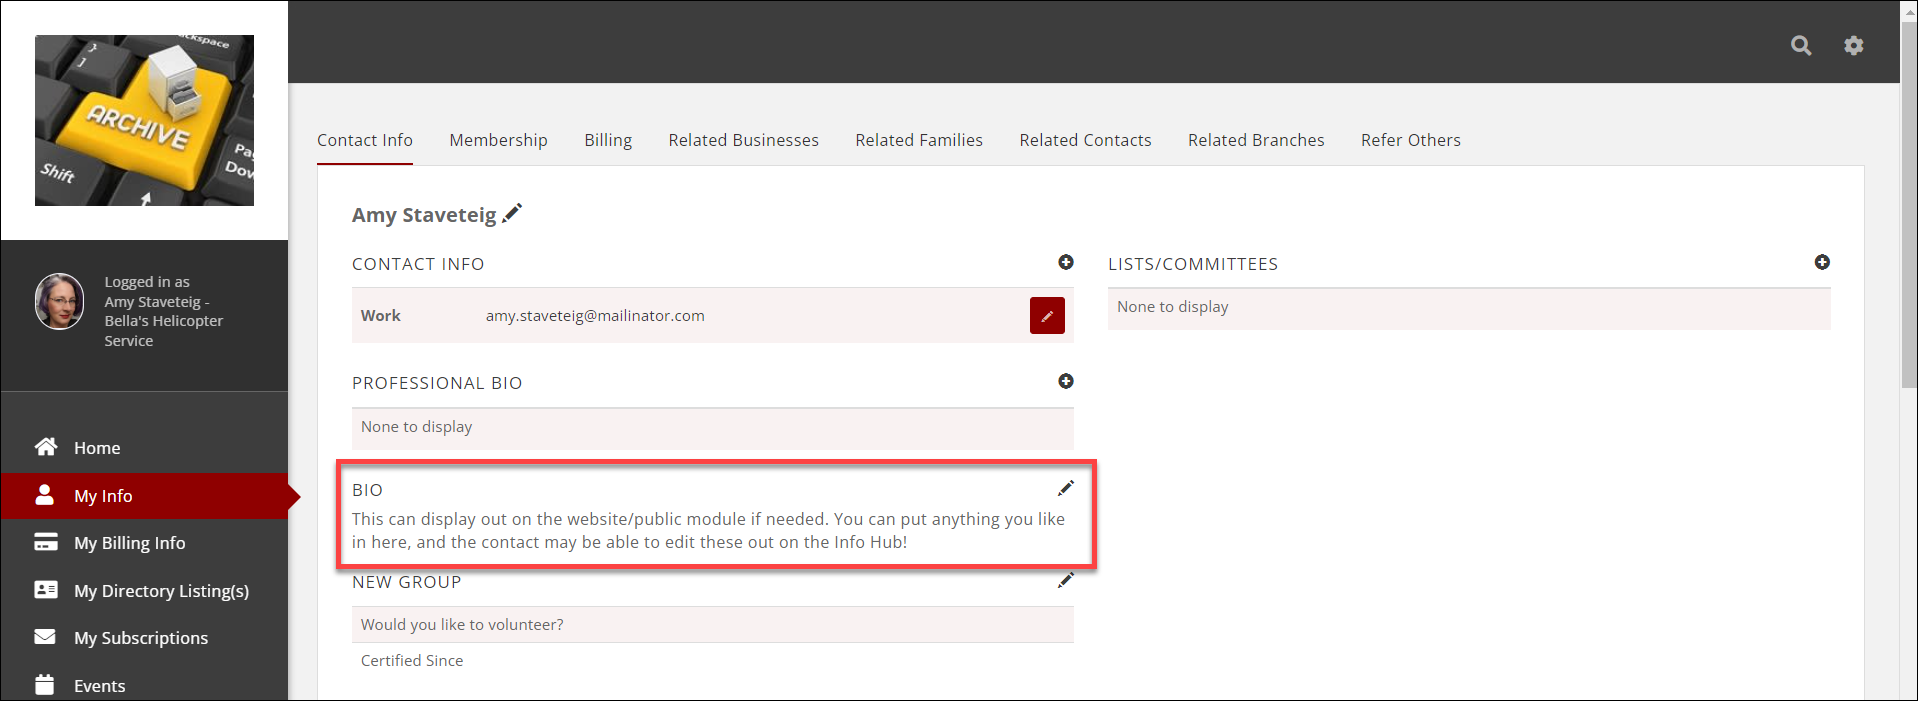
Setting an email to not display on a published list. - The "Bio" field can be used in many ways; be sure to use this field to your advantage! Either enter your desired text in it via the back office (you can find this field on the More Info tab), or have contacts add their own info via the Info Hub (on the the Contact Info tab in their My Info section).
Once you have verified your list contacts have the necessary/desired information entered in their contact record, create your list (use the Committees category) and add the contacts to it. You can either:
- Create the list and manually add contacts to it; OR
- Run a Contacts Report and use the "Add to List" option
When your list is created and has the correct contacts on it, you can then create the "public" version of the list that will appear on your website.
Creating the Public Module Page
Now we need to tell GrowthZone that we want this list to be publicly available (i.e. visible on a website). To do that, we need to create a public module page.
Navigate to Setup -> Website -> GrowthZone Pages:
- Click the number in the Pages column;
- Click the Add Module button;
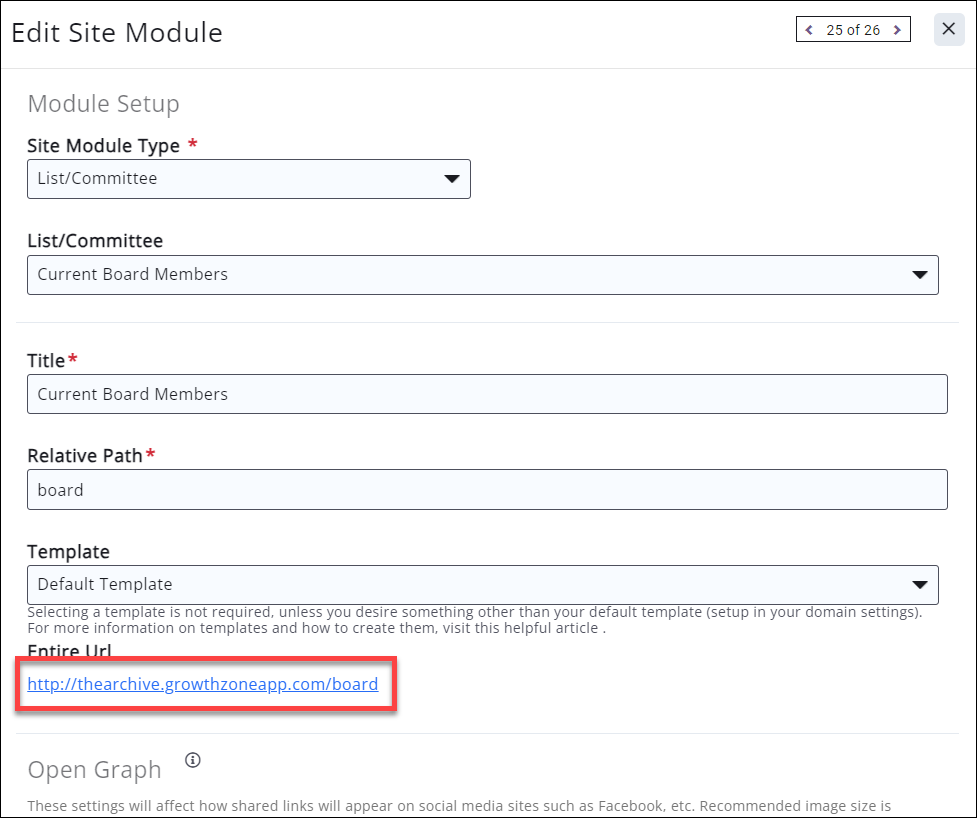
- (REQUIRED) In the Add Site Module window, select List/Committee from the Site Module Type dropdown menu;
- (REQUIRED) In the List/Committee dropdown, select the list you created above;
- Edit the following options:
- (REQUIRED) Title: By default, the Title of the page will be the name of the list selected from the dropdown. This will be what displays in the tab of the browser when someone views the list. Change this to something more description, like "Current Board Members" (or whatever you prefer).
- (REQUIRED) Relative Path: By default, this will be "listcommittee". This is the URL of the public webpage you are setting up; you'll probably want to edit this to match the Title, OR be something as short/succinct as possible. In this case, we're changing this to "board".
- (OPTIONAL) Template: Selecting a template is not required, unless you desire something other than your default template (setup in your domain settings). For more information on templates and how to create them, visit this helpful article on How to Create and Assign Templates to Your Module Pages.
- (READ ONLY) Entire URL: This will populate with whatever you put in the Relative Path field. When you first create the list, it will prefix the Relative Path with the word "null"; once you complete the module setup it will then display the whole URL you will be using in the next steps.

The Add Site Module window displaying our selections and settings. - (OPTIONAL) Open Graph settings: These settings will affect how shared links will appear on social media sites such as Facebook, Twitter/X, etc.
- (OPTIONAL) Image: Setting an image here will display that image when a link to this page is shared.
- (OPTIONAL) Title: Setting a title here will display that title when a link to this page is shared.
- (OPTIONAL) Description: Setting a description here will display that description when a link to this page is shared.

The Open Graph settings for our new public module.
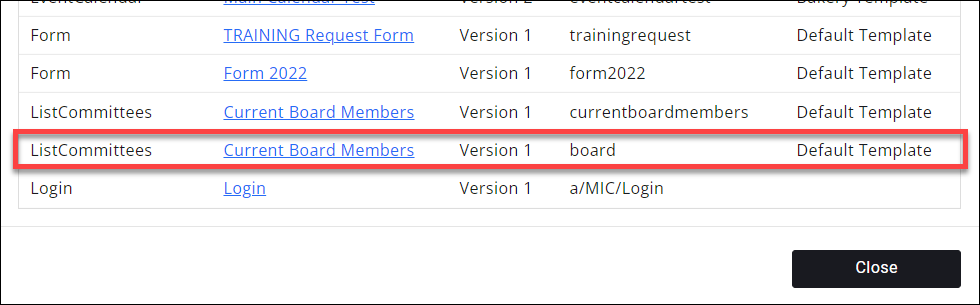
When you have selected and customized all your preferred settings for the new public page, click the Done button. In the Manage Site Modules window, the new page will appear toward the bottom of the list.
Adding the Page to your Website
The next step will be adding this link to our website navigation. The following instructions are specific to GZCMS websites, but should work similarly for any website; essentially, we are taking the link we just created and adding it to our website navigation menu.
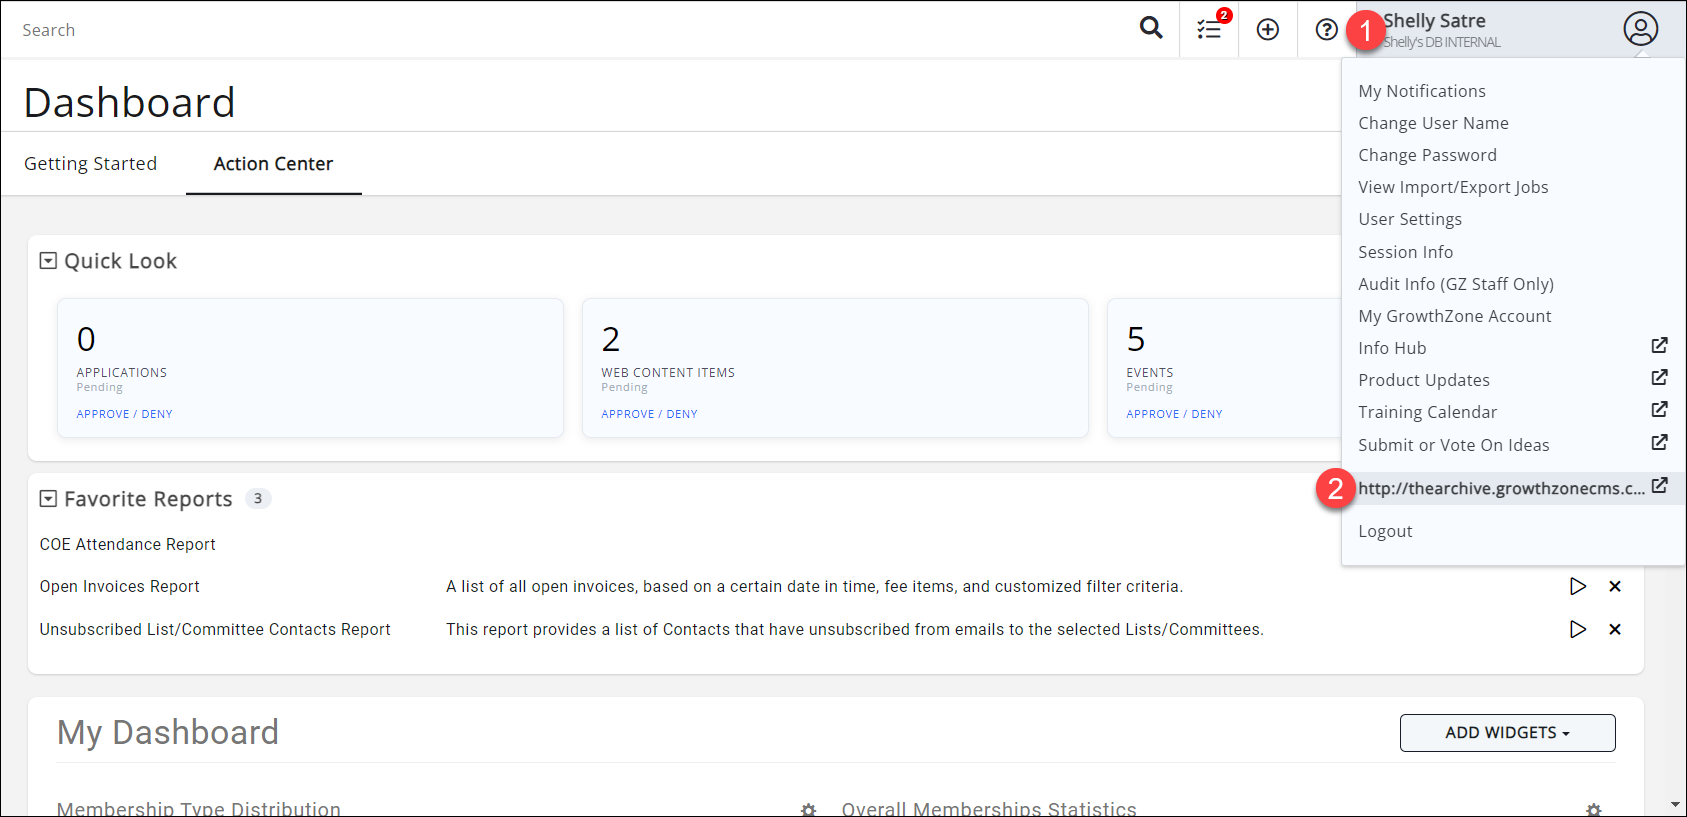
Click on the name of the new public module to open the Edit Site Module window. Find the now fully-populated link in the Entire URL section and copy it. You may want to paste it into a temporary document for reference.
Open your website. For GZCMS sites, there is a website link under your name in the upper-right corner of your GrowthZone interface. Clicking that link will automatically log you in as a site administrator.
Once your site is open, hover over the name of your website (to the right of the GrowthZoneCMS logo) and select Menus.

This will take you right to the Menus area of your GZCMS website. Note: you may have multiple menus in your website! Check with your web person if you aren't sure which menu to edit. You can select the menu from the dropdown; in most cases you will be editing the Main Menu (Header Menu).
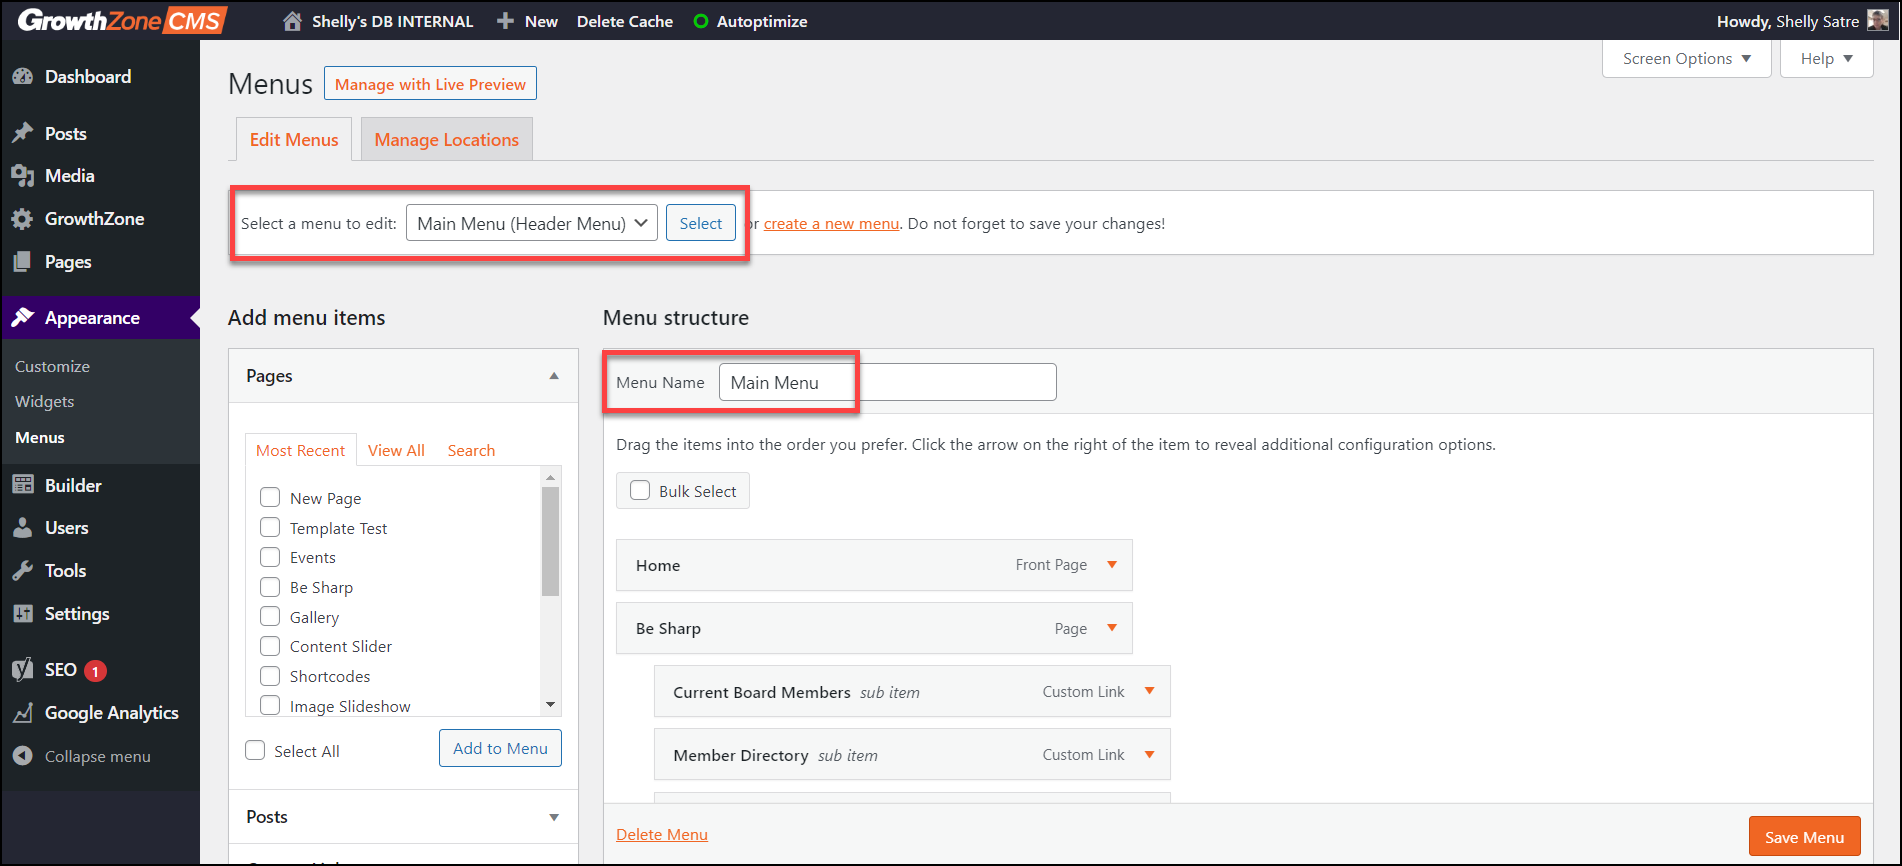
In the left pane you will see options to add Pages, Posts, Custom Links, and Categories; in the right pane you will see your current Main Menu navigation options. These correlate to the links/buttons on your website navigation.
In the left pane, click the Custom Links option. This will collapse the options above it and display two fields: one for URL and one for Link Text.
Paste the link from the Edit Site Module window in GrowthZone into the URL field and enter the text you wish to display for the navigation link.
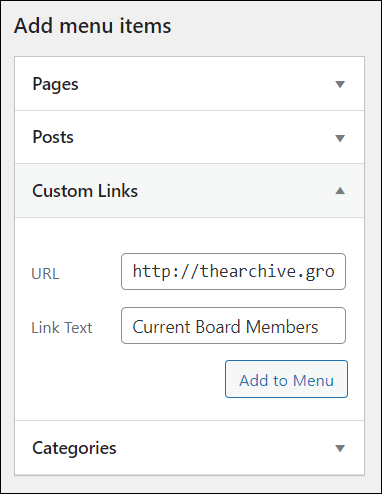
Click the Add to Menu button and your new link will appear at the bottom of your menu options.
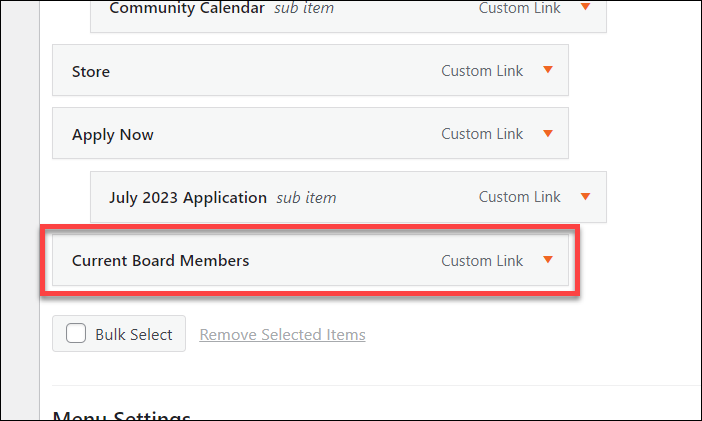
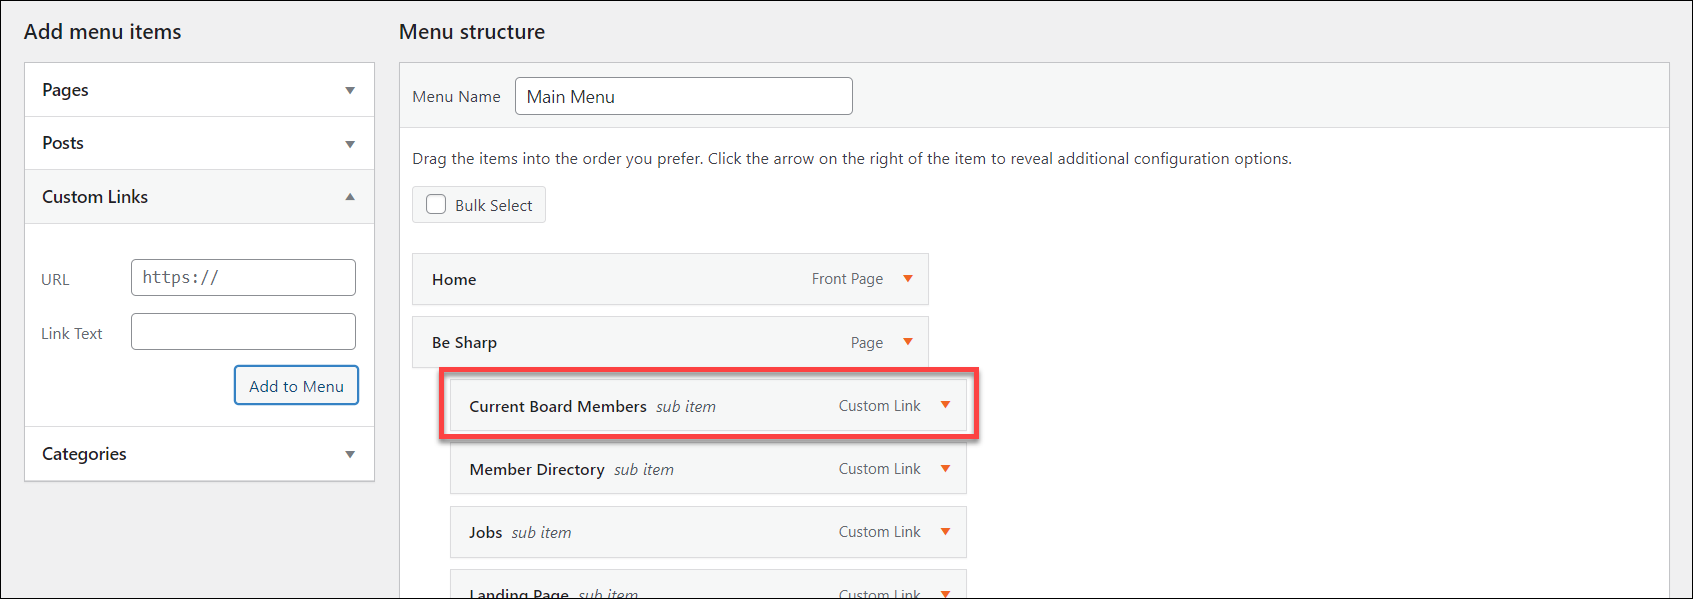
You can then click and hold the link to drag it into place in your menu navigation. You can even "nest" it under another link, like we have here:
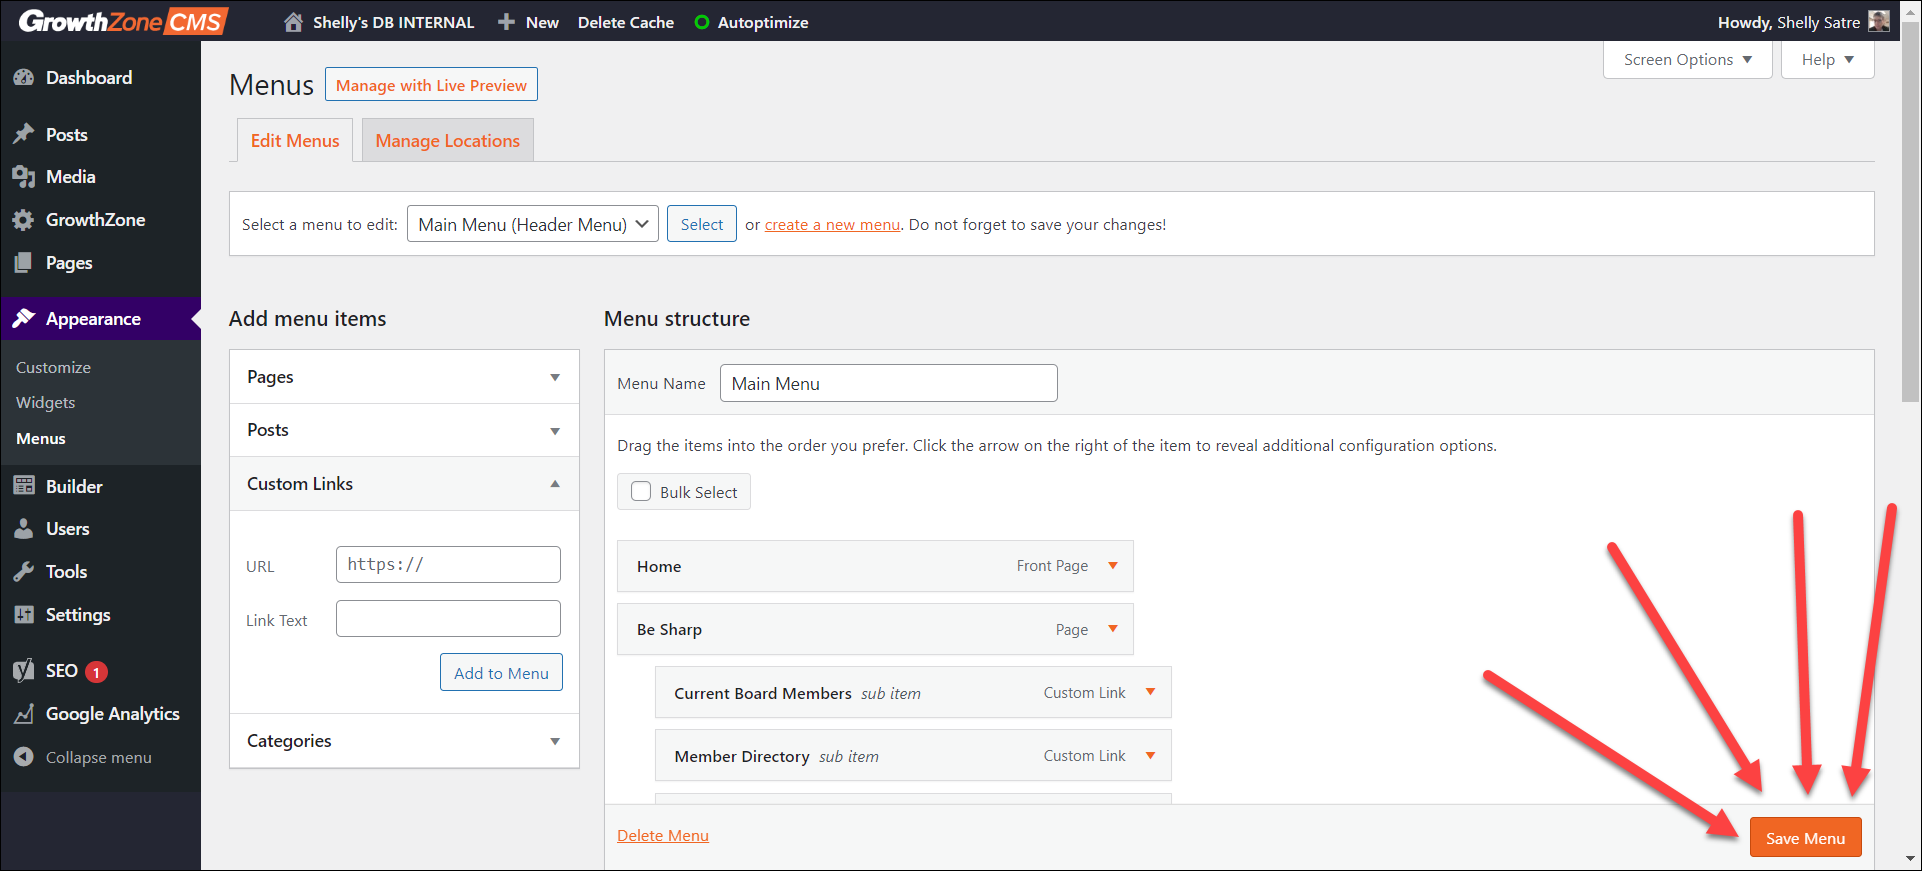
When the new link to your list is in place, BE SURE TO CLICK THE SAVE MENU BUTTON!
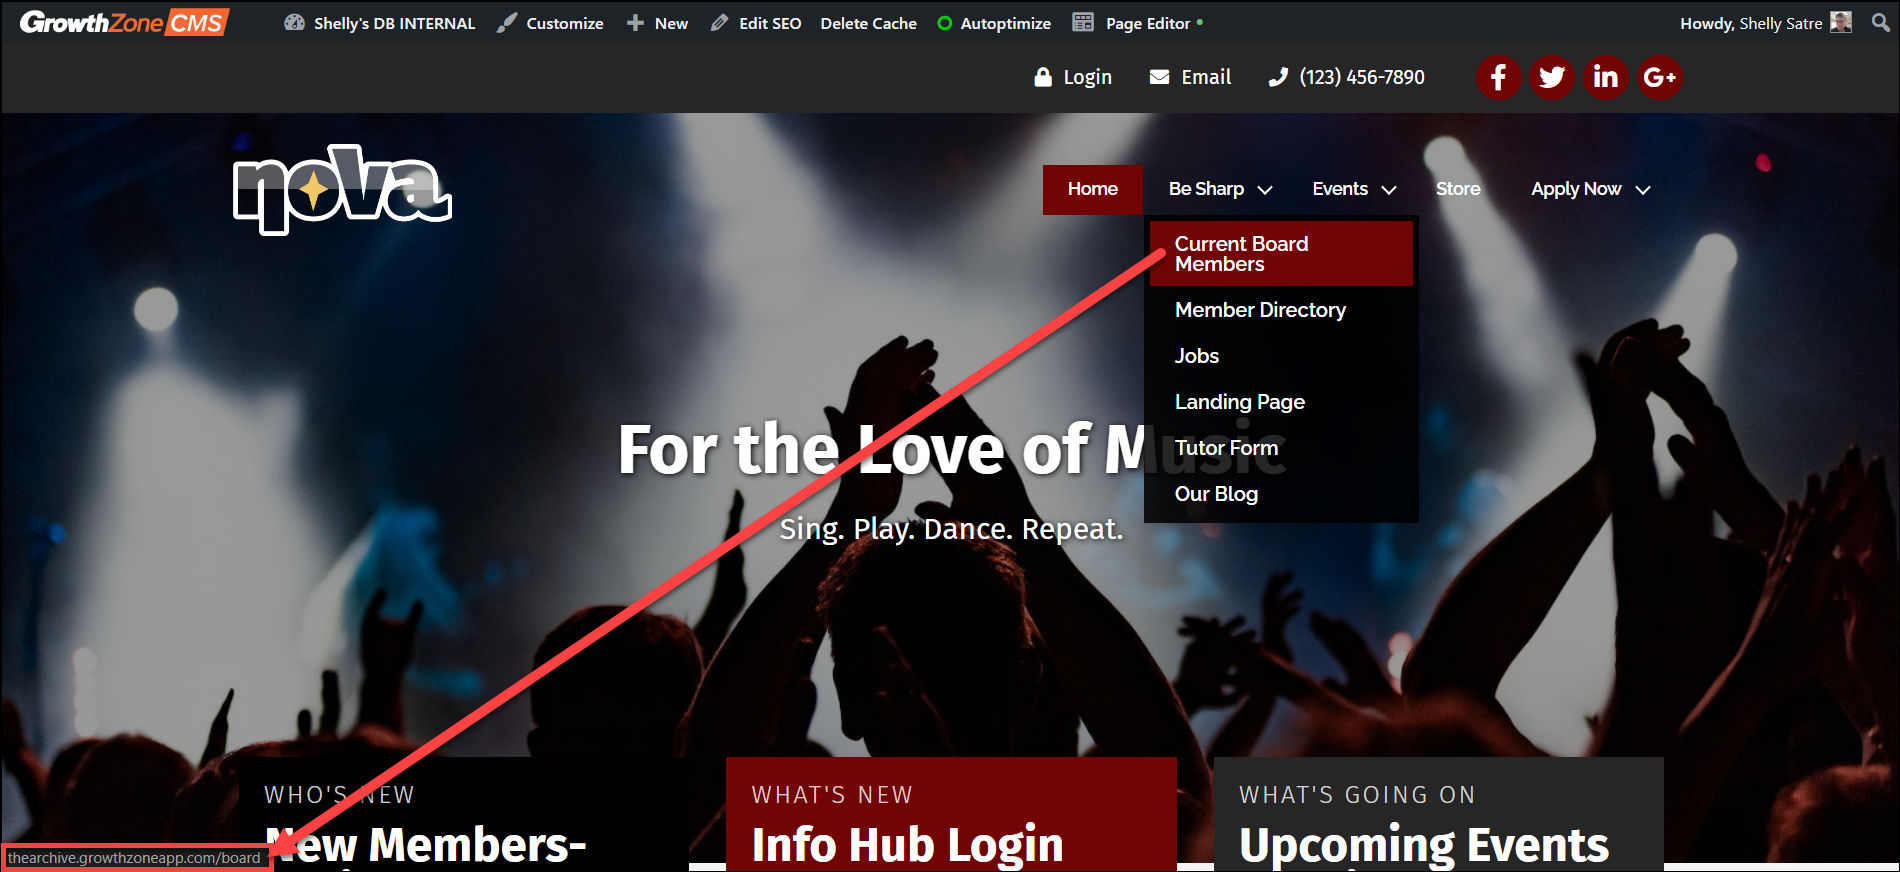
You can now click the link at the top of the window to go back to the website display (it should have a little house logo to it- this will take you to your site's homepage). Your link should now appear in your website navigation menu. You can usually see the link you're being directed to pop up in the lower left hand corner of your web browser.
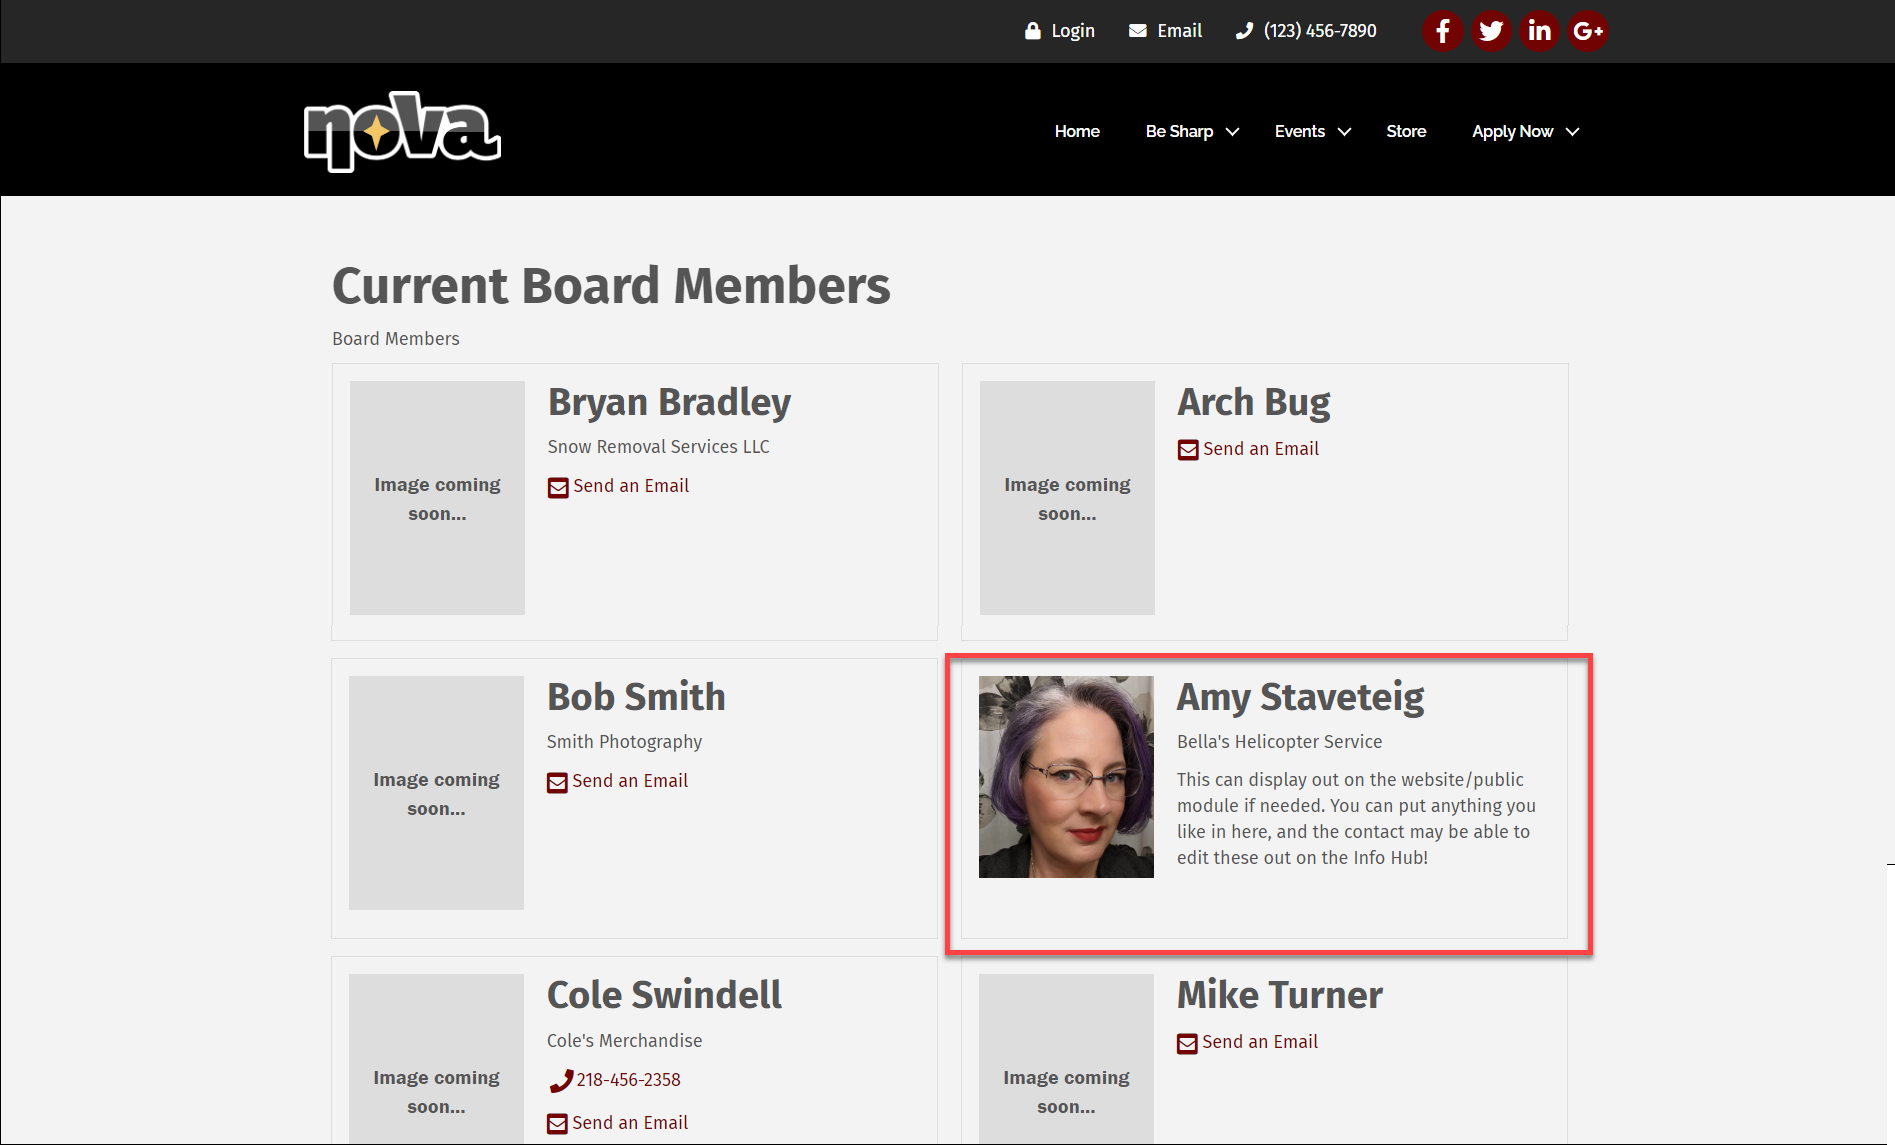
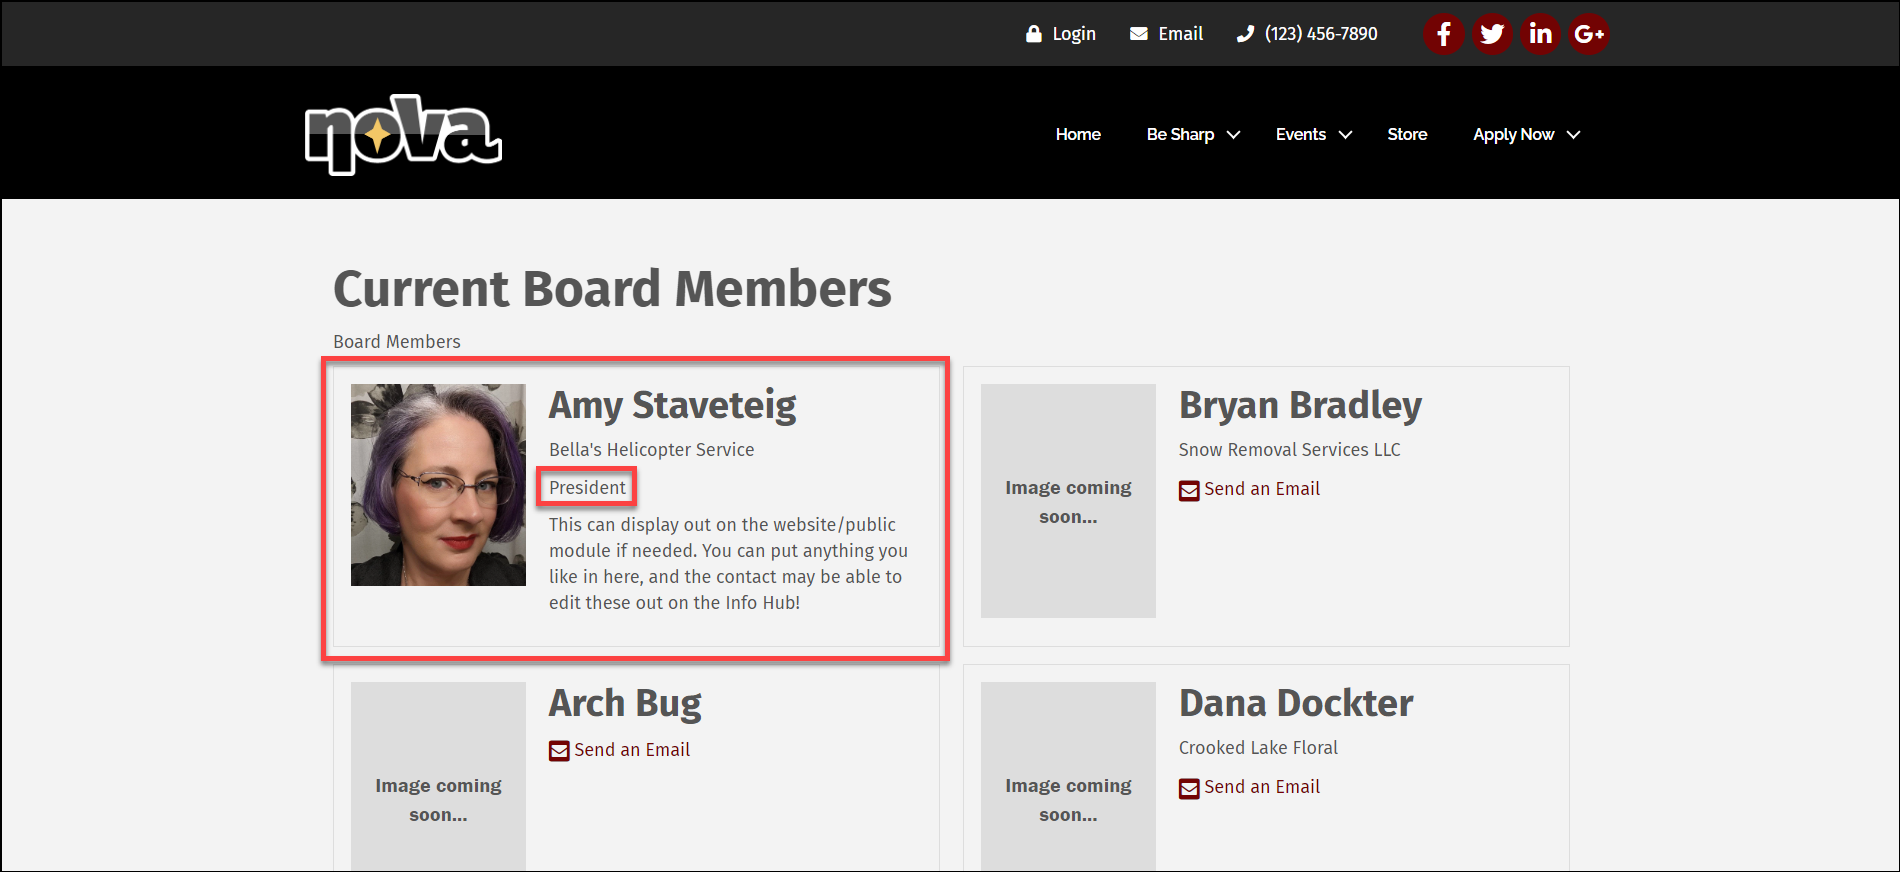
Clicking the link will bring you to your new Board Members webpage; the page will inherit any styling from the template from your website. In our case, Amy's display shows her photo but does not include her email link, as we marked that as Internal Use Only, and it does contain the text we put in her Bio field.
Adjusting the Display and/or Order
By default, the list will display in alphabetical order by last name. We realize this may not be the order you want, and you can adjust the order by editing the contacts in the list.
- Navigate to your Lists/Committees module and open the list. Click the pencil icon to the far right of any contact in the list to open that contact. In the Edit List Member window, be sure to enable the Advanced Options checkbox; this will display the Display Order option.

Enabling Advanced Options to show the Display Order field. - Enter the number of the place you wish the contact to display in. Let's add Amy's title for this list to the display using the Role field- she's our President- and set her to display first. (The Role field is ONLY applicable to the list being displayed- it will not alter or add anything to her contact record!)

Amy's edited Role and Display Order. - Click Done to save the changes.
Now if we refresh our published public module page, Amy is displayed first and her display now includes her role in the committee.
Maintaining/Updating the List
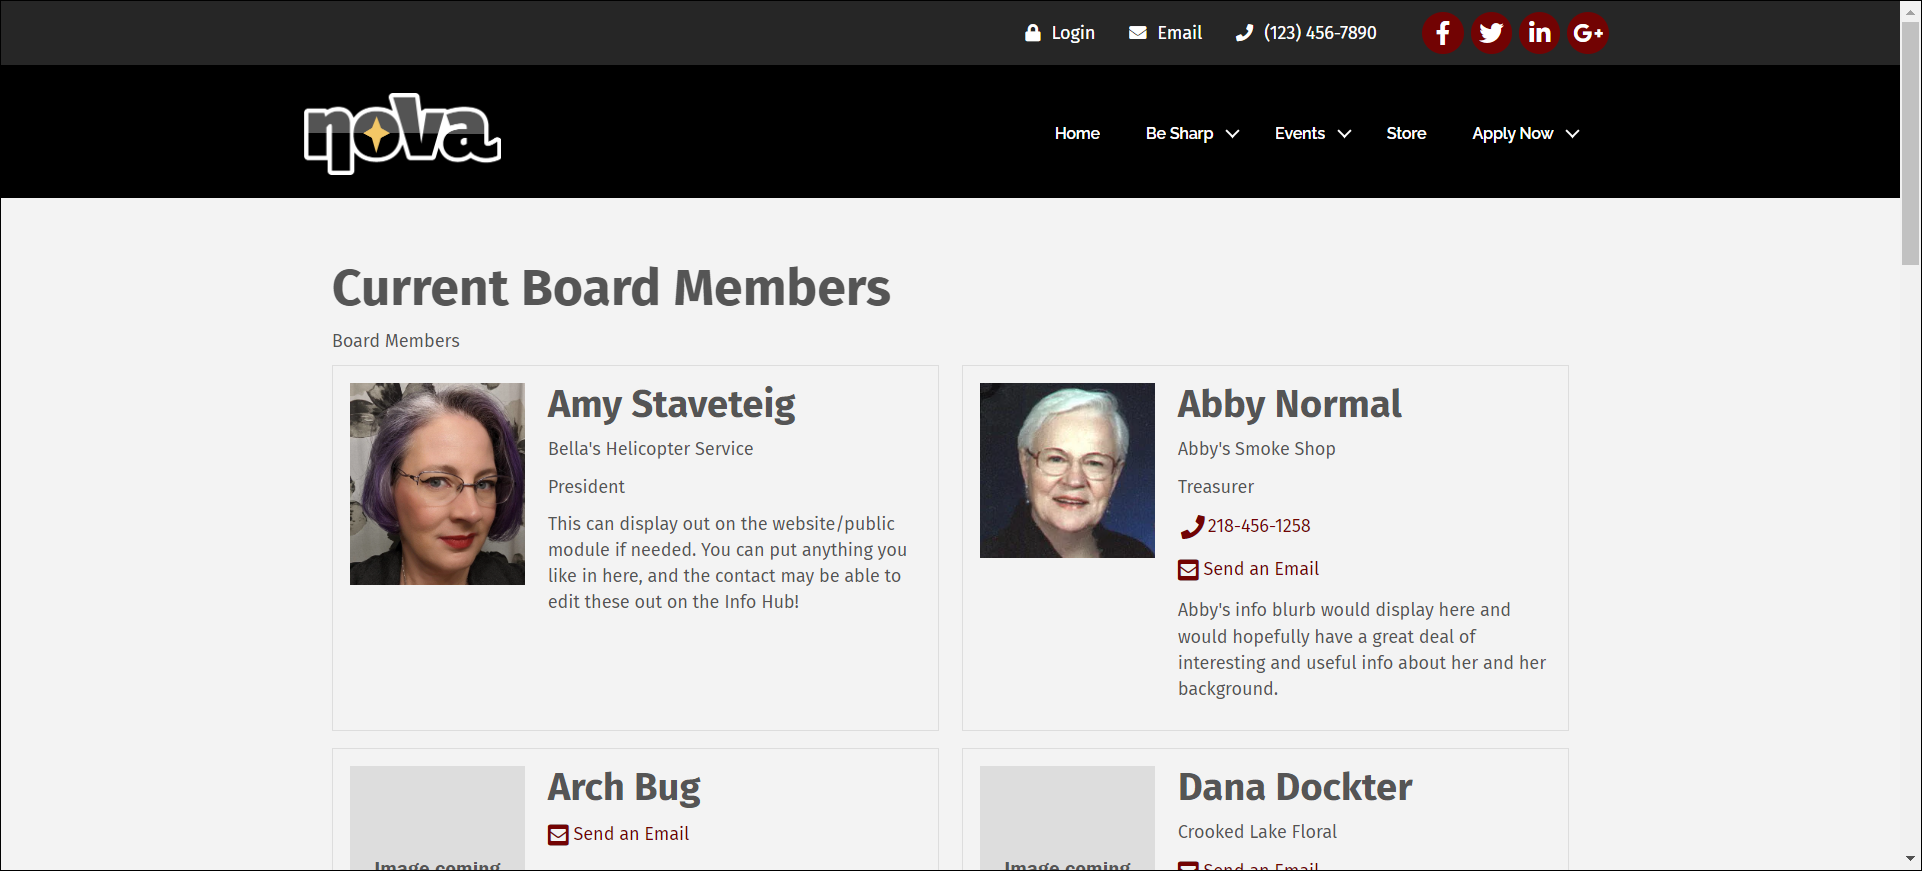
Once the list is set up and everything is published, the now-public webpage will automatically update when changes are made to the list. When you inactivate a contact from the list, that contact will no longer display, and a new contact will automatically appear on the page. Let's say Bryan Bradley's term is up, and he needs to be replaced with Abby Normal.
- First, inactivate Bryan from the list.
- Then add Abby (after we make sure her contact record is up to snuff!).
- Now we'll adjust Abby's list options to add her Role- Treasurer- and her list display order (2nd).
There's nothing else to do; the list is updated, and the page on the website will automatically reflect those changes; Abby now displays second on the page with role and bios and all her contact information.
And if we need historical information about the list, we can use the historical contacts download to see when any contact on the list was added, disabled, or marked as Do Not Contact.

