
 2329
2329
Mistakes do happen; sometimes an existing agent is given a new M1 number when they already have one. After the number has been assigned, GrowthZone is unable to change it- this is per M1 rules.
Here is how you can "fix" an M1 number if it is wrong.
IMPORTANT: Disable the Sync to M1 on the incorrect record. Don't forget to re-enable the sync once the merge is complete!
To disable:
Click on the edit icon next to M1 Information.
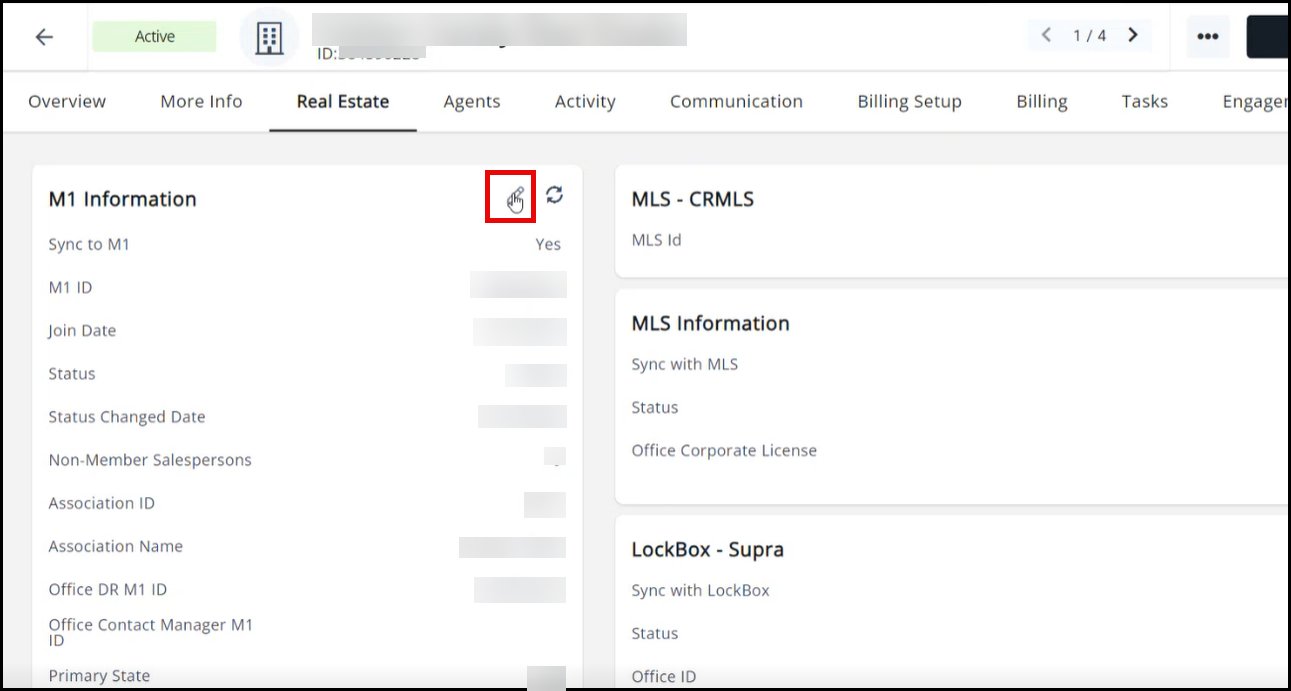
Then uncheck the Sync to M1 box.
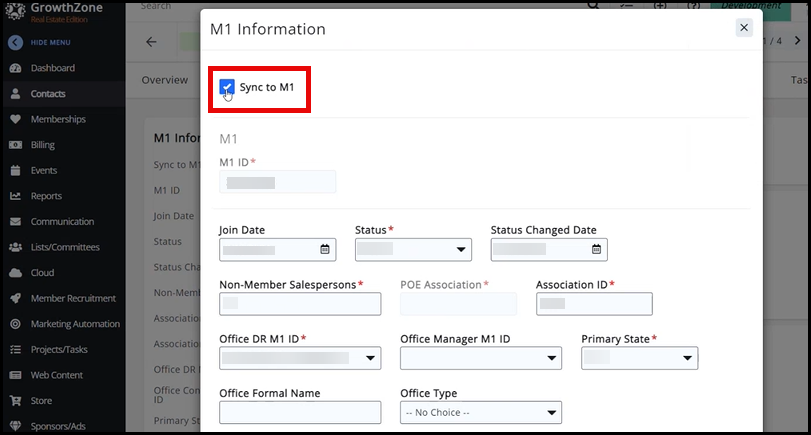
- Once the M1 sync is turned off underneath the Sync to M1 checkbox, remove the M1 ID number for the agent in that record.

Editing/clearing an incorrect M1 number from a contact record. - IMPORTANT Use Case:
- The M1 ID numbers should not be changed. If the M1 ID numbers are edited or changed accidentally rather than removed, you will receive a pop-up notification that gives you a warning. Best practice is to click 'No' and close out of the tab without saving. If 'Yes' is clicked, the GrowthZone system will ignore the change and will not sync the new number. Our system will ignore changes made to the M1 ID numbers and will not sync an edited number because you cannot change an M1 ID number. You can edit the M1 ID number back to its original number and the sync will be able to be completed.

- The M1 ID numbers should not be changed. If the M1 ID numbers are edited or changed accidentally rather than removed, you will receive a pop-up notification that gives you a warning. Best practice is to click 'No' and close out of the tab without saving. If 'Yes' is clicked, the GrowthZone system will ignore the change and will not sync the new number. Our system will ignore changes made to the M1 ID numbers and will not sync an edited number because you cannot change an M1 ID number. You can edit the M1 ID number back to its original number and the sync will be able to be completed.
- IMPORTANT Use Case:
- Create a new GrowthZone record for the agent. (See Add a New Agent or Add a Primary Office.) Because you are creating a new record for a contact that already exists in your database, the system will see the duplicate. Ignore for this purpose. NOTE: This new record really only needs the agent's first and last name; nothing else needs to be entered. In a future step we will populate this record with data.

Did You Know? When creating the new record, if you add a "1" at the end of the last name, it will avoid the system prompt to match with the previous record. - Once the new record opens, navigate to the Real Estate tab and click the "Search M1/Add Member" button.

The Real Estate tab, showing the Search M1/Add Member button in the upper right. - Search M1 for the agent and locate the correct NM1 record; enable the "Use Suggested" option and the M1 record to import and click Done. This will import the correct agent information into the new GrowthZone record.

Enabling the "Use suggested" option and selecting the appropriate record to import. - Click the
 icon on the top right hand side of the screen and Merge Contact.

Using the Merge option - In the Destination field, type the name of the agent and select their previous/incorrect record.

Merging with the agent's previous record in GrowthZone. - Review the Fields to Merge options. By default the Data Source will be set to Use Destination; change the selection to Use Current Contact as needed (i.e. for all M1-based info, or any other fields as determined by you).

Merge Contact
IMPORTANT! Your list of fields may differ from the example. Please review these fields CAREFULLY to determine the appropriate Data Source for each one! - Once the data sources have been reviewed and all fields verified as correct for the merge, click Done to save.
- Best Practice: review this final merged record for data consistency; there may be some cleanup involved after the merge of the two records. Please review all data in the new record and verify with the agent which data should be marked as default or needs to be updated, and ensure that any/all syncs are set correctly. After completing a final check enable the sync to M1 on the Real Estate tab.
As a final step in your merge edit that M1 ID displayed under the agent's name. NOTE: Secondary Agents are not able to have this field updated. Their M1 number will ONLY display on their RE tab.
- On the Real Estate tab, in the M1 Information section, copy the correct M1 ID.
- Click Edit Agent in the top right hand side.

- Paste the M1 ID into the M1 ID field.

Copy and paste M1 ID - Click Done. The M1 ID is now updated both in GrowthZone and in M1.

