.png)

 9739
9739
Categories allow you to create filtering and grouping options for such things as member directory, store items, web content etc. It is recommended that you use categories:
- If intended for public or internal use and is used to segment records into groups. For example: You may have categories of products in your store, categories in your directory search, etc.
- If you wish to allow visitors to your directory, web content, events, etc. ability to filter to specific categories
- If you wish to display this information publicly or in the Info Hub.
|
|
NOTE: Your GrowthZone software allows you to use tags, custom fields and categories. To guide your decision in which to use, see a comparison list here. |
Category List Options
There are several options available to choose from which will define where the category will be able to be used throughout the software.
- Business contact - organization record (business)
- Individual contact - individual record (person)
- Contact - both organization and individual record
- Store item - products in the Store module (if applicable)
- Membership - membership types
- Sales Opportunity - Sales Funnel module (if applicable)
- Content - Web Content module (if applicable)
- Job - Job pages in the Web Content module (if applicable)
- Hot deals - Hot Deals pages in the Web Content module (if applicable)
- Event - Event module for organizing the calendar
- Projects - Projects module (if applicable)
- Certifications - Continuing Education module (if applicable)
- Resource - uploaded materials in the Cloud>Resources area for the Info Hub
- Tickets - not currently available to use in GrowthZone
- Saleable Items - Goods/Services in the Setup
Create a Category List
- Select Setup in the Navigation Panel.
- Click Category Lists in the Categories section.
- Click the Add button.
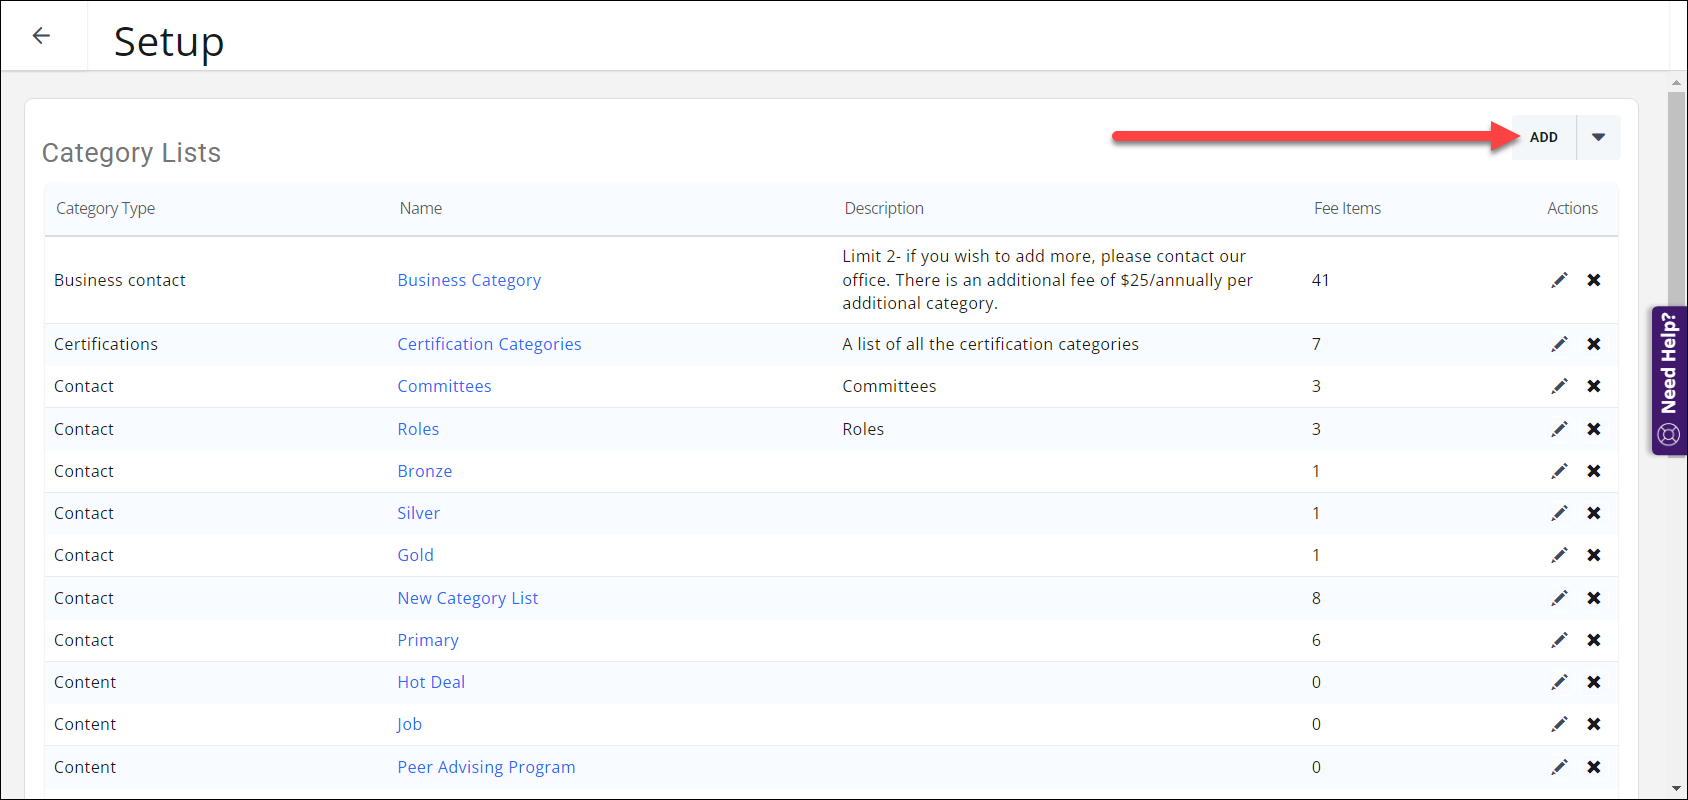
Category Lists - In the Add Category List window, make the following selections:

Adding a new Category List
- Choose the appropriate Category Type. The type is important as it will drive where the category list is available in the future. See Category List Options for more details on category types.
- Provide a Name for the category list.
- (Optional) Add a Description if needed. This is for internal purposes only.
- Other Options:
- Is Active will default to be checked, this allows the category to be used in the software. When a category list is no longer needed, best practice will be to de-activate the category list rather than deleting.
- (Optional) If you would like the option to add this category as a filter for your directories, events, web content etc., check the box for Available to Public?
NOTE: Some of your category lists may be for internal use only, in which case you would not enable this option. - (Optional) If you wish to allow members to view this category list in the Info Hub, check the box for Available to Members (Info Hub).
NOTE: Some of your category lists may be for internal use only, in which case you would not enable this option
- (Optional) Click the Advanced Options check-box to configure the following:

- Allow Members To Edit (Info Hub): Enable this option if members should be allow to make changes to this category list in the Info Hub. This will also display the category list name even when no categories are selected.
- Is Required: If you are creating a business or individual contact category list, and you wish to display this category on the members profile tab even if a category has not been assigned, check the Required box. This allows the category list to act much like custom fields, with high visibility on the profile tab.
- Minimum Quantity/Maximum Quantity: This settings allow you to limit the number of categories that may be selected from this list.
Click Done to save the new list.
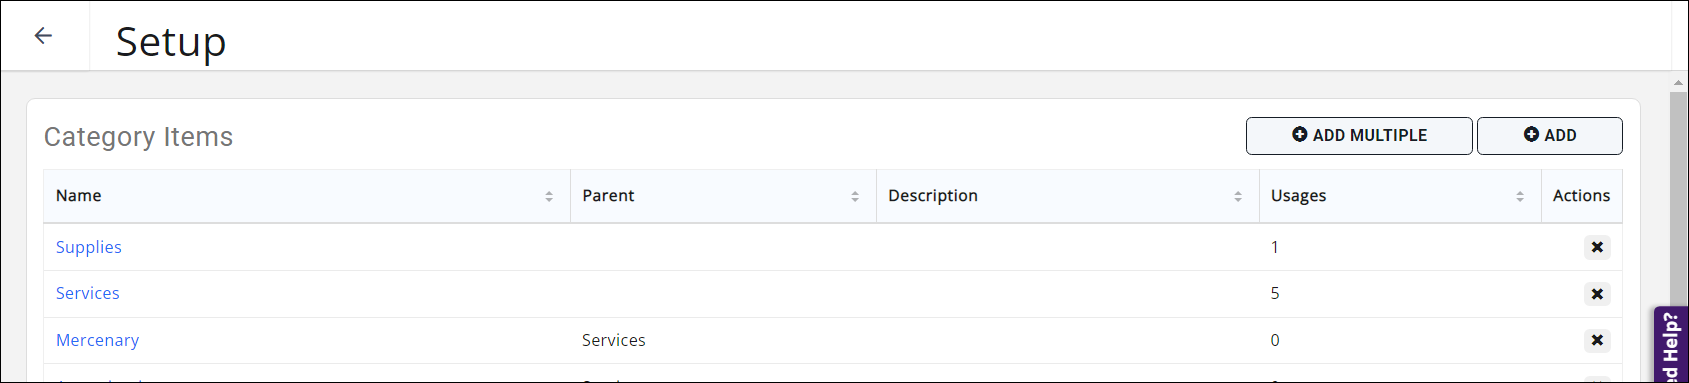
Once the assigned Name appears in the Category List, click on the Name to add items to the category list. You may add multiple items at one time by clicking the Add Multiple button ![]() , adding one item per line. Or you may use the Add button
, adding one item per line. Or you may use the Add button ![]() to add one item to the list.
to add one item to the list.
Add a Category to a Category List
You may add new or additional categories into existing category lists. In Setup -> Categories -> Category Lists, click the name of the category list in which you wish to add the new category.
This will open the window showing you the list of category items already in that category list.
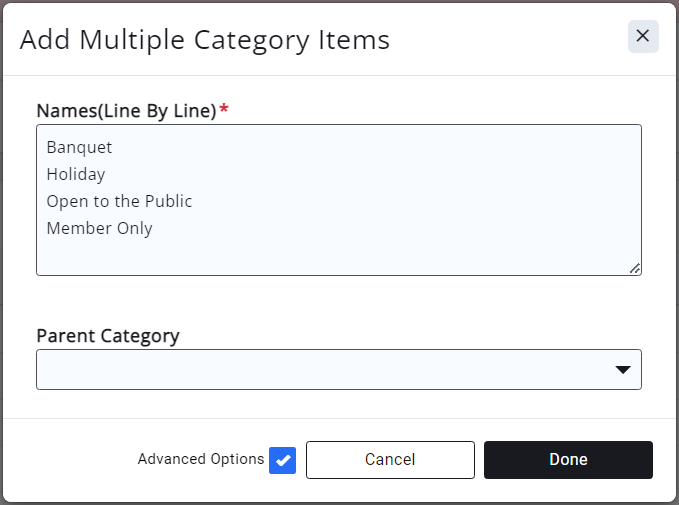
You may add multiple items at one time by clicking the Add Multiple button ![]() , adding one item per line. Enabling the Advanced Options allows you to assign a Parent Category if needed.
, adding one item per line. Enabling the Advanced Options allows you to assign a Parent Category if needed.
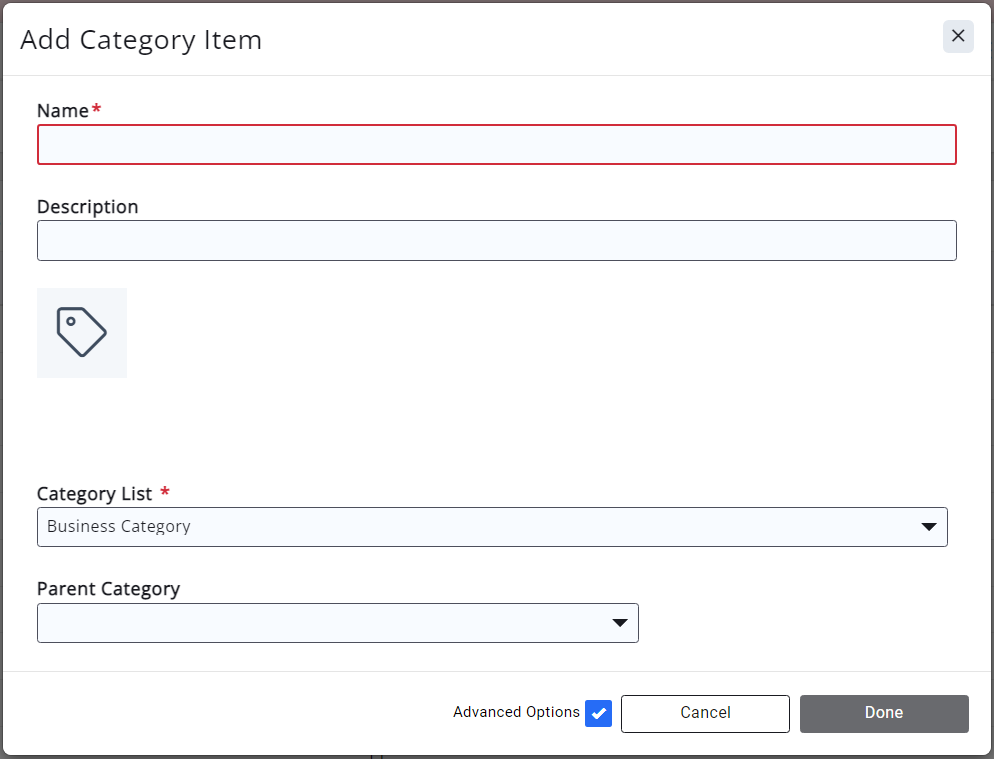
Or you may use the Add button ![]() to add one item to the list. Give the category item a name (required) and a description (optional, internal only). Enabling the Advanced Options allows you to assign a Parent Category if needed.
to add one item to the list. Give the category item a name (required) and a description (optional, internal only). Enabling the Advanced Options allows you to assign a Parent Category if needed.
Click Done to save your additions to the category list.
View Directory Categories
- Select Setup in the Navigation Panel.
- Click Category Lists in the Categories section. A list of all categories will be displayed. By default your system is populated with the Contact Business Category. These business categories are available for selection when assigning your members to directory categories.
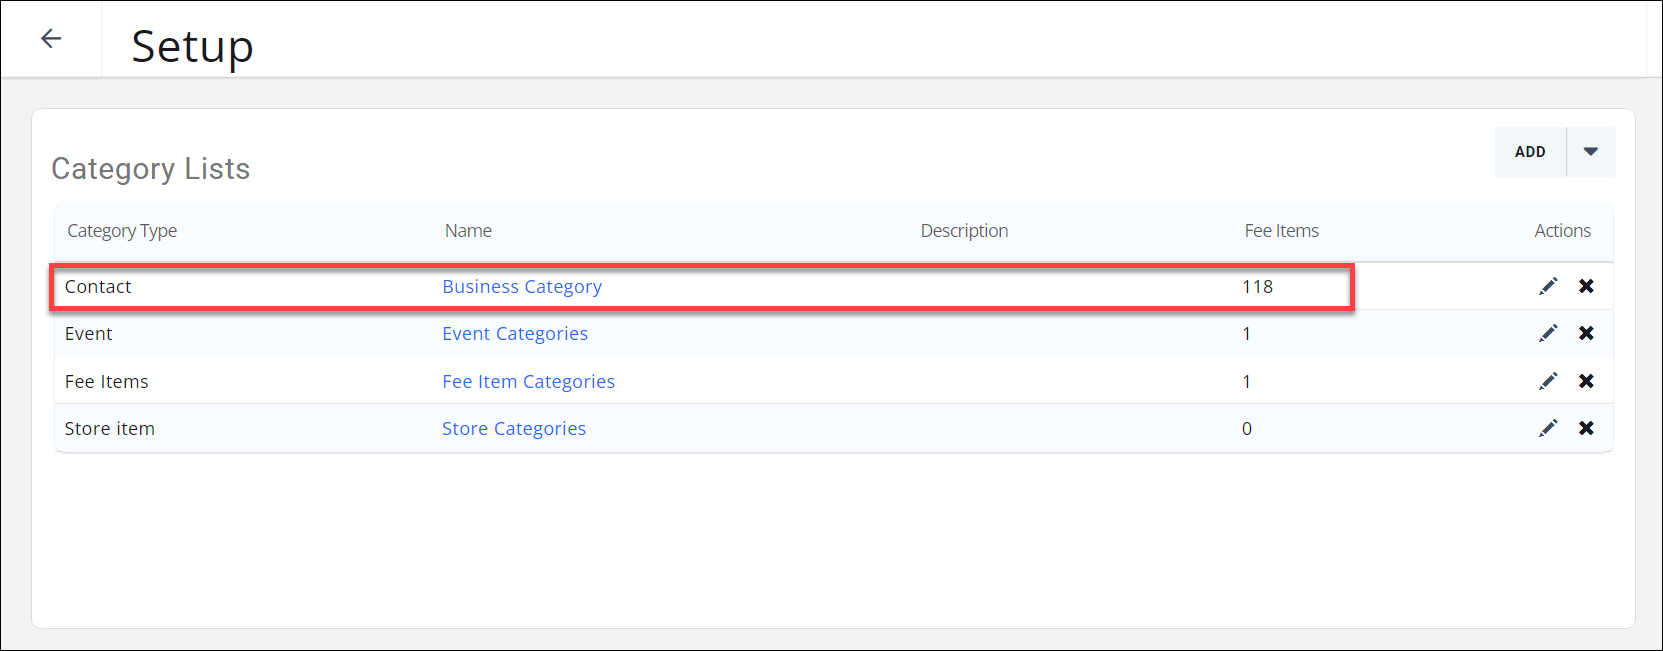
The Default Contact Business Categories List - Click the Business Category hyper-link. A list of internet standard directory categories will be displayed.

The default category items in the default Business Category List
Add Categories to your Directory
New top level categories (those that appear in bold in your active directory) or sub categories may be added to your directory.
- Select Setup in the Navigation Panel.
- Click Category Lists in the Categories section. A list of all categories will be displayed. By default your system is populated with the Contact Business Category. These business categories are available for selection when assigning your members to directory categories.
- Click the Business Category hyper-link. A list of internet standard directory categories will be displayed.
The default category items in the default Business Category List - To add an individual category, click the Add button
 to add one item to the list. Give the category item a name (required) and a description (optional, internal only). Enabling the Advanced Options allows you to assign a Parent Category if needed.
Adding a single category item to a category list - Name - Enter a name for the category. This is the name that will appear in the active directory.
- Description - (Optional) Enter a description of the category.
- Image - Click the
 image icon to upload the image you would like displayed for this category in the directory.
 - Parent Category - (Optional) Select the parent category. If a parent category is selected, your new category will be displayed below the parent in the active directory. If no parent is selected, the new category will be a top level category shown in bold in your active directory. NOTE: This option is visible when you enable the Advanced Options.
- To add multiple top-level categories, click the Add Multiple button, adding one item per line. Enabling the Advanced Options allows you to assign a Parent Category if needed.
Adding multiple category items at once - Names(Line By Line) - Enter each category line by line. This is the name that will appear in the active directory.
- Parent Category - (Optional) Select the parent category. If a parent category is selected, the new categories will be displayed below the parent in the active directory. If no parent is selected, the new categories will be a top level category shown in bold in your active directory. You may select only one parent category for all the new categories you have listed. NOTE: This option is visible when you enable the Advanced Options.
- Click Done to add your multiple category items to the Category List.
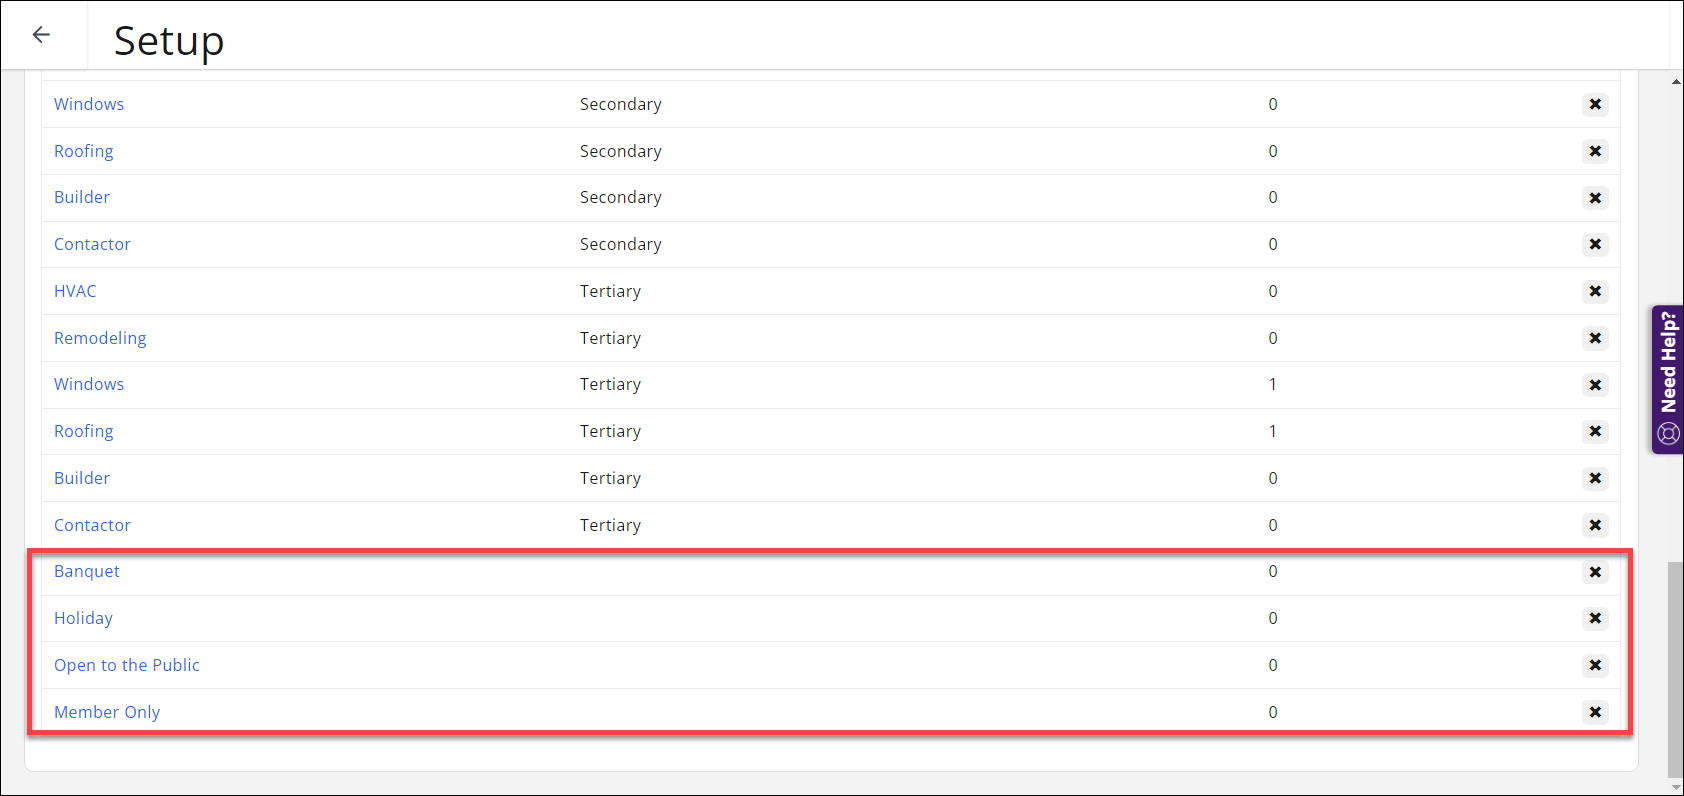
Newly created category items displaying in a category list
Reassign Categories
When a category is assigned but you realize you’ve already created a category with a similar name, you may want to move everyone in that original category and assign them the new name so you can delete the original category.
- Click Setup in the left-hand navigation panel.
- Click Category Lists in the Categories section.
- Click the down arrow next to the Add button and select Reassign Category.

- In the Category Reassign window, select your options:

The Category Reassign window - Select the desired Category Type from the list.
- Select the desired Category List from the list.
- Select the category that you wish to reassign from the Category list.
- Select the category that you wish to reassign to from the Category list in the New Category section.
- Click Done.

