.png)

 3799
3799
Classes can be used in GrowthZone to provide you with greater control over revenue categorization. As in QuickBooks (Desktop and Online), you can create classes that you assign to transactions. This lets you track account balances by department, business office or location, separate properties you own, or any other meaningful breakdown of your business.
Setup Transaction Classes
- Click Setup in the left-hand navigation panel.
- Click Transaction Classes in the Finance section. A list of the transaction classes you have currently setup in your database will be displayed.

- On the Transaction Clases screen slick the Add.

- On the Add Transaction Class screen:
- Enter the Name of the transaction class. The name should match the transaction class in QuickBooks. Class names are limited to 31 characters per level.
- Parent Class (Optional)
- Is Active? Enable this option to make the class available in the software. Best practice: If you are no longer using a class deactivate it vs. deleting it.

- Click Done.
Assigning Transaction Classes
Transaction classes may be assigned on:
-
Invoices
-
Credits
-
Write-offs: When manually written off, the system will default to the class of the original line item being written off, however, this can be over-written. If invoices are automatically written off (auto-drop process), the system will default to the class that was assigned to the original line item.
-
Refund: Defaults to the same class as original transaction that is being refunded but can be over-written.
-
Sales Receipt (the transaction created by a Store purchases)
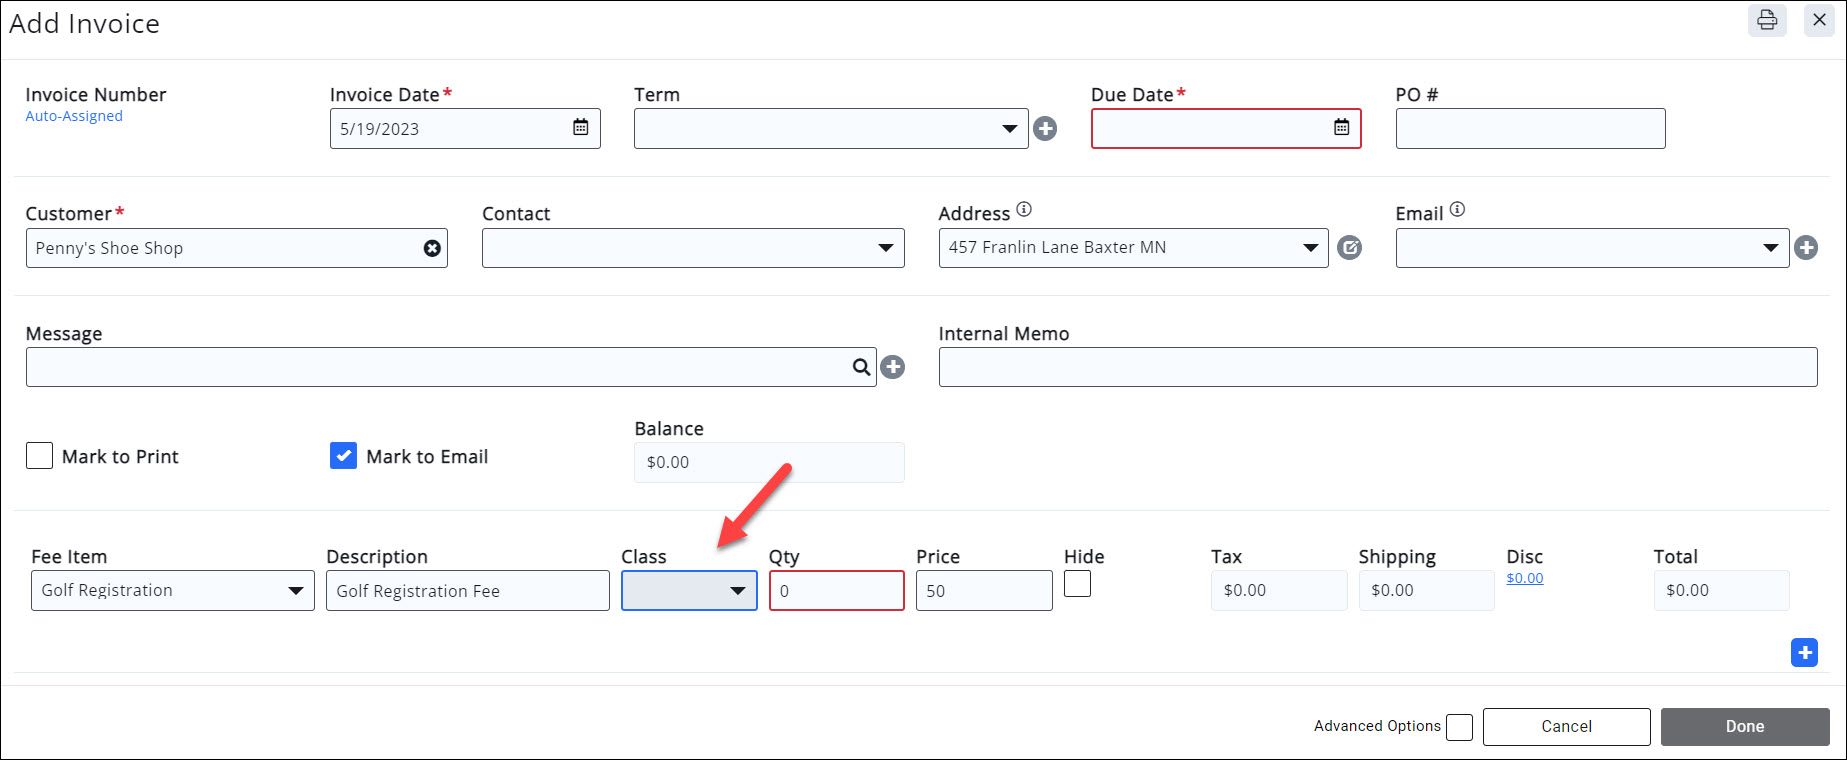
NOTE: Discounts automatically use the same class that is assigned to the line item you are discounting. For example, if you have Western Region assigned as the Class name on the golf registration item, any discount against the golf registration would also have Wester Region assigned as the class automatically.
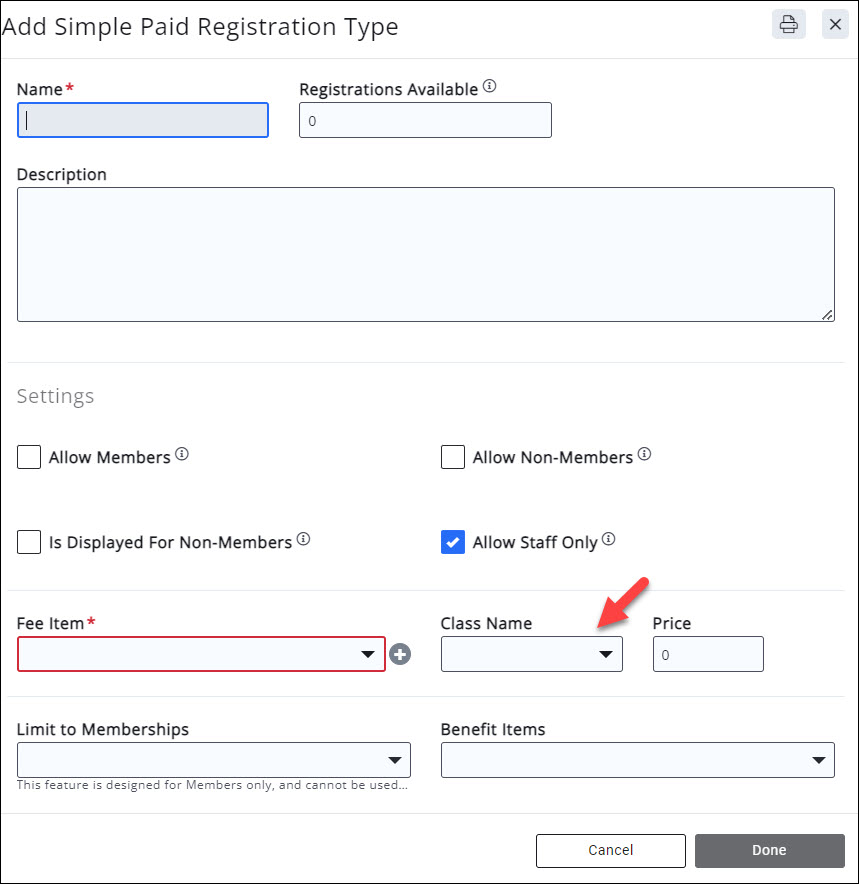
In addition, classes may be assigned any where a Fee Item is used such as Membership Type setup or Event Registration setup (V2 only). This ensures that, when invoices are automatically generated, Fee Item are appropriately classified.
Reporting on Classes
The Accounting Transaction report provides Class Name as a field to display. When that is included in your report, you'll see the assigned class on each pertinent line item. Note: classes are only attributed to the income and expense portion of the transaction. So you'll only be seeing the class name on those line items (i.e. line items where the Chart of Account is of type = Expense, Other income, Revenue, Sale, or Fund)
Exporting Classes to QuickBooks IIF
When you are ready to export the transactions and their class assignments, you can do so using the QuickBooks IIF export option. See
Accounting Export Process - Best Practices for further information on performing the export.
The export will automatically include the class name if the class name has been assigned to those transactions. No additional settings or steps to make it appear in the export.

