 2325
2325
If you don't have the Expo module, you can still have registrants select a session (or sessions!) to attend using Event Custom Fields.
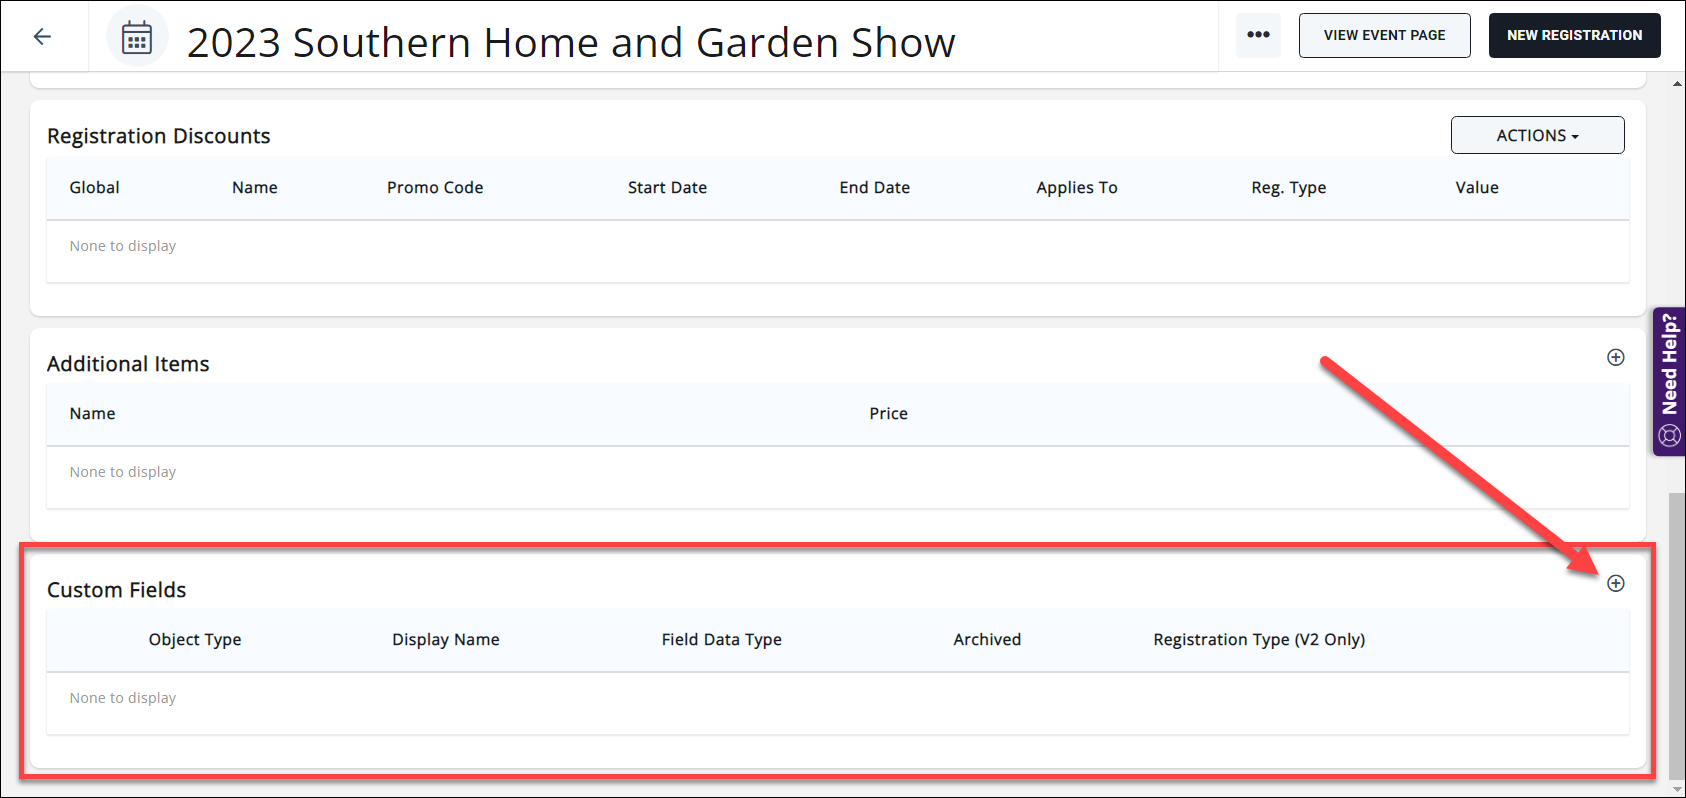
In your event, navigate to the Attendee Setup tab and find the Custom Fields section. Click the + to add a custom field.

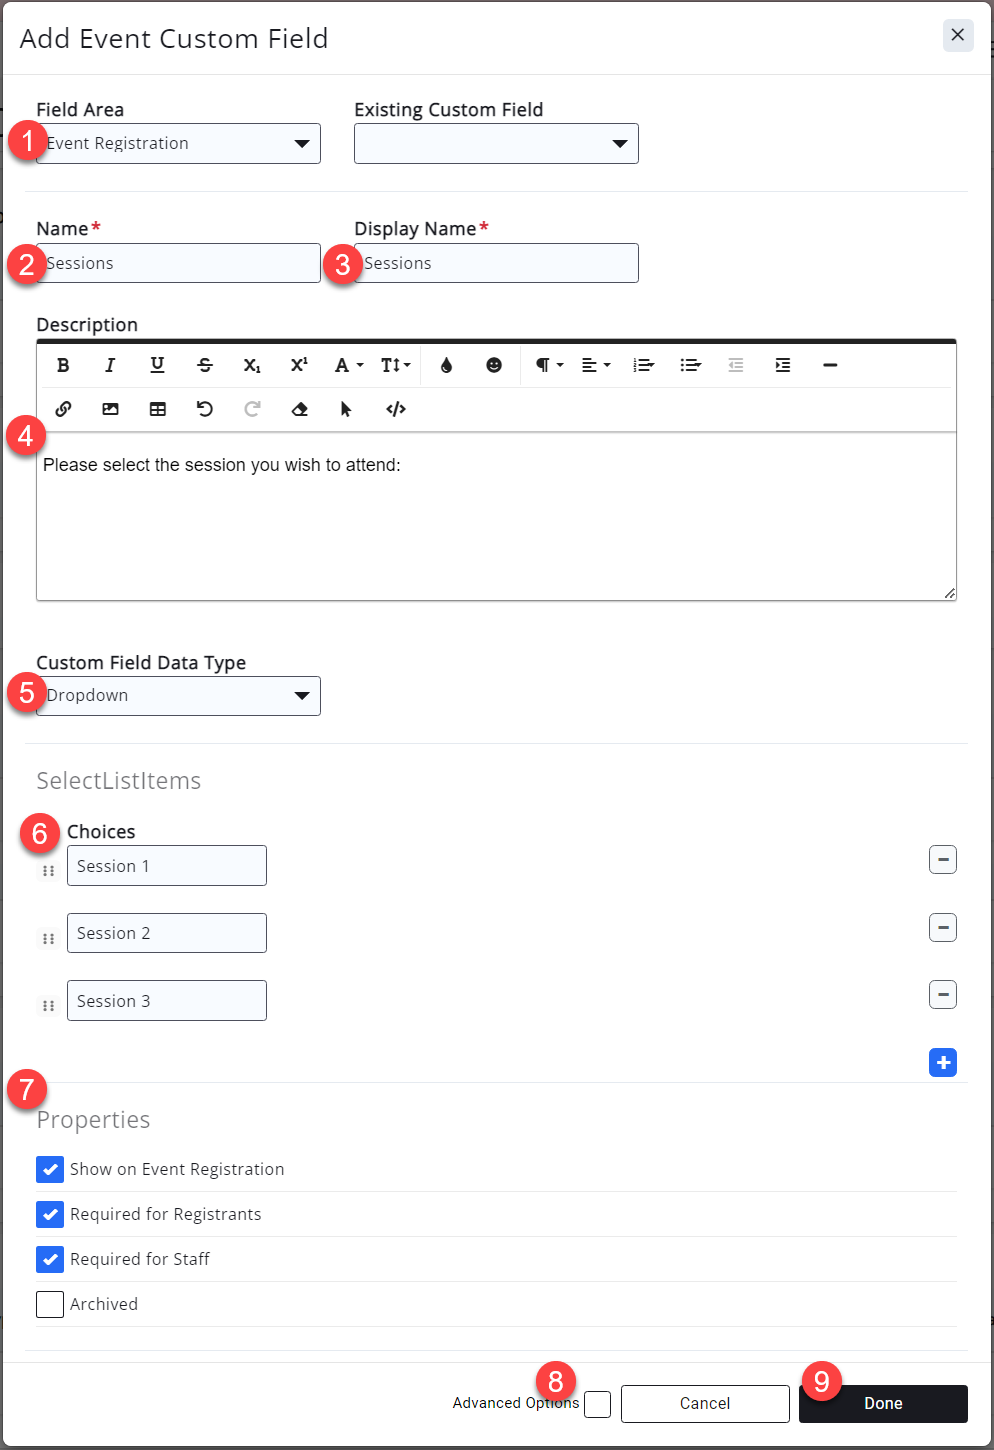
Set up your custom field as follows:

- Field Area: Event Registration
- Name: This is the name that will display internally in the back office.
- Display Name: This is what will display out on the event registration page.
- Description: Optional; you can add instructions or make the field more "friendly" by adding something here.
- Custom Field Data Type: Dropdown
- SelectListItems: Click the + to add options. You can add as many options/sessions as needed.
- Properties:
- "Show on Event Registration": this will make the field appear on the event registration page for your members to select.
- "Required for Registrants": if selecting a session is a requirement, enable this option.
- "Required for Staff": enable this to force staff making registrations from the back office to also make the session selection(s).
- Advanced Options: if you need to have this custom field apply ONLY to a specific registration type or types, enable the Advanced Options and select the registration type(s) from the dropdown.
Click Done.
Repeat to add more selections (for example, if you have multiple timeslots requiring a session selection).
The custom field will display on the event registration page once a registration type has been selected:

If you have an event with multiple timeslots, each with their own selection of sessions, you can set up a Custom Field for each timeslot.
Prior to the event, you can use the Download Attendees option on the Attendees tab to download a spreadsheet of your registrants. The spreadsheet will contain the Custom Fields you have set up on the event. You can then filter or arrange the spreadsheet to reflect each session's registrations.


