.png)

 2814
2814
Getting Set up In Zapier
*NOTE
GrowthZone integrated with Zapier is very limited. The only triggers we have available are as follows:
- GrowthZone has a Membership trigger that will pass membership details when a new membership is added or a change is made to an existing membership
- GrowthZone has an Event Registration trigger that will pass registration details for all or specified events when a registration occurs.
Once you have a Zapier account, and the GrowthZone team has given you API access, you can then begin to build out your Zap(s).
Unlike most GrowthZone integrations, the majority of the setup involved in integrating with Zapier will occur on the Zapier side via your customer dashboard. This does mean if you are having an issue with a Zap you have created, you may need to contact Zapier support for assistance for issues that occur within their Zapier Dashboard, Zap setup, and behavior.
The following documentation will walk through how to set up Zapier for this scenario:
You have members that are helping you run an upcoming event, but they don’t have access to registration data in your GrowthZone backoffice. You want to use Zapier to automatically send registrant information to a Google Sheet that you share with specific members.
Your need for automation may differ, in fact there are endless possibilities, but in general the documentation below is designed to walk you through setting up triggers and actions to create your desired results.
Getting Started
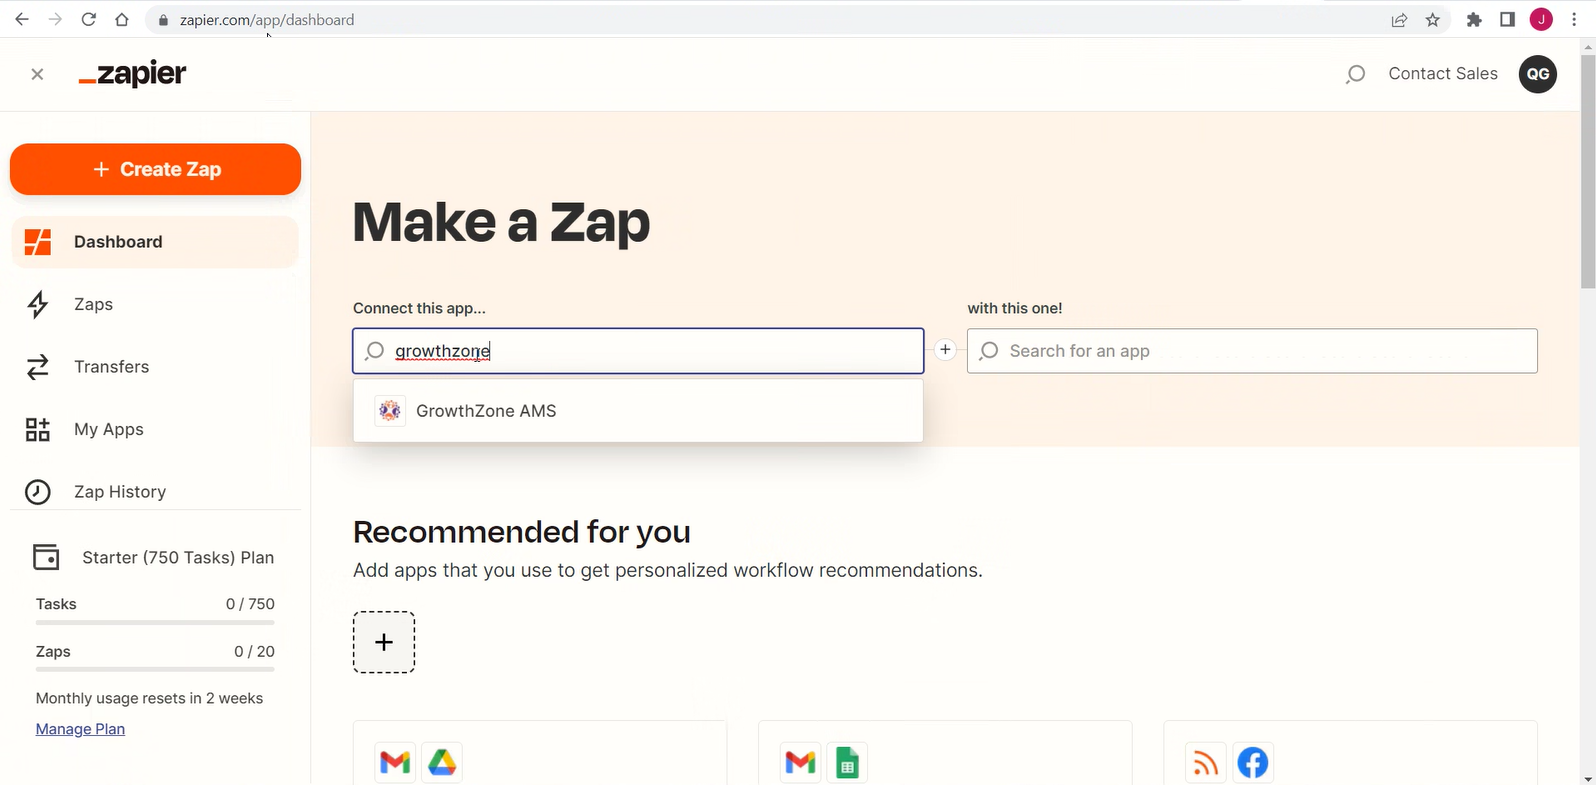
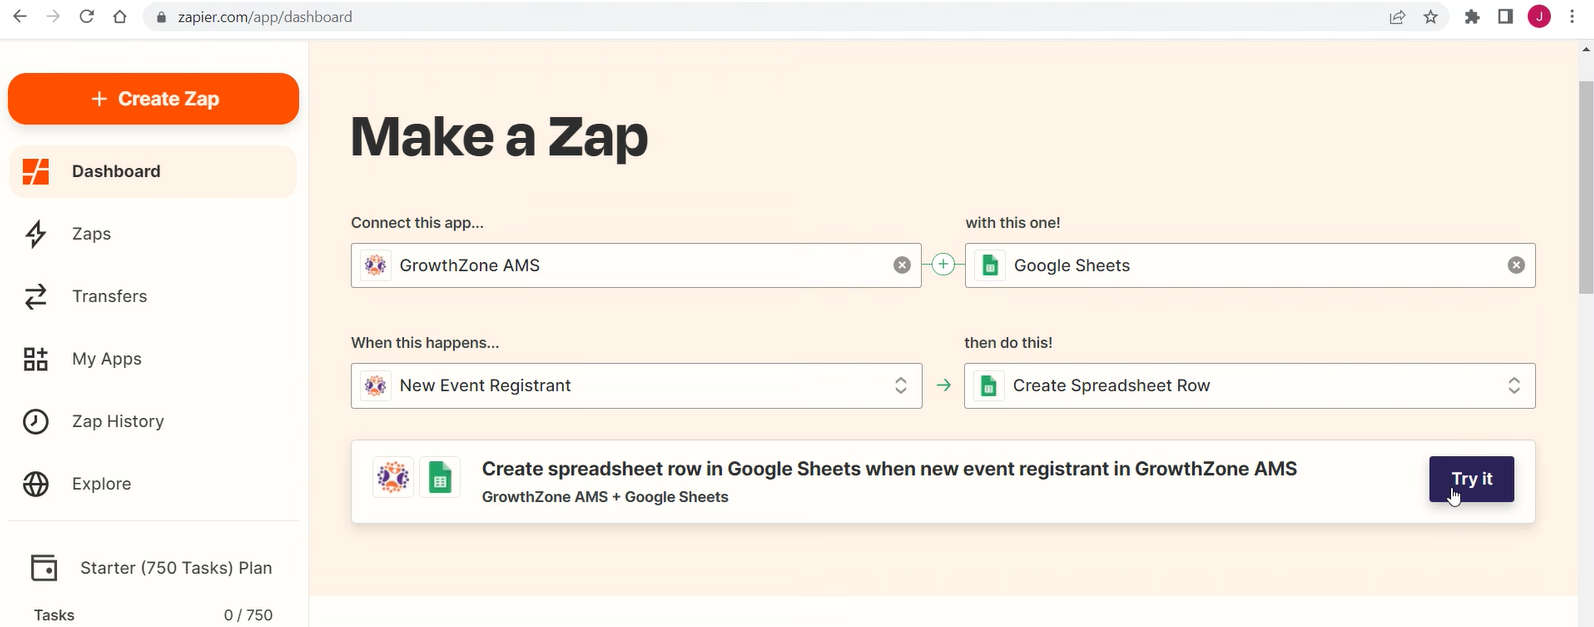
After logging into your Zapier account, you’ll want search for “GrowthZone AMS” on your Zapier dashboard (or click the Create Zap button).
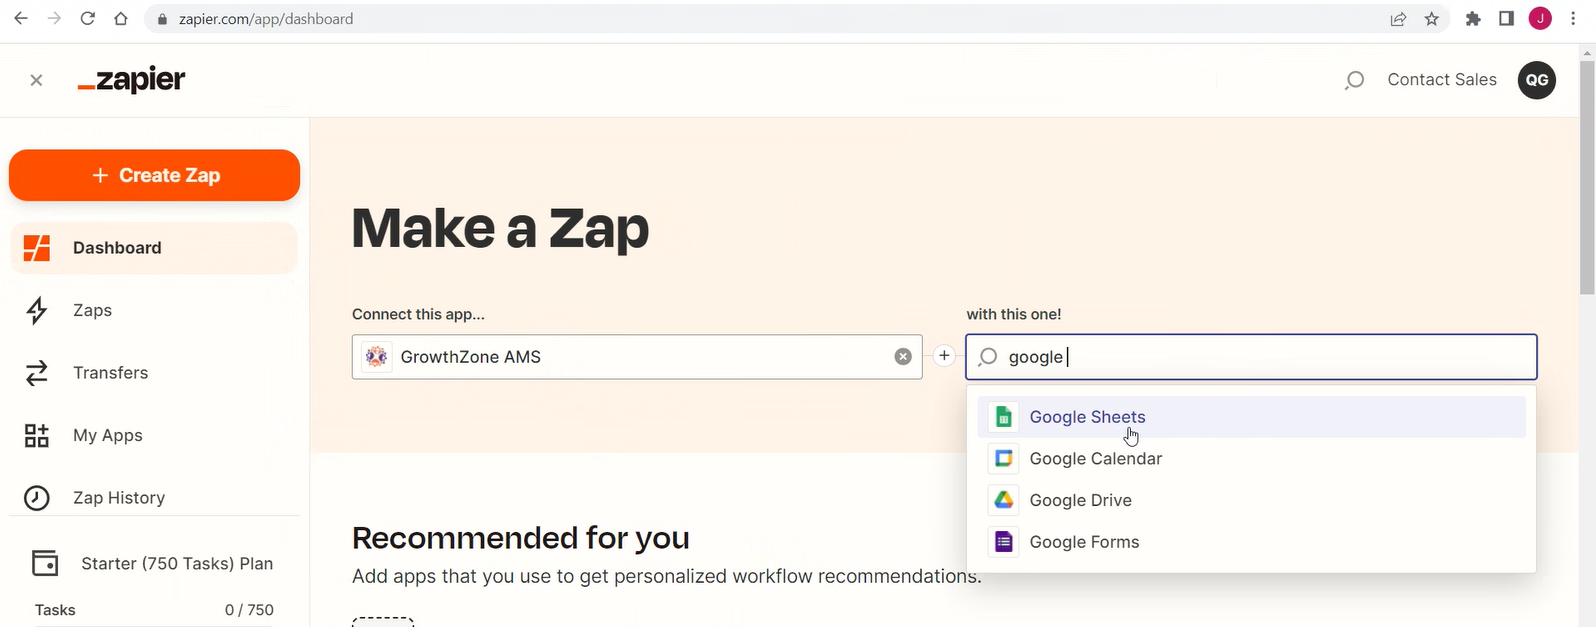
You’ll then select the application you’d like to connect it to. For this example, we will connect to Google Sheets.
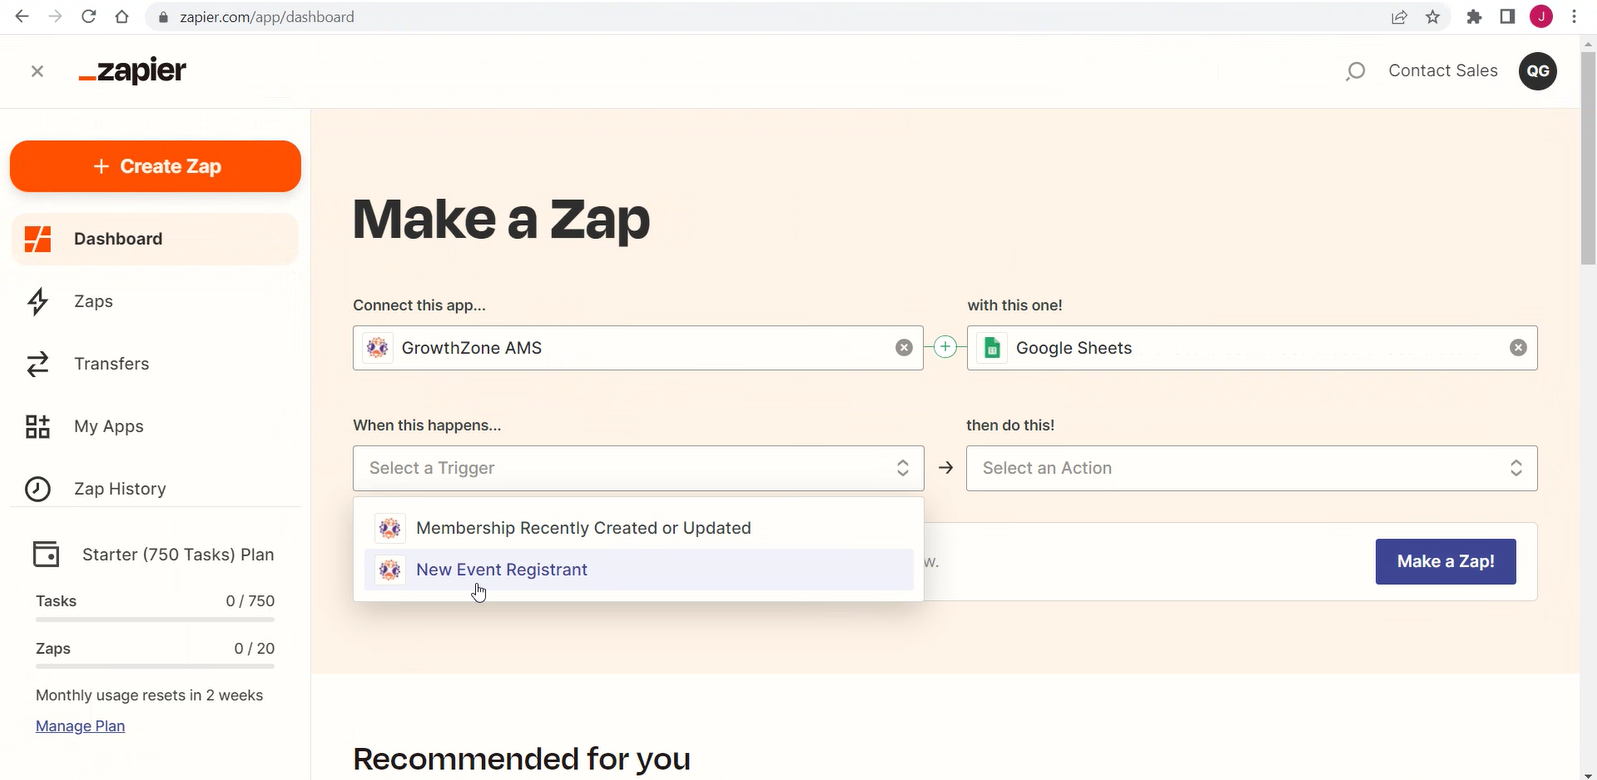
Select the appropriate trigger for your needs. GrowthZone currently has two triggers to choose from, Membership Recently Created or Updated and New Event Registrant. In this example, we are going to select New Event Registrant trigger.
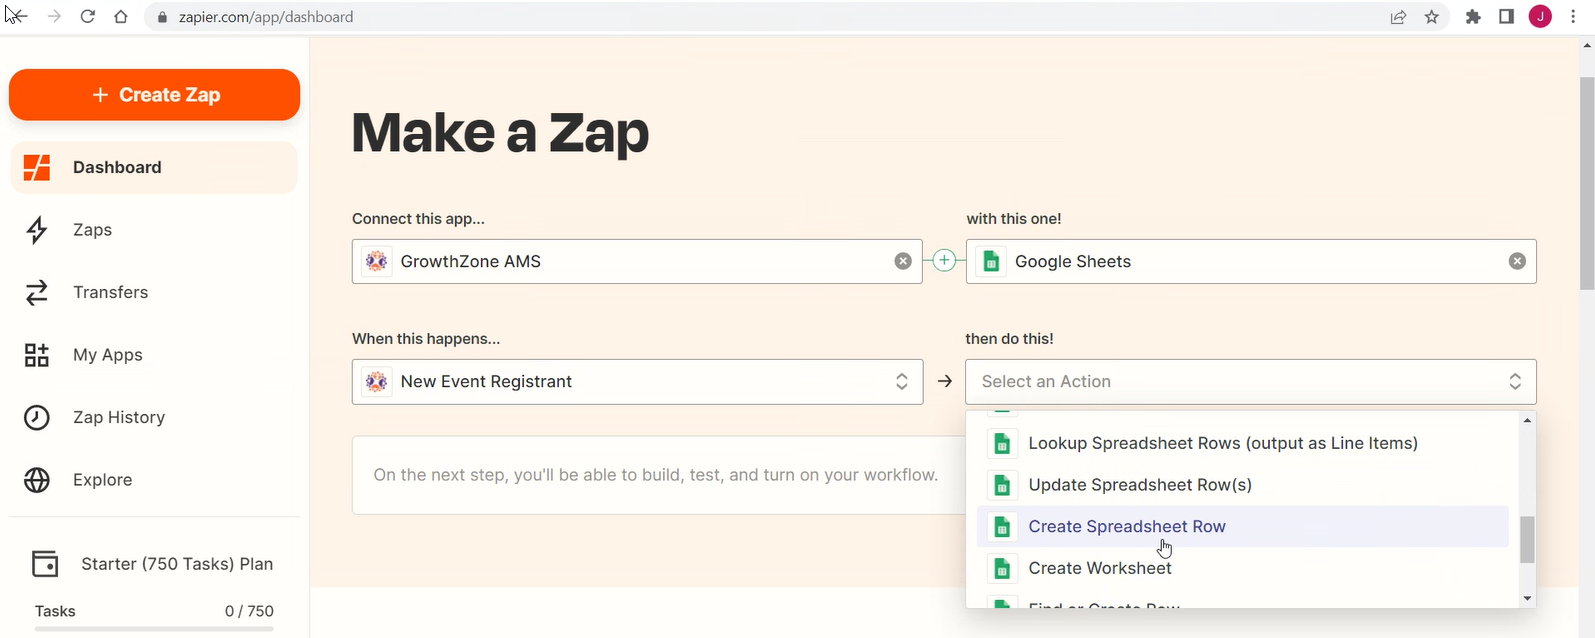
We then get to decide on the action for when the trigger occurs. In this case, we are wanting to Create a Spreadsheet Row in a Google Sheet each time there is a new GrowthZone Event Registrant.
Once you’ve got your items selected, click “Try it”. This will now open up the Zap creation wizard. This process will walk you through the specific configurations you need to ensure a successful automation. The items with yellow exclamation marks are areas you’ll specifically need to address.
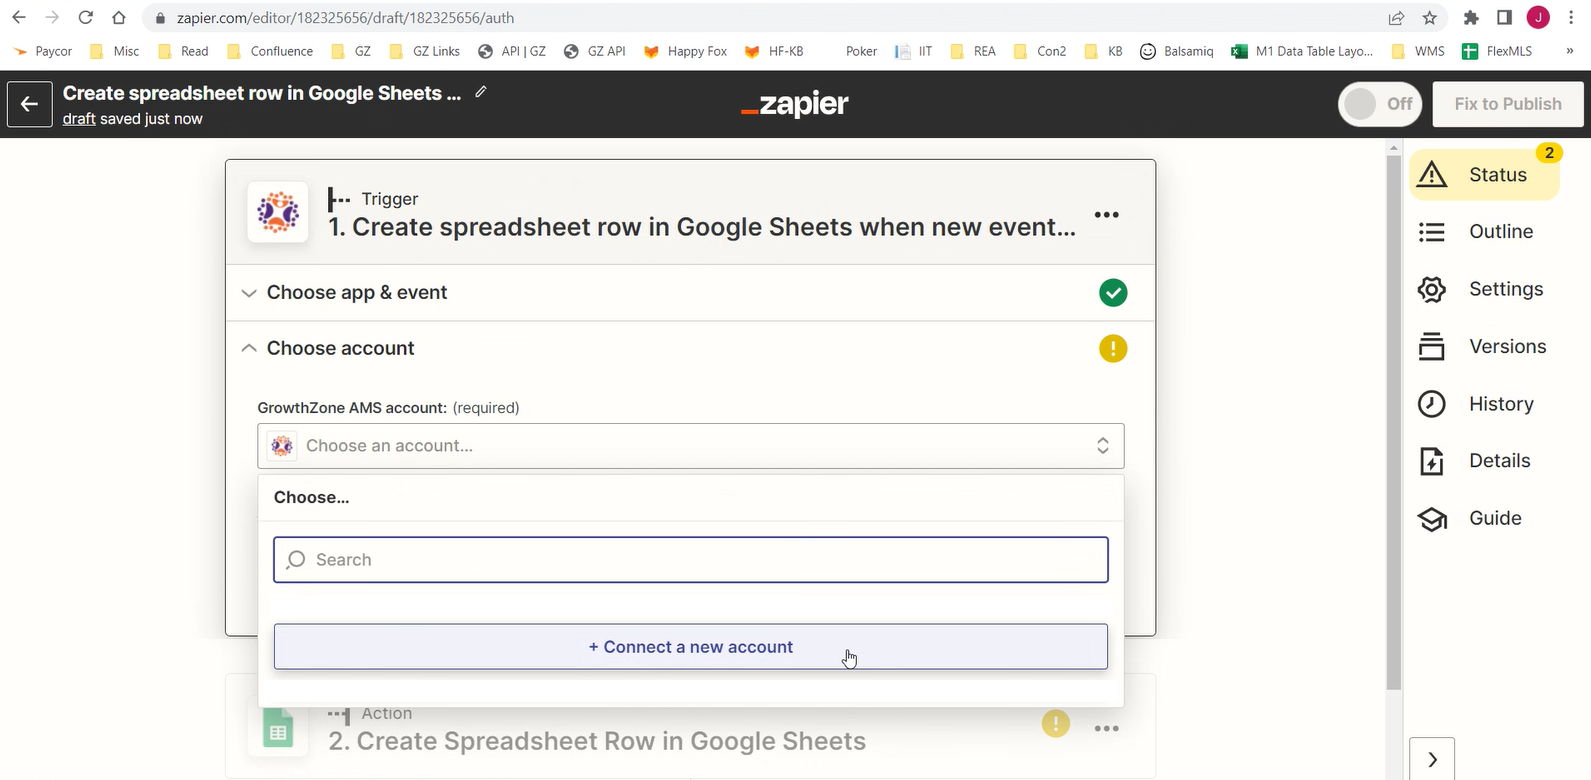
Configuring Your Trigger
Click on the trigger to select additional configuration details. Here, you’ll want to select the Connect a New Account button (or if you’ve already set up a Zap before, you can select GrowthZone from the radio buttons).
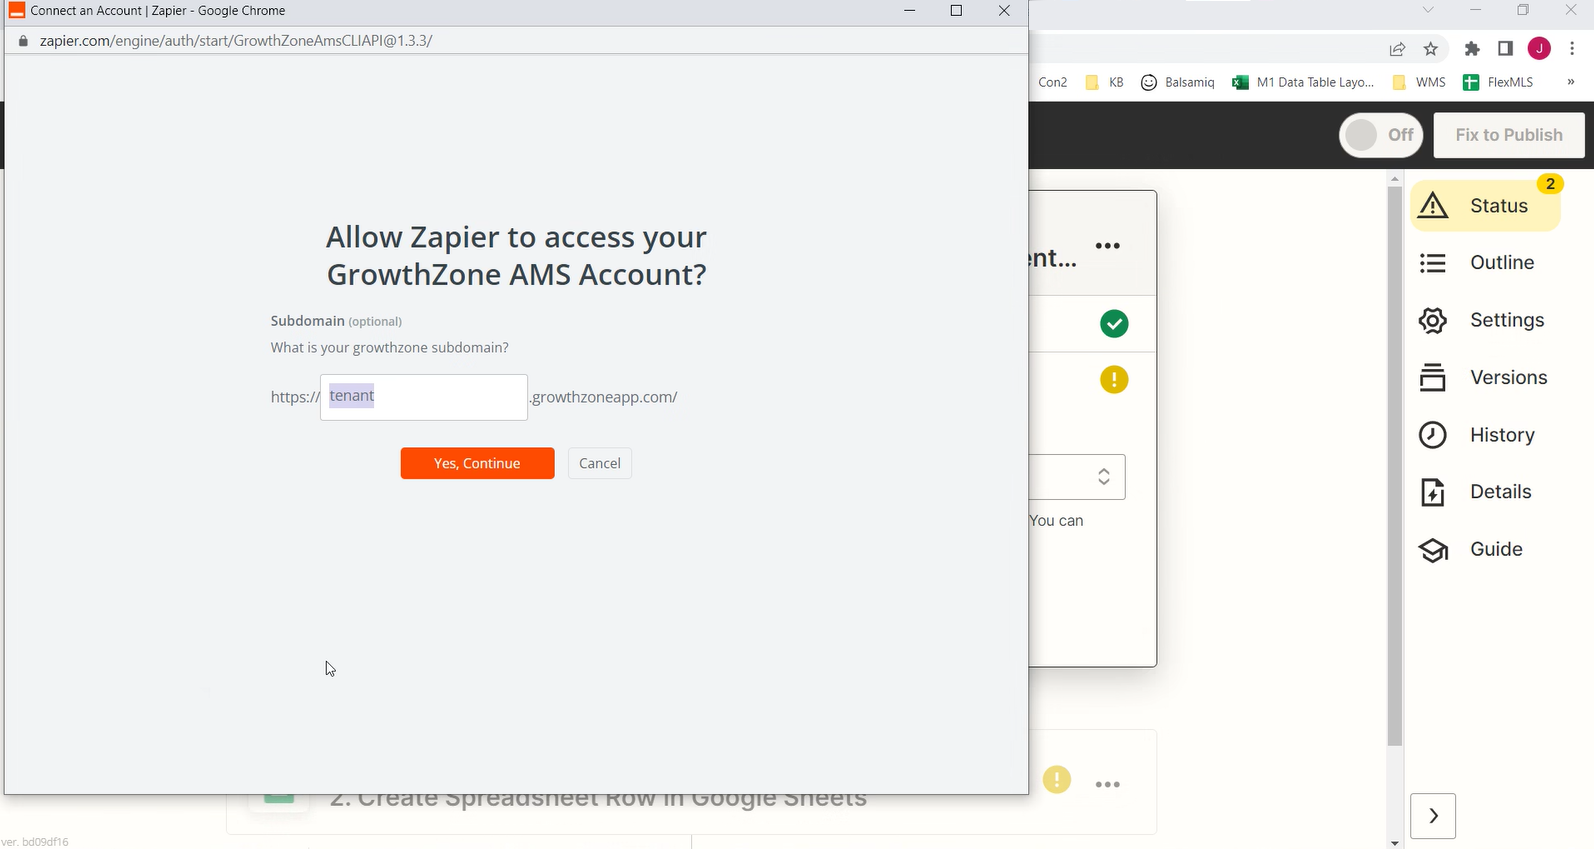
To connect a new account, you are brought to a screen where you have to identify your GrowthZone database (tenant) and login to it. You should see a familiar login screen that shows your logo.
|
|
NOTE: The tenant field should be populated by YOUR tenant domain name. In the example below, we’ve highlighted the section of your database URL that you’d want to enter. This is just an example, and should be your database name (i.e. https://alaskachamber.growthzoneapp.com). |

Test Your Trigger
Once connected to your database, you’ll need to test your trigger, by clicking the Test Trigger button.

Zapier will attempt to run a quick test of the trigger you’ve created. If it finds an example from your database, you’ll see a payload of familiar information.
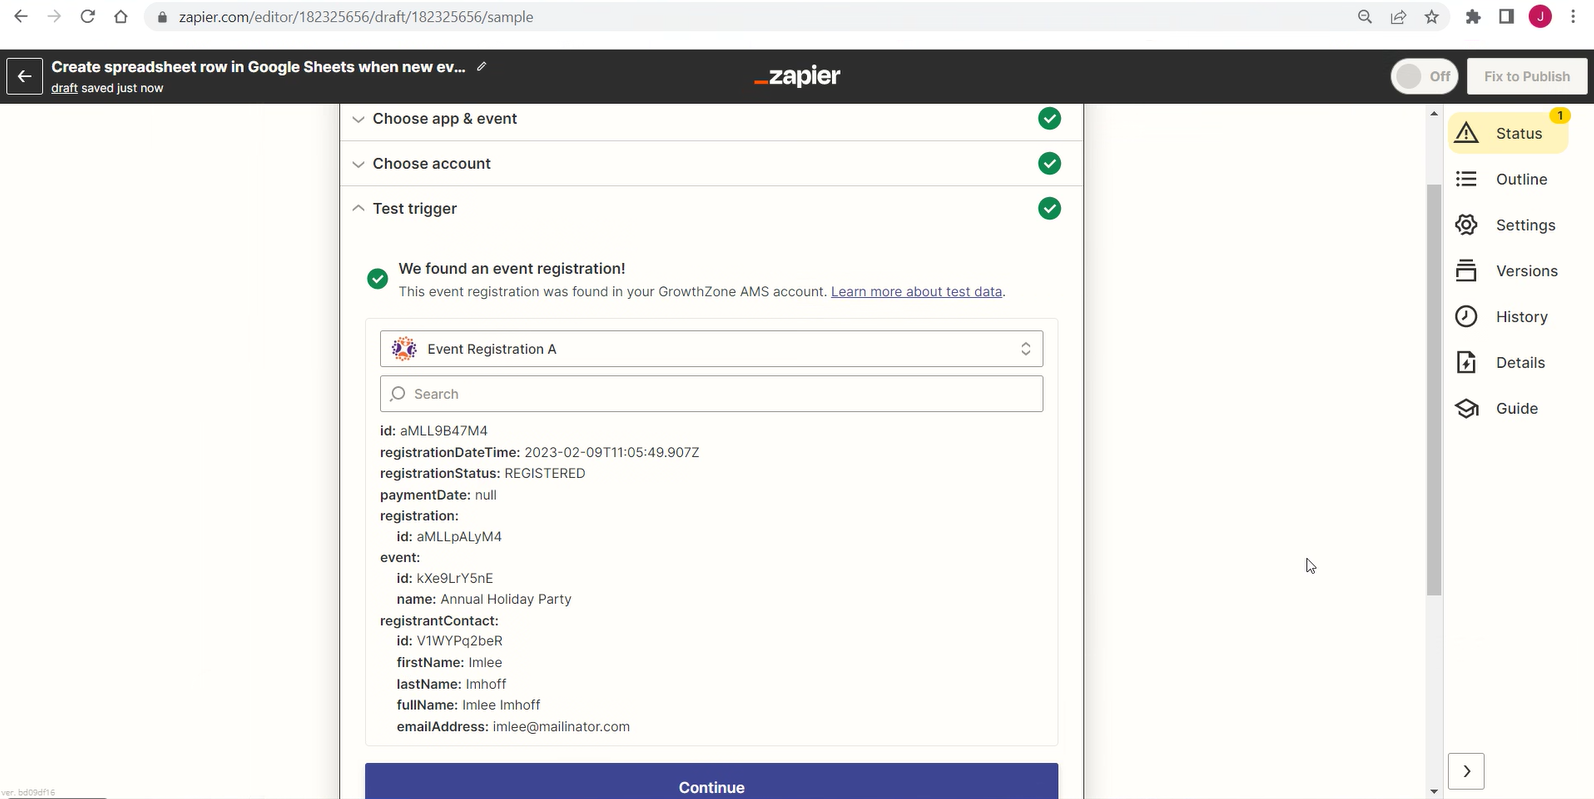
If it does not find a recent event registration in your database, you may need to create a test one in order to test the trigger. (You can always delete this test registrant from your GrowthZone event later).
Once you have a successful trigger test, you can click continue. This will bring you the Action setup. To continue with our example using Google Spreadsheets, you will need you to connect to your Google account and give Zapier permission to write to your spreadsheet. Click continue again.
Configuring Your Action
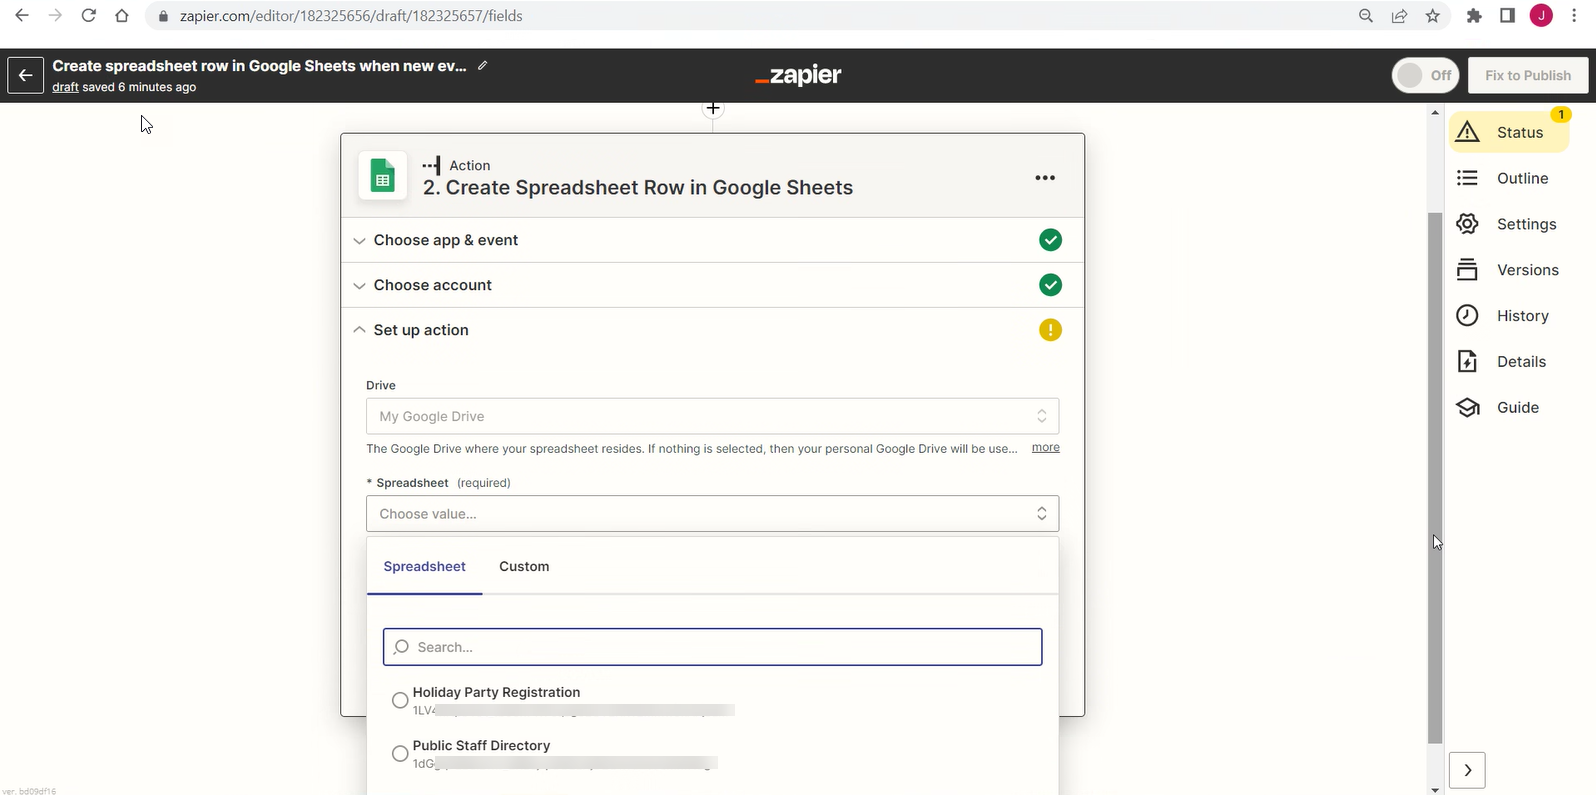
Set up the Action by selecting the drive and specific spreadsheet that you want to write to. Again, this action setup area is completely controlled by the application you’ve selected to connect with. This example is just the process for adding a row to a Google Spreadsheet, and other applications may have different needs and selections.
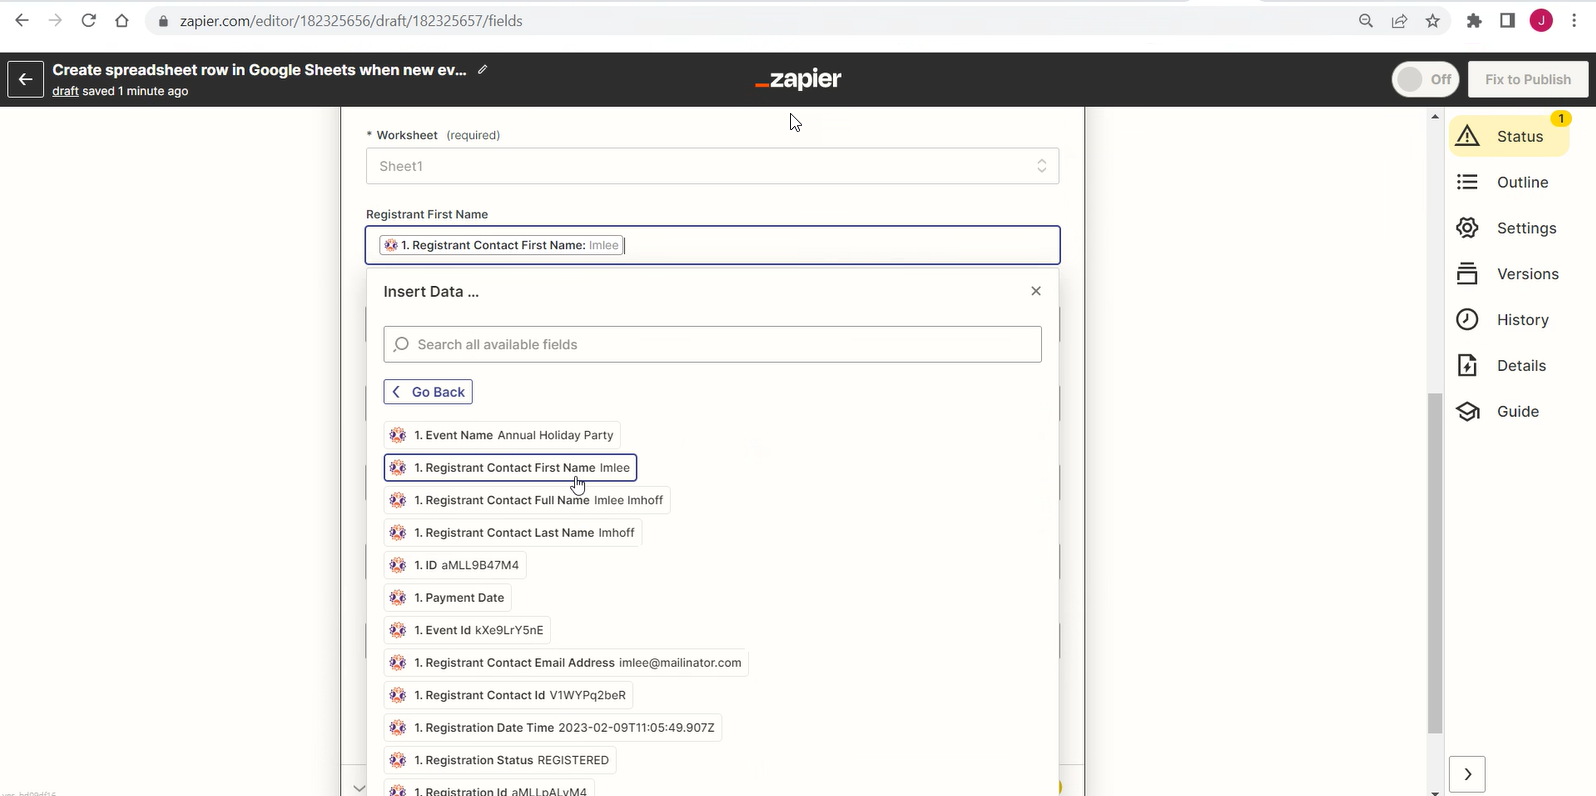
The field on your selected Google Spreadsheet will show, and you can map the fields to the appropriate GrowthZone data fields. Click continue when your mapping is completed.
Test Your Action
You can then test your Action, and ensure your test registrant has been added as a row to your Google Spreadsheet.

Configure Additional Filters/Segmentation (optional)
Your Zap is technically complete and ready to use, but the data it’s gathering may be too broad for your needs. You may want to specify a few additional details to ensure you are gathering the right data. For example, perhaps you want this Google Sheet to be filled in with registrants from a specific GrowthZone event. Without additional filtering, Zapier will pull in ALL event registrants from your GrowthZone database.
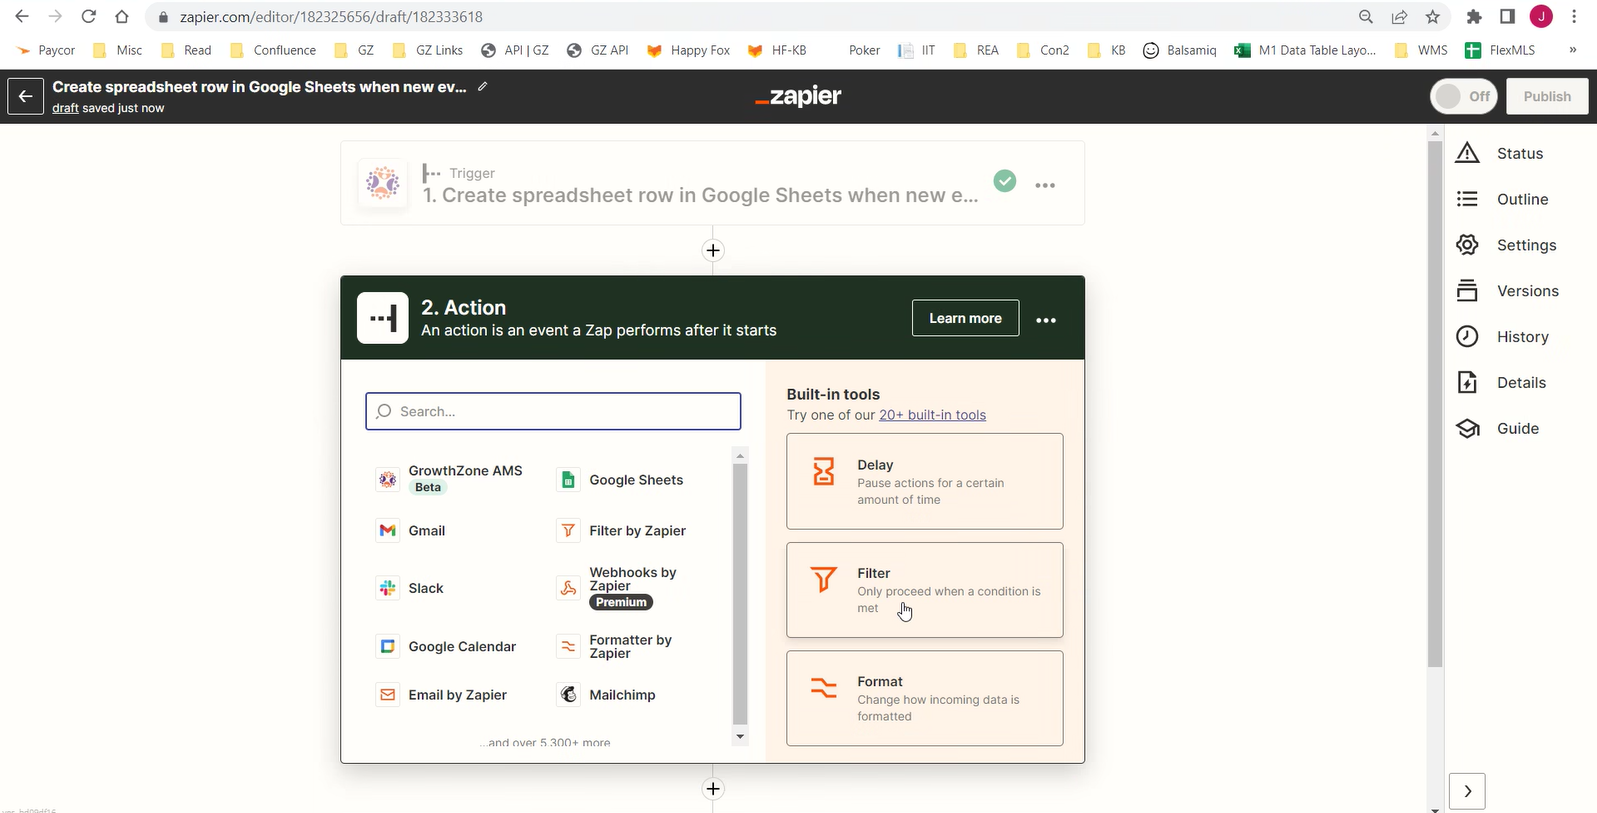
To add filtering, select the plus sign between your Trigger and Action. There you’ll see a screen with a variety of options, but in this example we’ll select the Filter button.
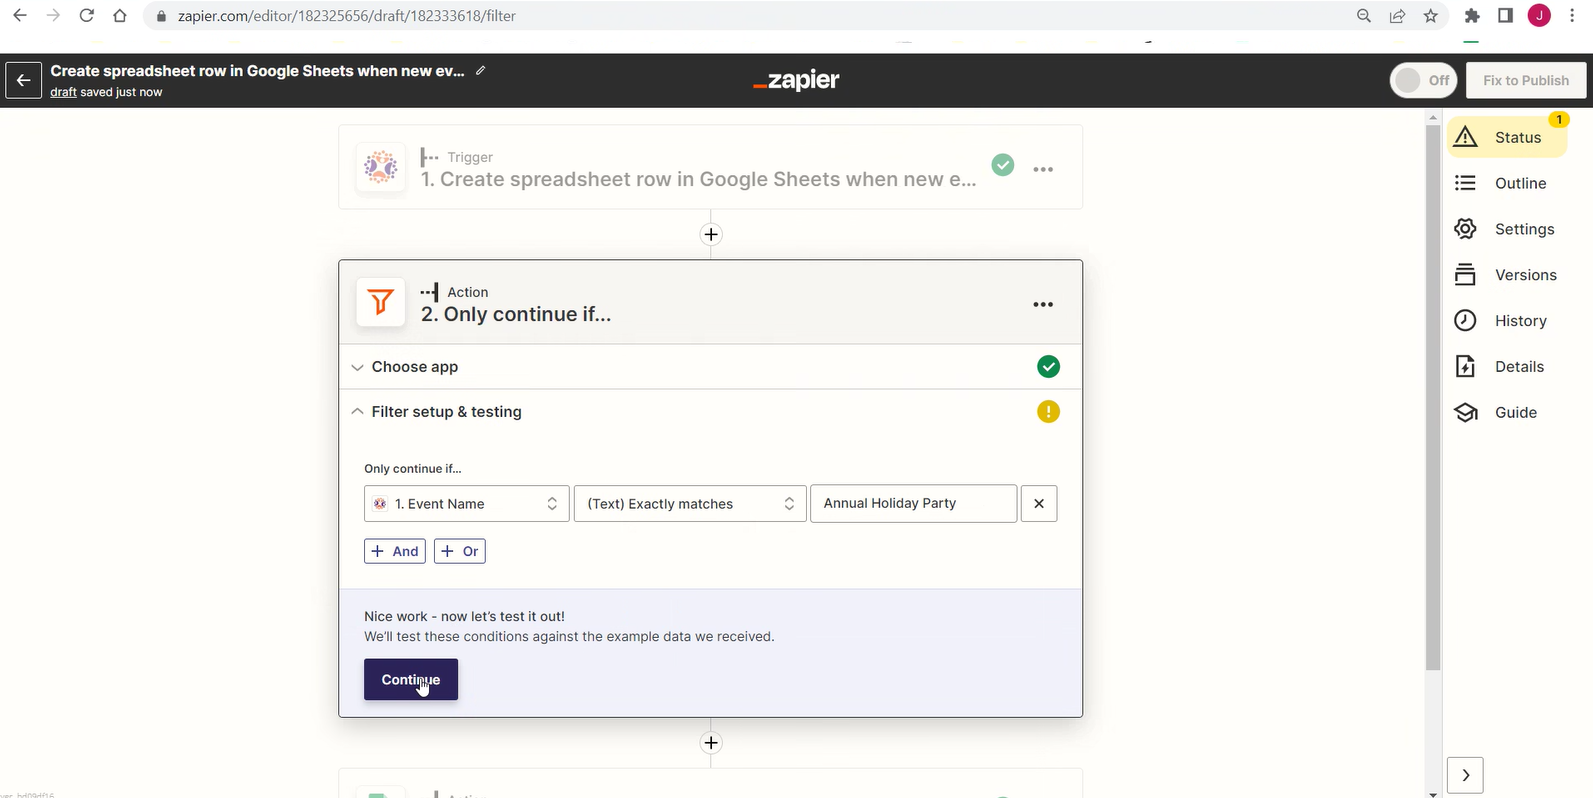
Once you select Filter, you’ll be able to customize it based on your needs. In this example, we only want to pull registrants from an Event with a specific name.
Test Your Filter
You’ll then have the opportunity to do a test again. The testing opportunities throughout this process are an important to making sure your gathering/sharing the right data.
FAQ
Q: Can you help me understand some of Zapier’s Terminology?
Answer:
Zap
A Zap is an automated workflow that tells your apps to follow this simple command: "When this happens, do that." Every Zap has a trigger and one or more actions. A trigger is an event that starts a Zap, and an action is what your Zap does for you. When a Zap runs, each action it completes counts as one task. Think of these as building blocks for your Zap. Start with your trigger and add the action or actions you want Zapier to perform. Read more
Trigger
Triggers get new data, parse individual data fields, and let you include that data in subsequent Zap action steps. Triggers can run every time something new is added to an API endpoint or pushed to Zapier via a Webhook, or they can use filters to watch for specific items.
- GrowthZone has a Membership trigger that will pass membership details when a new membership is added or a change is made to an existing membership
- GrowthZone has an Event Registration trigger that will pass registration details for all or specified events when a registration occurs.
Action
Actions push or put new data into apps through API calls that pass data from user customized input fields. Action steps in Zaps can create new items in an app or update existing items with a create action, or find existing items in an app with search actions.
- GrowthZone has a Find Event action that will allow you to find detailed information about specific events. This is useful when used in conjunction with the Event Registration trigger.

