.png)

 3408
3408
-
Click Fundraising in the Navigation Panel. The Fundraising module will display a list of all of your fundraising campaigns.
-
Click the Add New button.

-
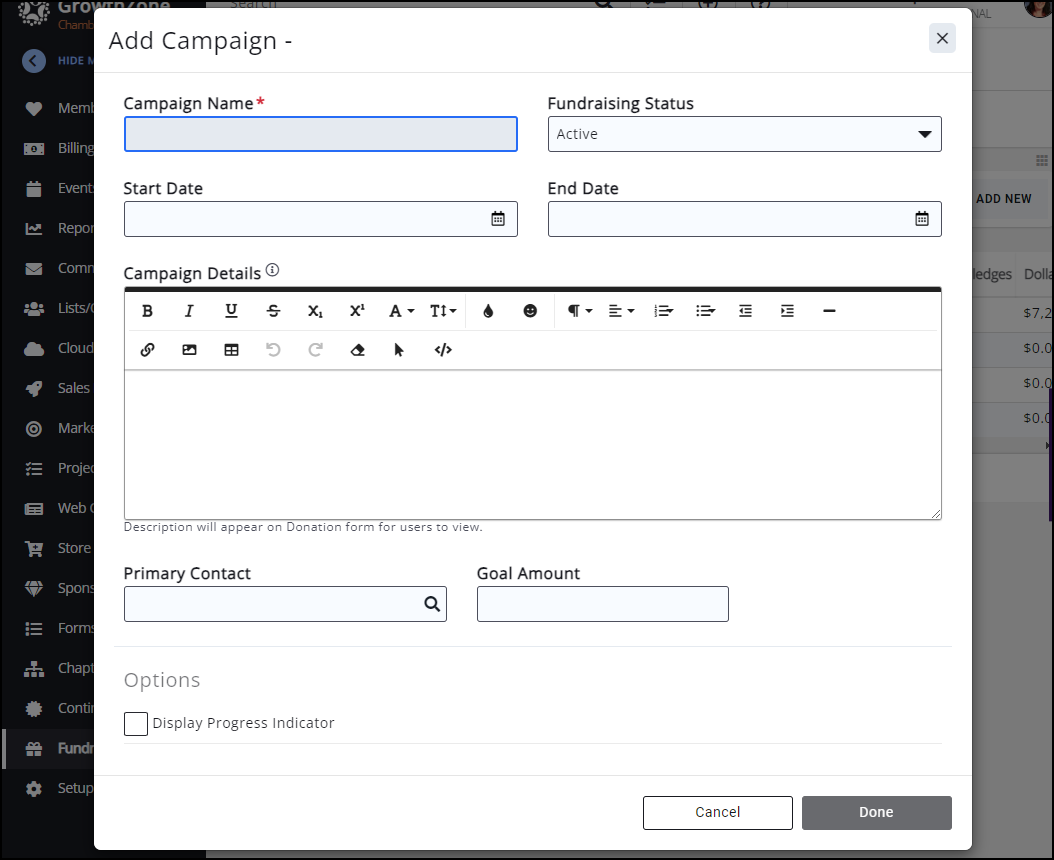
Configure the following settings:
-
Campaign Name: Enter a name for this new campaign. This will be the display name for the campaign.
-
Fundraising Status: Select the status of this campaign from the dropdown list.
-
Start Date and End Date: Contributions may be accepted from the start date to the end date.
-
Campaign Details: Enter a description of the new campaign. The description will be displayed on the contribution form for users to view.
-
Primary Contact: Enter the name of the primary contact for the campaign. The contact must exist in your database.
-
Goal Amount: Enter your financial goals for this campaign.
-
Receipt Template: Select the receipt template you wish to use for this campaign. Click here for details on managing and editing your templates. This will be the email sent in response to a contribution.
-
Display Progress Indicator: Select to include an indicator on the fundraising page indicating how much has been raised compared to the Goal Amount. When this is selected, the Goal Amount field becomes required.
-
-
Click Done.
Contributors Covering Processing Fees (GrowthZone Pay ONLY)
If you have GrowthZone Pay as your integrated credit card processor, you can select to have your fundraising contributors cover the credit card processing costs. To enable this option in your campaign:
Go to your Fundraising campaign. On the Contribution tab under Billing and Checkout, you can check a box that allows contributors to help cover processing fees. You can add a Fee Item for Processing Fees and a Fee Percentage.
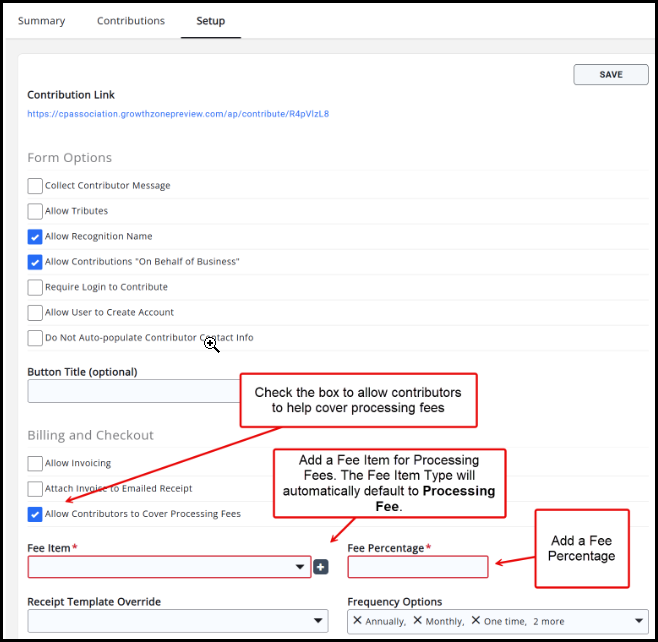
- Select the option to Allow Contributors to Cover Processing Fees.
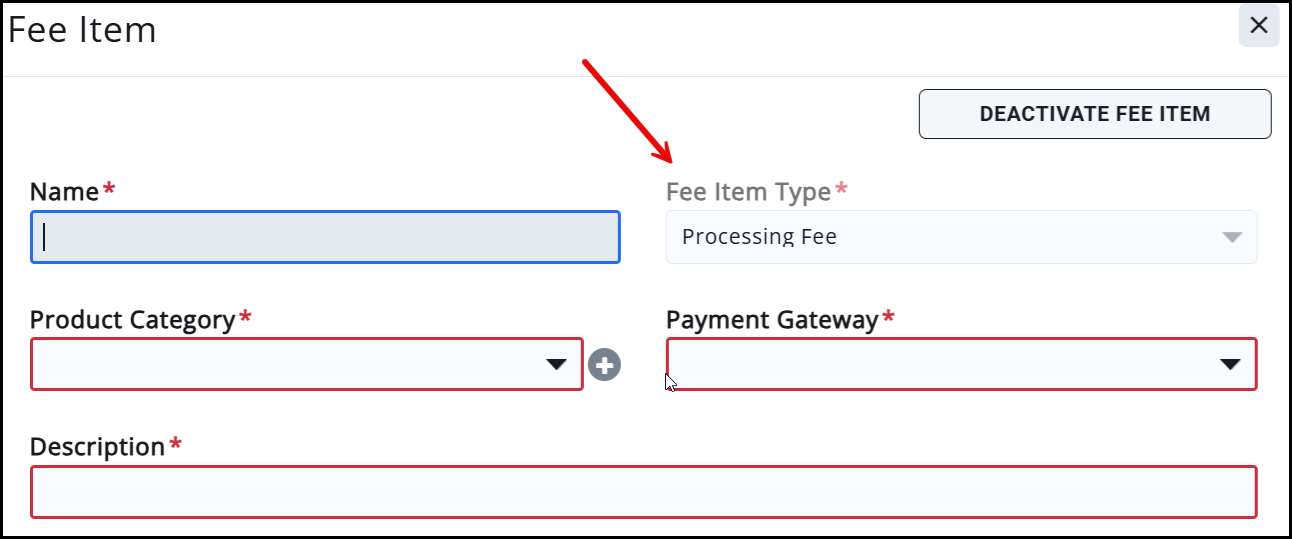
- Choose an existing processing fee Fee Item or create a new one.
- Set the Fee Percentage.
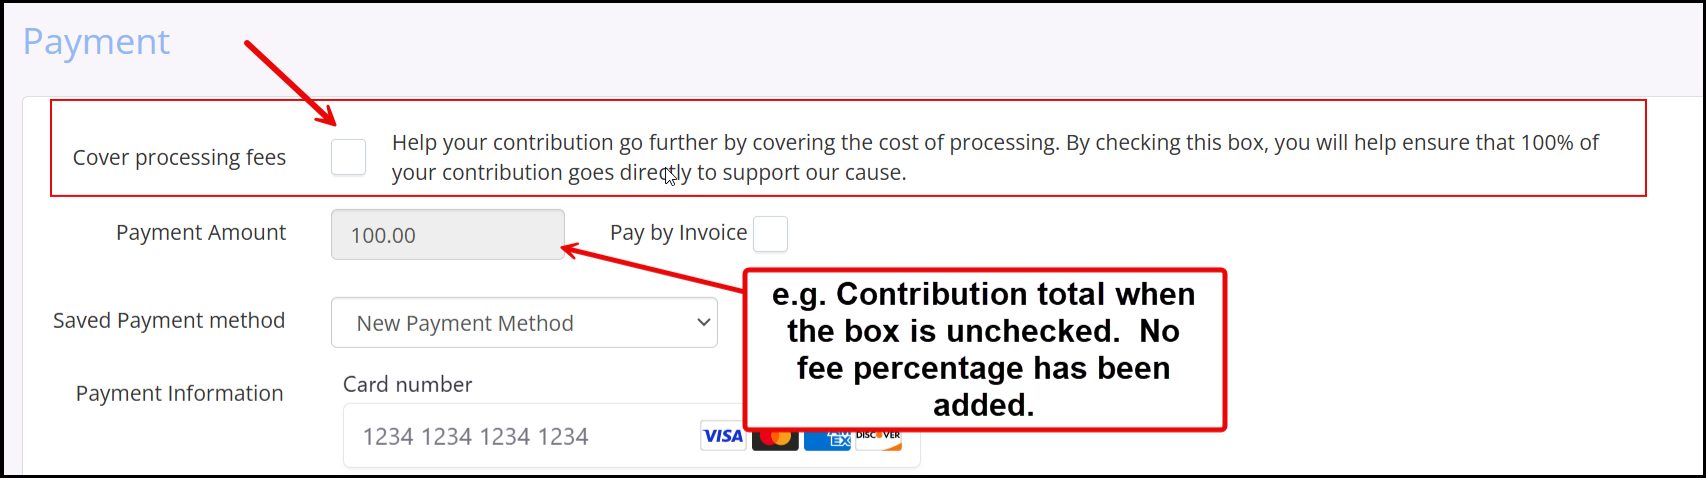
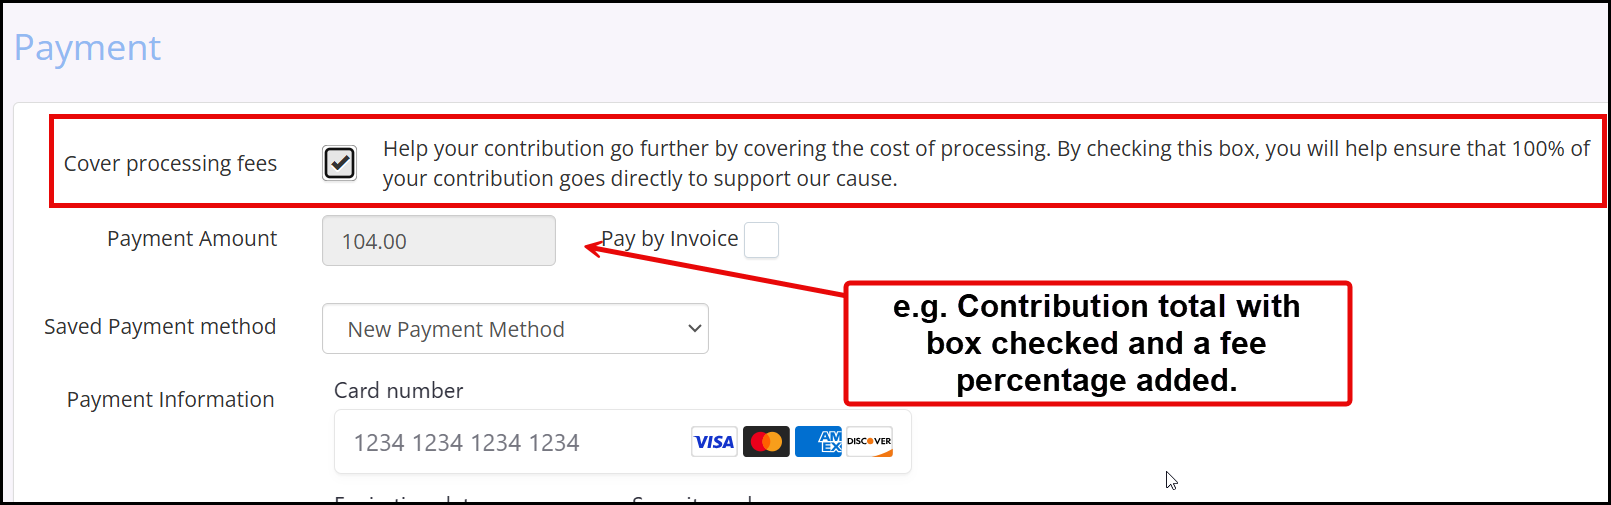
While checking out, on the payment screen Contributors will be asked if they would like to help cover the processing fee.
|
|
IMPORTANT: To ensure compliance with payment processing regulations and industry standards, the text displayed in the checkout screen is hardcoded and cannot be modified. |