
 6201
6201
Sponsors can be registered for events through the back office, or, if you have not enabled Allow Staff Only for the sponsor registration, sponsors can register via your registration page.
|
|
IMPORTANT: The Sponsors/Ads module is required to use this functionality. |

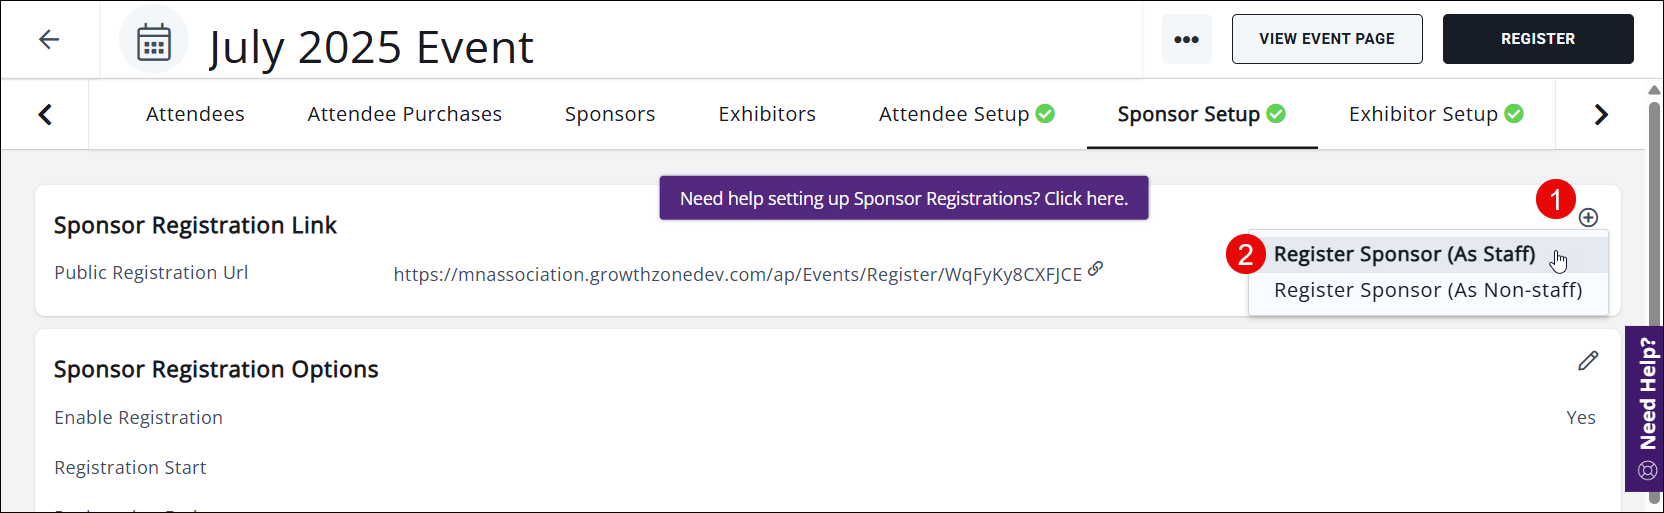
There are three places to add sponsors via the back office- the plus icon![]() in the Sponsorships section of the event's Overview tab, the Sponsor Registration Link provided on the Sponsor Setup tab, or by using the Add Sponsor button on the Sponsors tab. You also have the option to register sponsors As Staff (using your staff credentials) or Non-staff (completing the registration as the sponsor).
in the Sponsorships section of the event's Overview tab, the Sponsor Registration Link provided on the Sponsor Setup tab, or by using the Add Sponsor button on the Sponsors tab. You also have the option to register sponsors As Staff (using your staff credentials) or Non-staff (completing the registration as the sponsor).
Adding a Sponsor using the As Staff Option
This will be the most common process of adding a sponsor, as it provides the ability to register a sponsor using your staff credentials (required for sponsorships flagged as Allow Staff Only) and to add a sponsorship that includes attendees. You can access this option in either the Sponsorships section in the event's Overview tab or the Sponsor Registration Link in the Sponsor Setup tab.
To initiate the sponsor registration, click the plus icon ![]() in either of those areas and select the "Register Sponsor (As Staff)" option. This will override most settings and allow you to register sponsors that have been flagged as Allow Staff Only, as well as register sponsors for sponsorship types that include attendees.
in either of those areas and select the "Register Sponsor (As Staff)" option. This will override most settings and allow you to register sponsors that have been flagged as Allow Staff Only, as well as register sponsors for sponsorship types that include attendees.
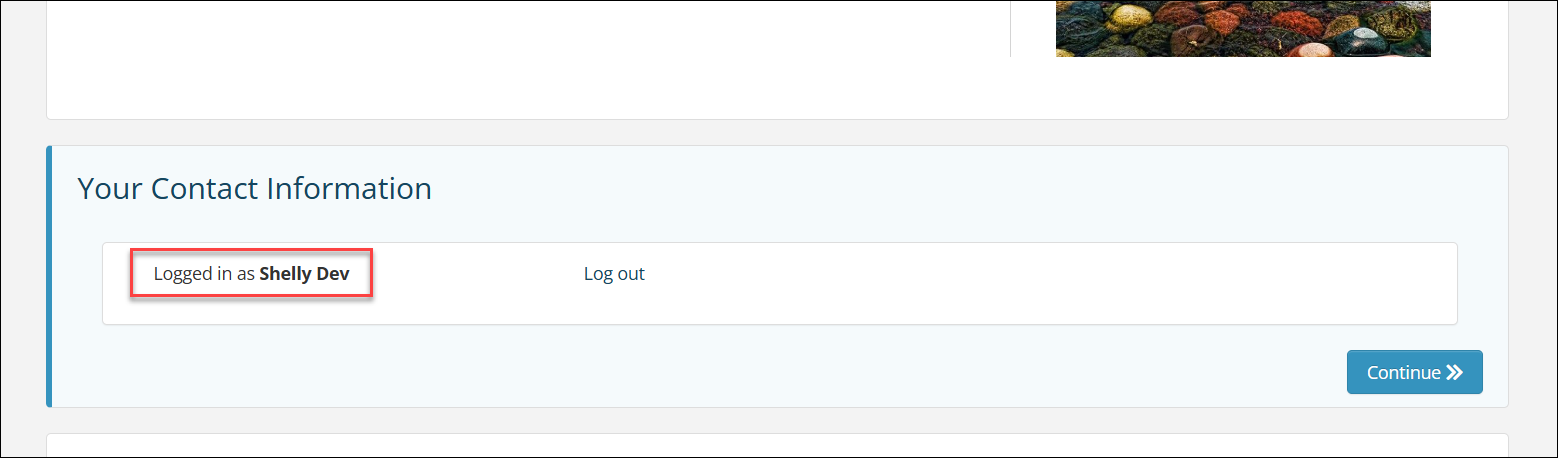
This will open a registration window, and you should see "Logged in as (your name)" in the My Information section.
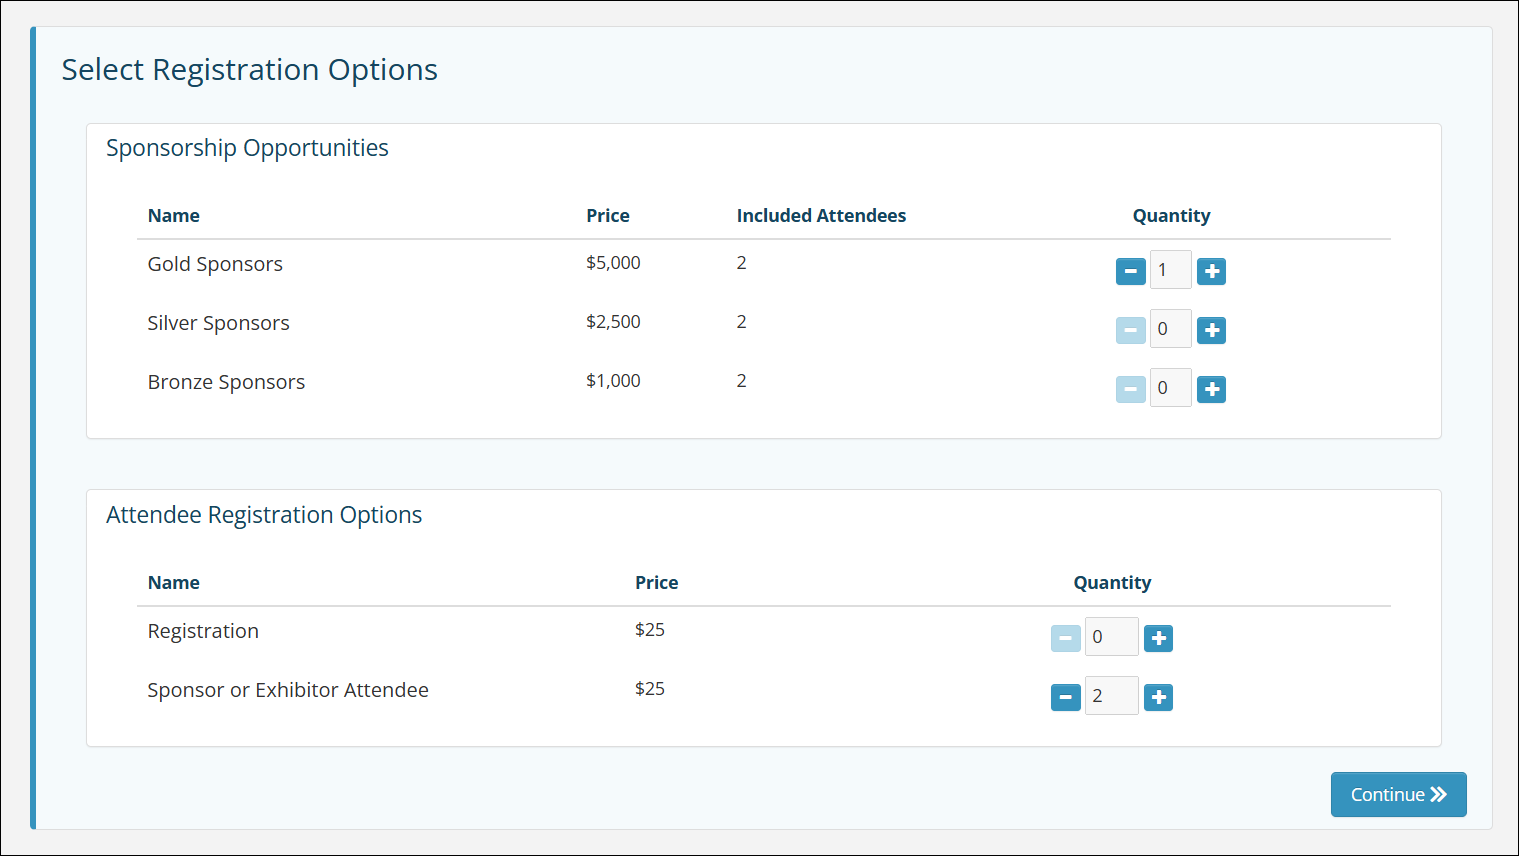
Scroll down to the Sponsorship Opportunities section and make your selection. (These will be the Sponsor Registration Types you previously have set up.) If the sponsor registration type includes attendees, the Attendee Registration Options section will also display; the number of attendees and the attendee registration type included in the Sponsor Registration Type will already be selected, but you may add more attendees at the standard registration cost if needed.
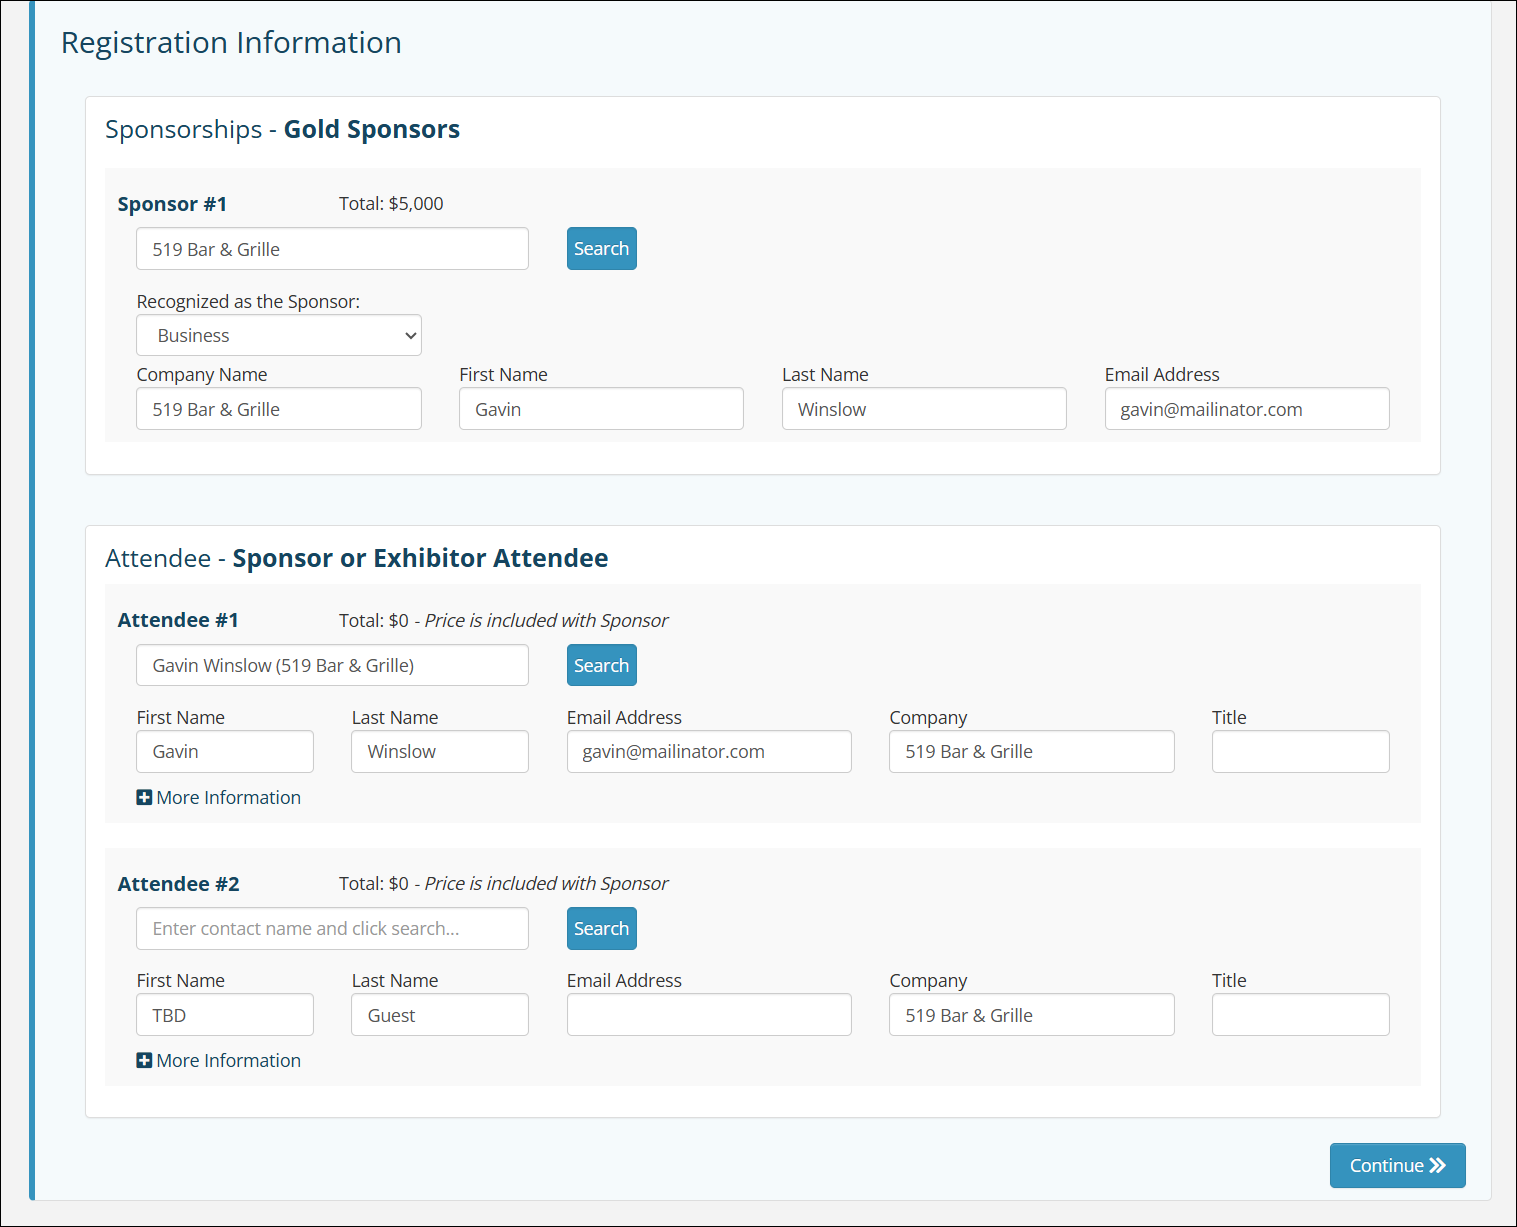
Once you click Continue, you will be able to enter contact information for that sponsor. If the sponsor exists in your system, you can enter their name and click the Search button to find their record and autofill their information.
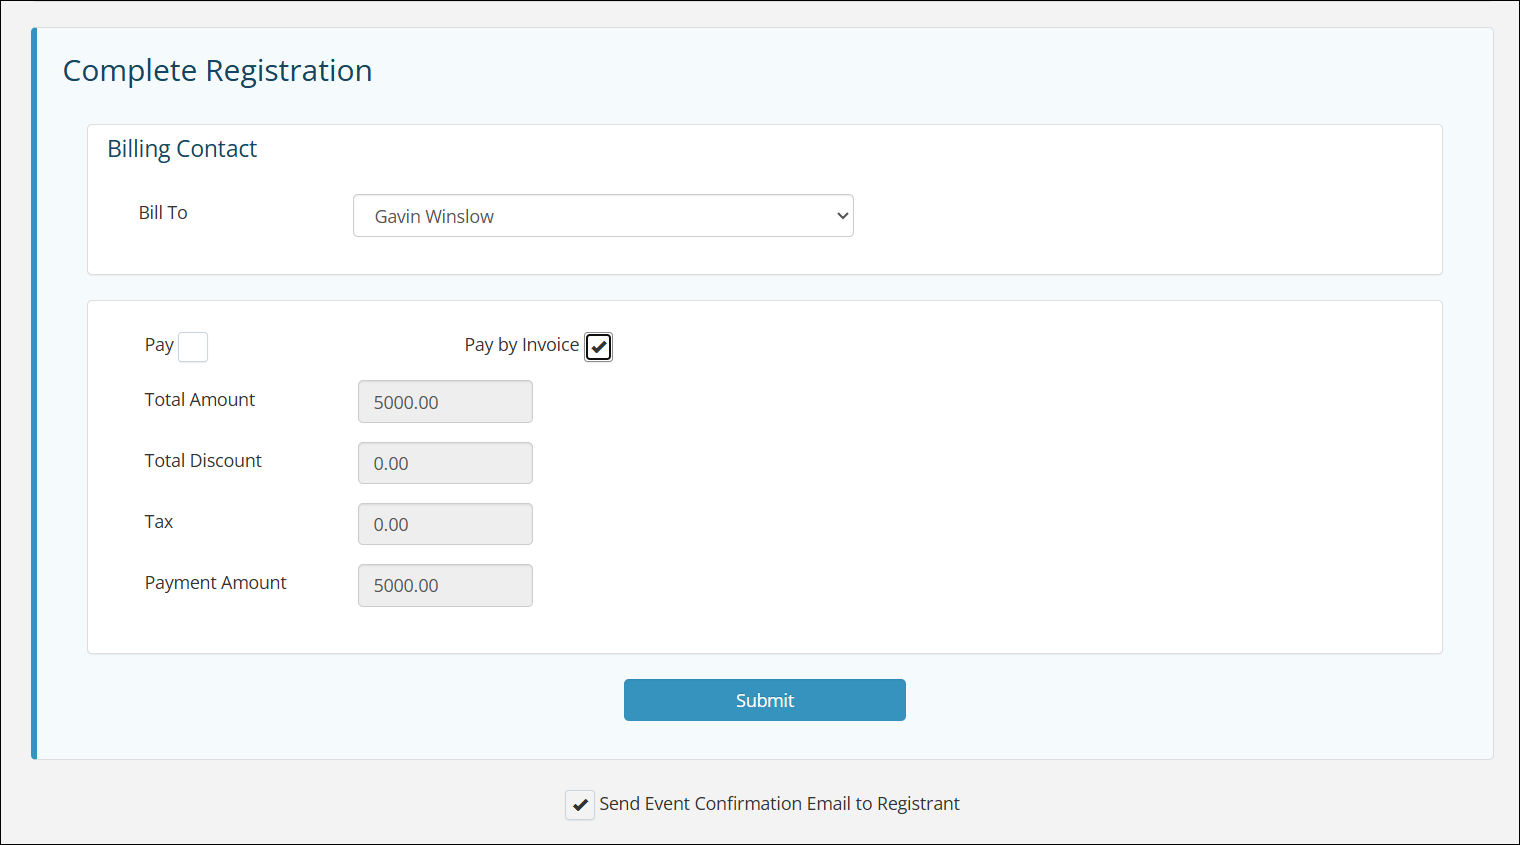
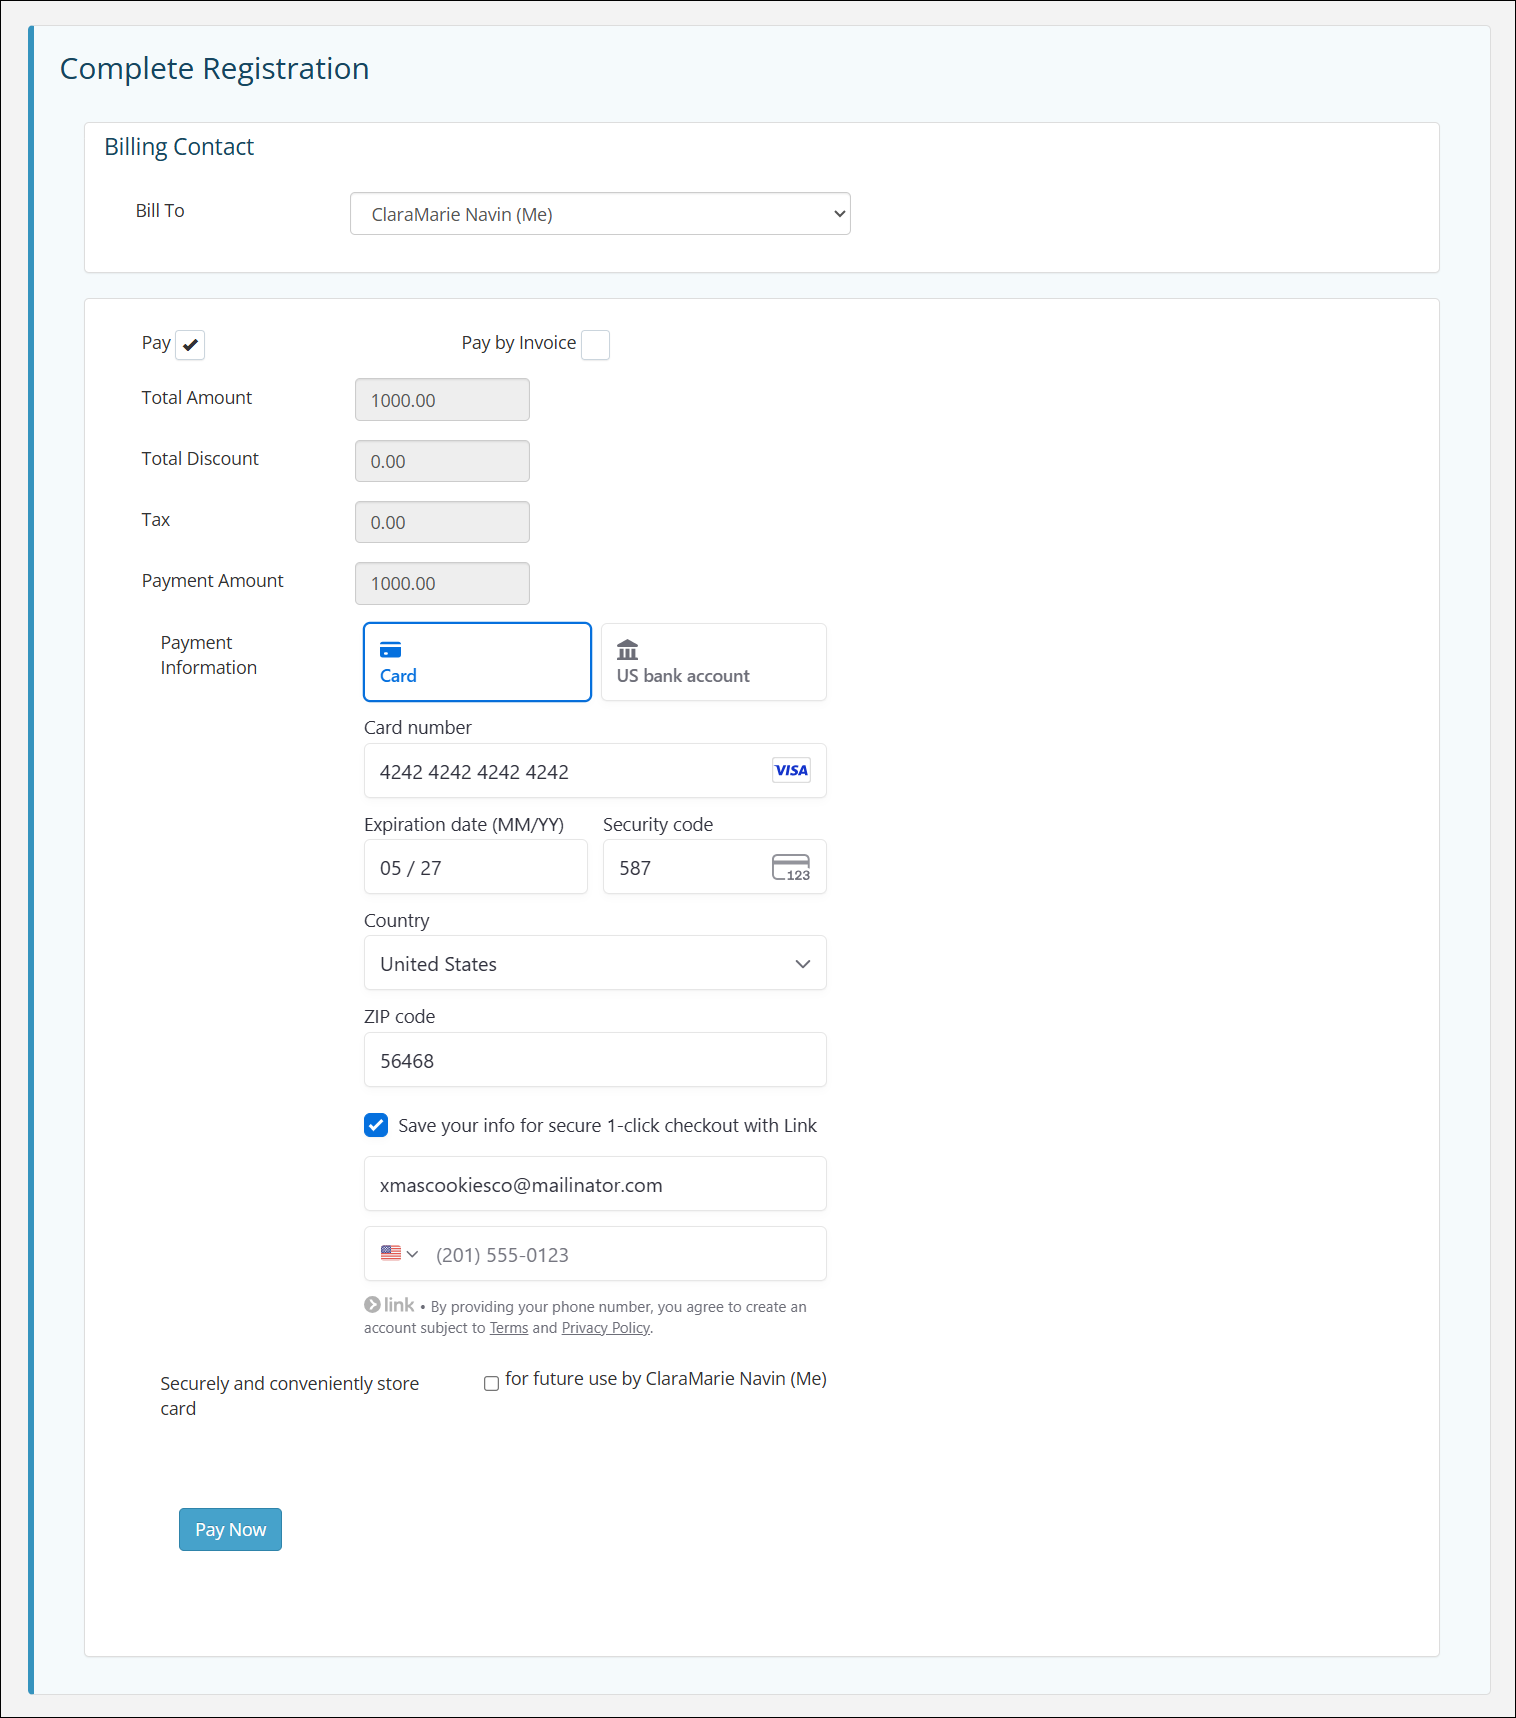
Select any desired additional items for the registration (per attendee and/or for overall registration) and any promo codes if applicable. Any other applicable discounts (such as early registration) will automatically be applied and will be reflected in the payment information section. NOTE: As staff, even if invoicing is turned off for sponsors, you will be able to select the Pay By Invoice option. Enter the Bill To contact and any needed payment information. You also have the option to not send the confirmation email to the sponsor; the system will log that the option was turned off if you disable it.
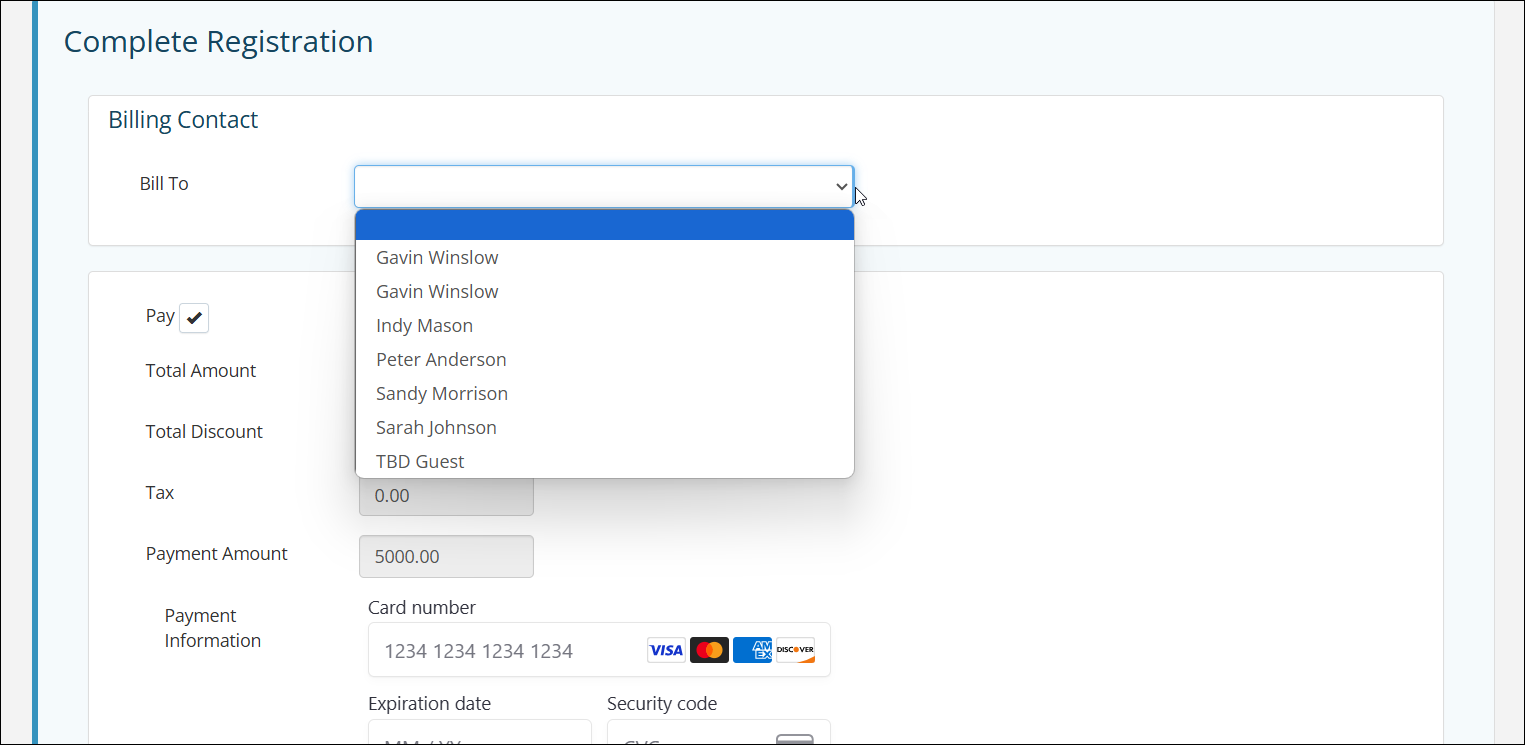
If using a credit card, you will see a Pay Now button; if invoicing is an option, you will see a Submit button. Click either of those to complete the registration.
Because the sponsor was registered using the As Staff option, the Sponsor Registration notification will NOT be sent to staff. The Sponsor will appear on the Sponsors tab in a Pending status. To approve the sponsorship, click the ellipsis in the Actions column and select the Approve option.
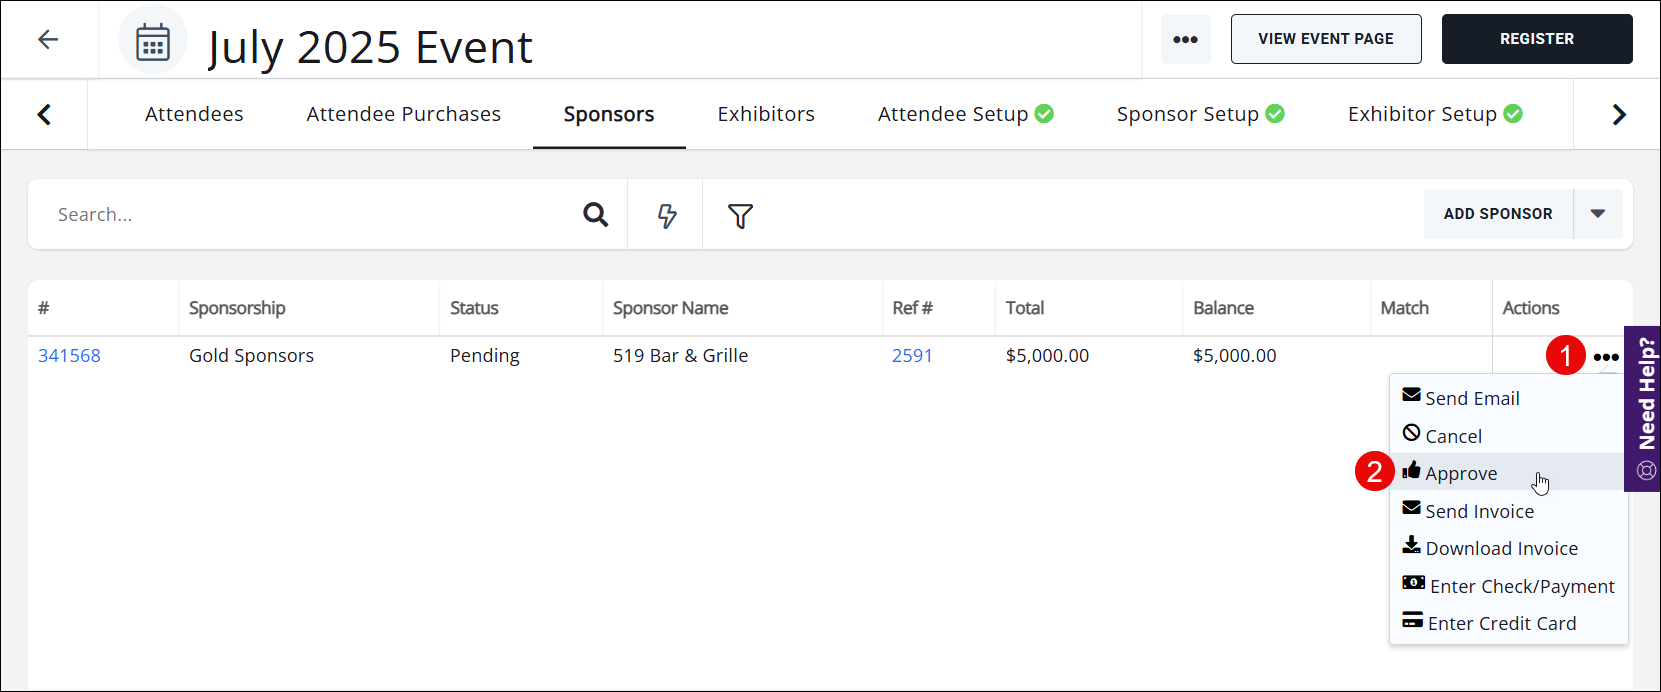
You may also cancel the registration if the sponsor is not approved, as well as sending the sponsor an email (this option automatically attaches the invoice), sending the invoice, applying payments, etc. If for some reason a refund is needed, you can initiate the refund from the invoice on the Attendee Purchases tab.
Adding a Sponsor using the Non-Staff Option
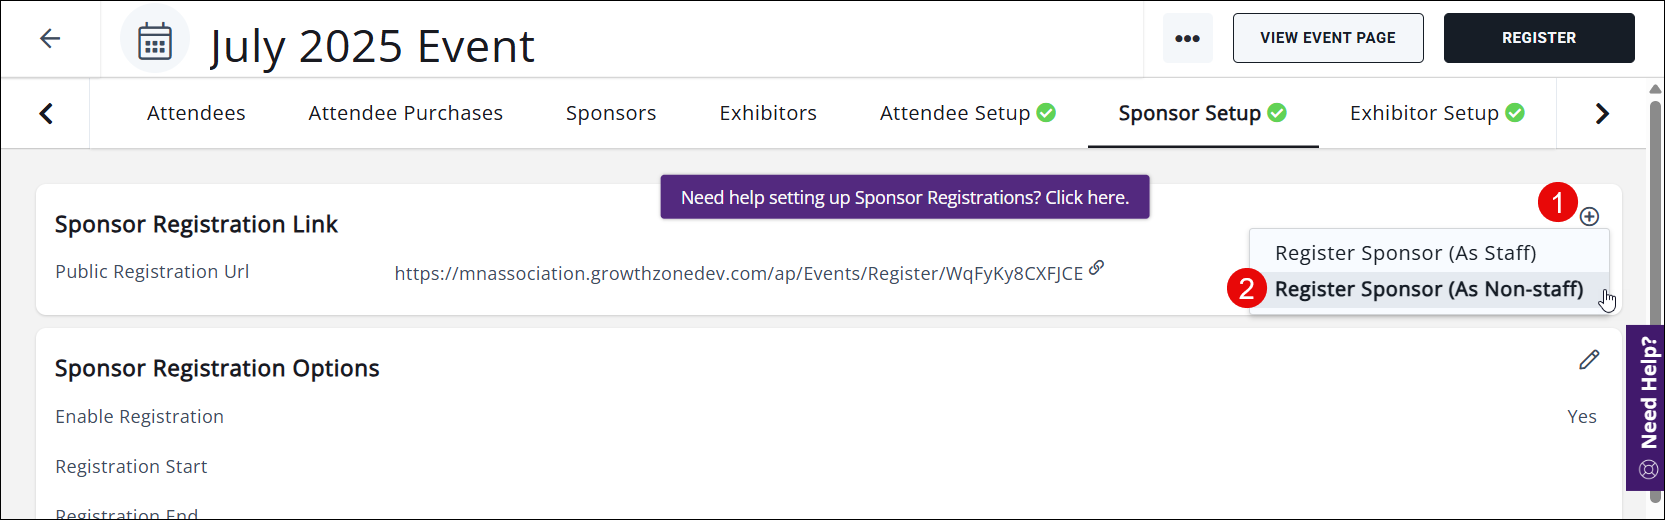
Sometimes you may need to register as the sponsor themselves. For sponsor registration types not marked as Allow Staff Only, you can use the Register Sponsor (As Non-staff) option. You can access this option in either the Sponsorships section in the event's Overview tab or the Sponsor Registration Link in the Sponsor Setup tab.
To initiate the sponsor registration, click the plus icon ![]() in either of those areas and select the "Register Sponsor (As Non-staff)" option.
in either of those areas and select the "Register Sponsor (As Non-staff)" option.
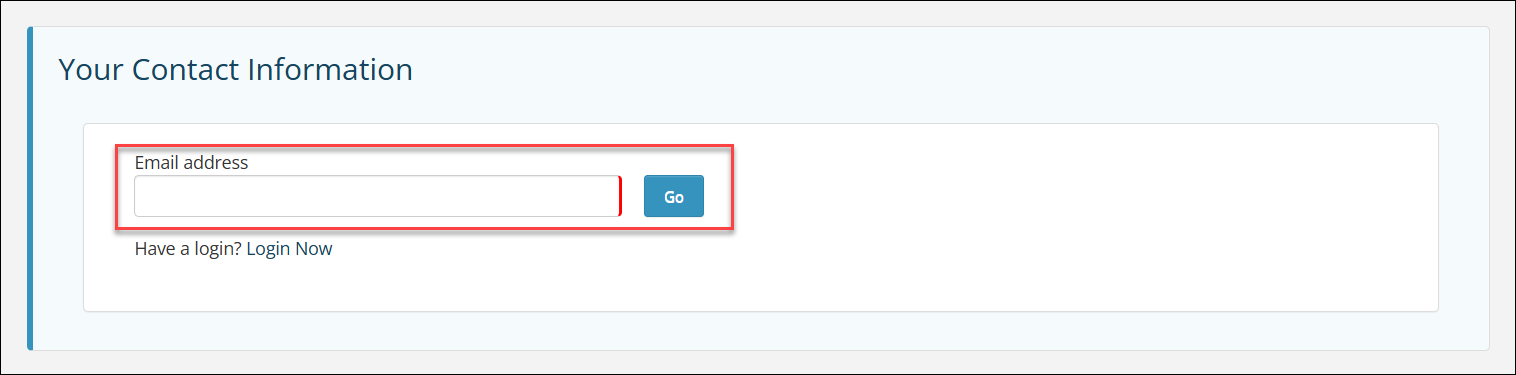
This will open the sponsor registration page, and you will see a prompt in the My Information section asking for an email.
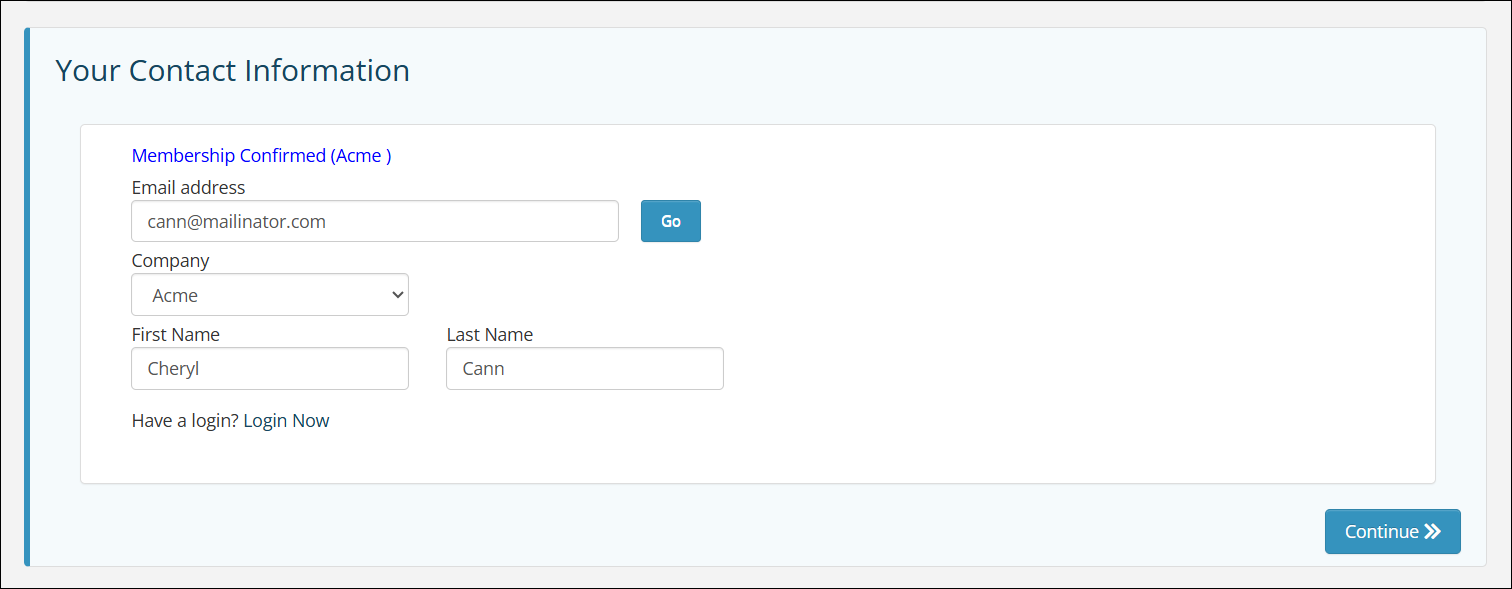
Enter the sponsor's email address and click the Find Me button. If the sponsor exists as a contact in your system, the page will confirm their information and present the appropriate sponsor registration options. NOTE: since you are using the Register Sponsor (As Non-staff) option, any sponsor registration types marked as Allow Staff Only will NOT be displayed.
If the sponsor contact does not exist in your system, the page will prompt to enter their information.

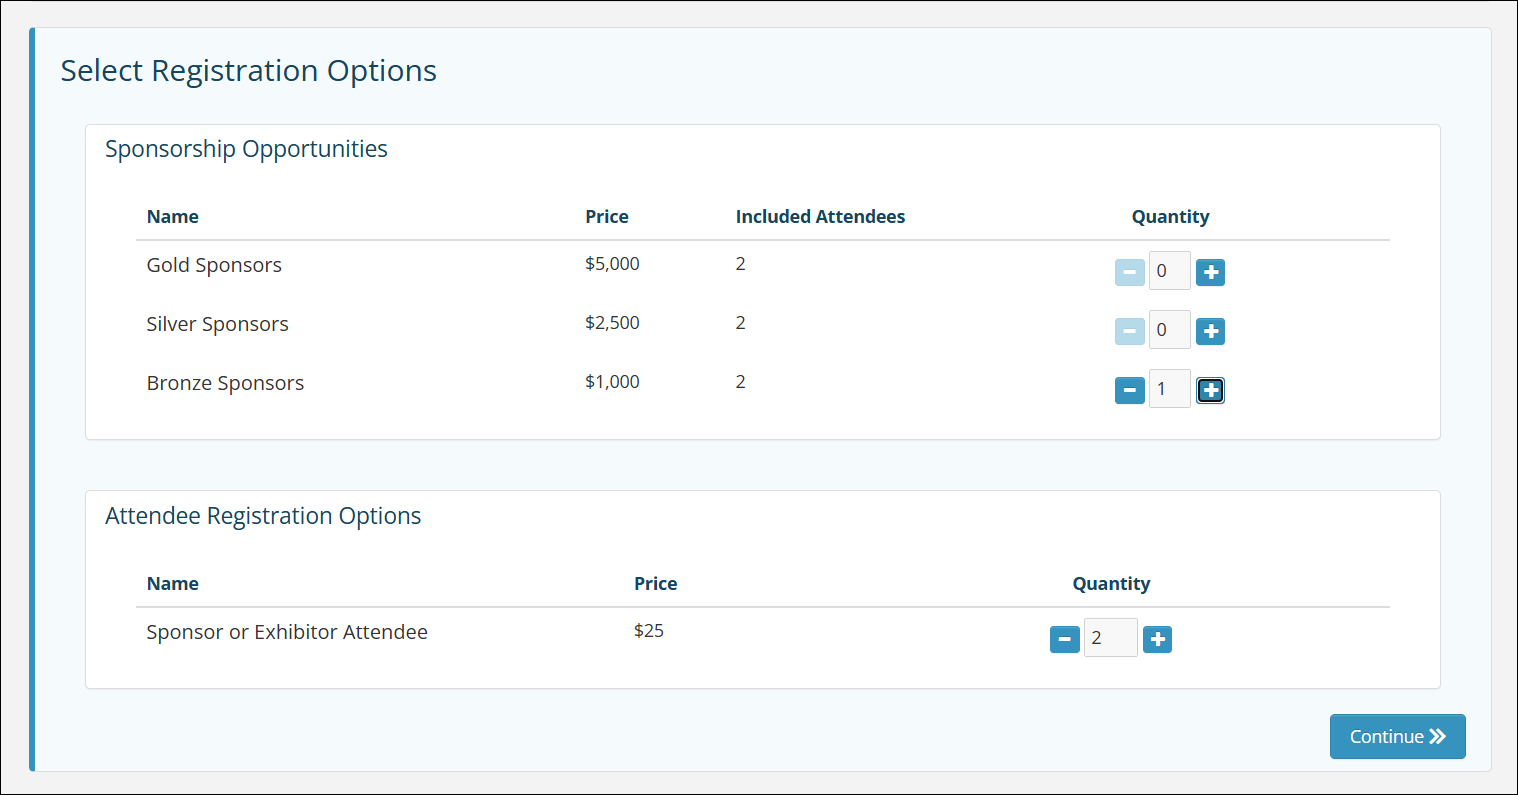
Select the desired sponsor registration type (these will be the Sponsor Registration Types you previously have set up) and enter any required information. If the sponsor registration type includes attendees, the Attendee Registration Options section will appear. (This may display more than just the attendee registration type included in the Sponsor Registration Type depending on how your Sponsor Registration Options are set up.) The number of attendees and the attendee registration type included in the Sponsor Registration Type will already be selected; you may add more attendees at the standard registration cost if needed.
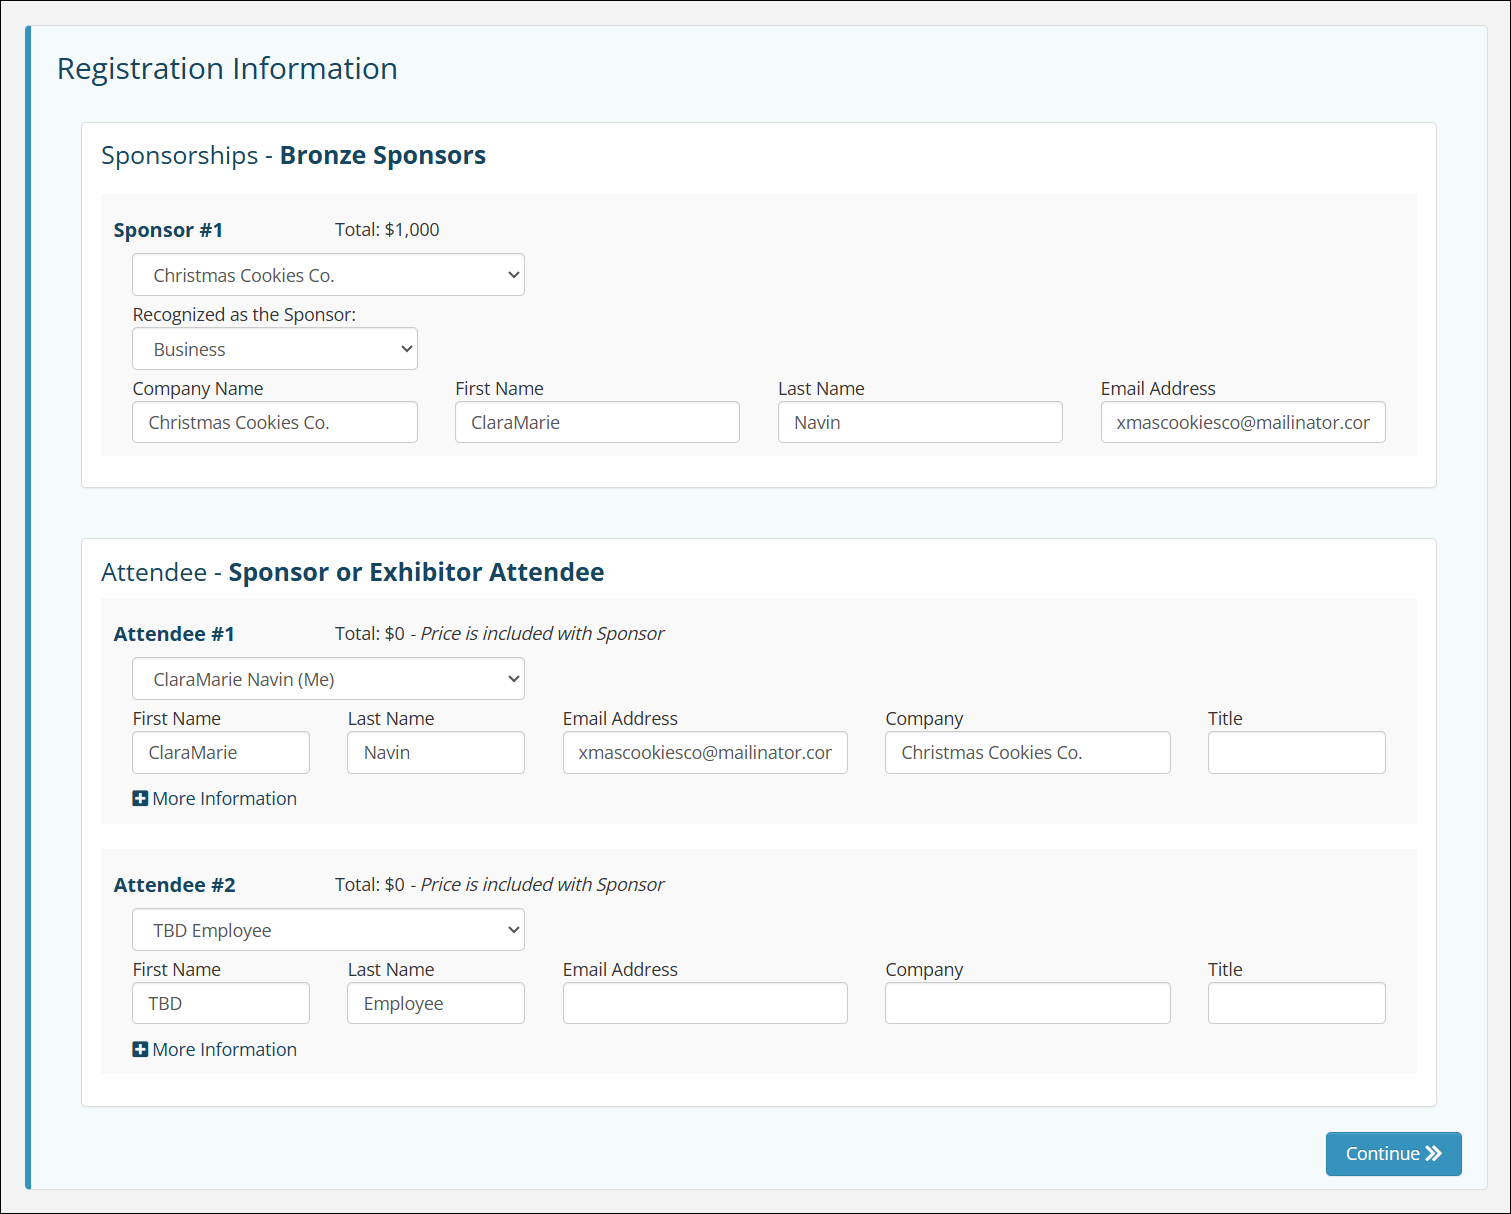
When you click Continue, you will see the options to enter the Sponsor and attendee information in the Registration Information section. Enter the information for the sponsor and any attendees and click Continue.
Select any desired additional items for the registration (per attendee and/or for overall registration) and any promo codes if applicable. Any other applicable discounts (such as early registration) will automatically be applied and will be reflected in the payment information section. Select the desired payment option (if needed) and enter the Bill To contact and any needed payment information.
If using a credit card, you will see a Pay Now button; if invoicing is an option, you will see a Submit button. Click either of those to complete the registration.
Once submitted, the sponsorship will be in a Pending status. Staff that have opted into the Sponsor Registration notification will receive an email alerting them to the new registration; that email will include a link to the Sponsors tab. To approve the sponsorship, click the ellipsis in the Actions column and select the Approve option.

You may also cancel the registration if the sponsor is not approved, as well as sending the sponsor an email (this option automatically attaches the invoice), sending the invoice, applying payments, etc.
Adding a Sponsor using the Add Sponsor button
You may also register sponsors via the Add Sponsor button on the event's Sponsors tab. This is the same process as using the Register (As Staff) option.
- Go to the Sponsors tab of the Event. Any sponsors already registered will appear here.
- Click the Add Sponsor button.
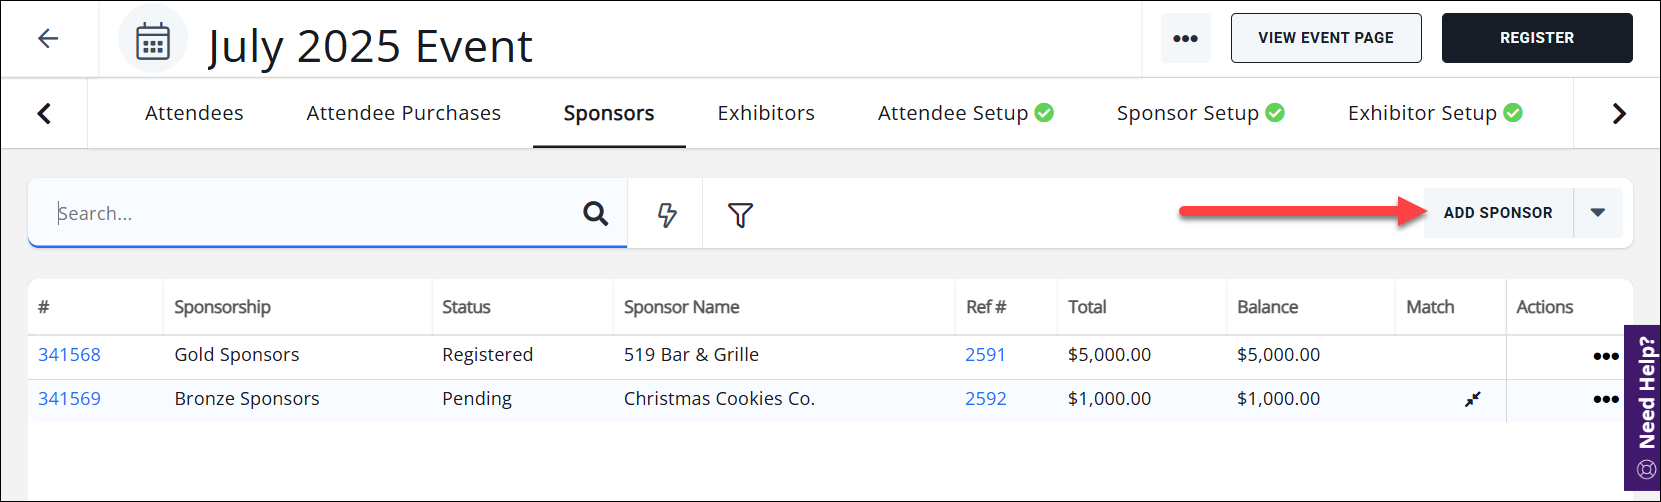
Using the Add Sponsor button on the Sponsors tab to register a new event Sponsor. - The Sponsor Registration page will open and will follow the same workflow as the Register (As Staff) option.
Related Topics:
- Changing Sponsor Terminology
- Set up Sponsor Display Options
- Set Up Sponsor Registration Types
- Set Up Sponsor Registration Options
- Set Up Sponsor Confirmation Messaging
- Register Sponsors- Back Office
- Register Sponsors- Online
- Matching Sponsors to Contacts
- Cancel Event Sponsors
- Canceling Events and Registrations: Scenarios
- Pre Sold Sponsorships: Best Accounting Practices
- Event Registration FAQs

