.png)

 2736
2736
When you're ready to configure the registration details for your event, the Attendee Setup tab is your next stop.
In your event, click on the "Attendee Setup" tab.
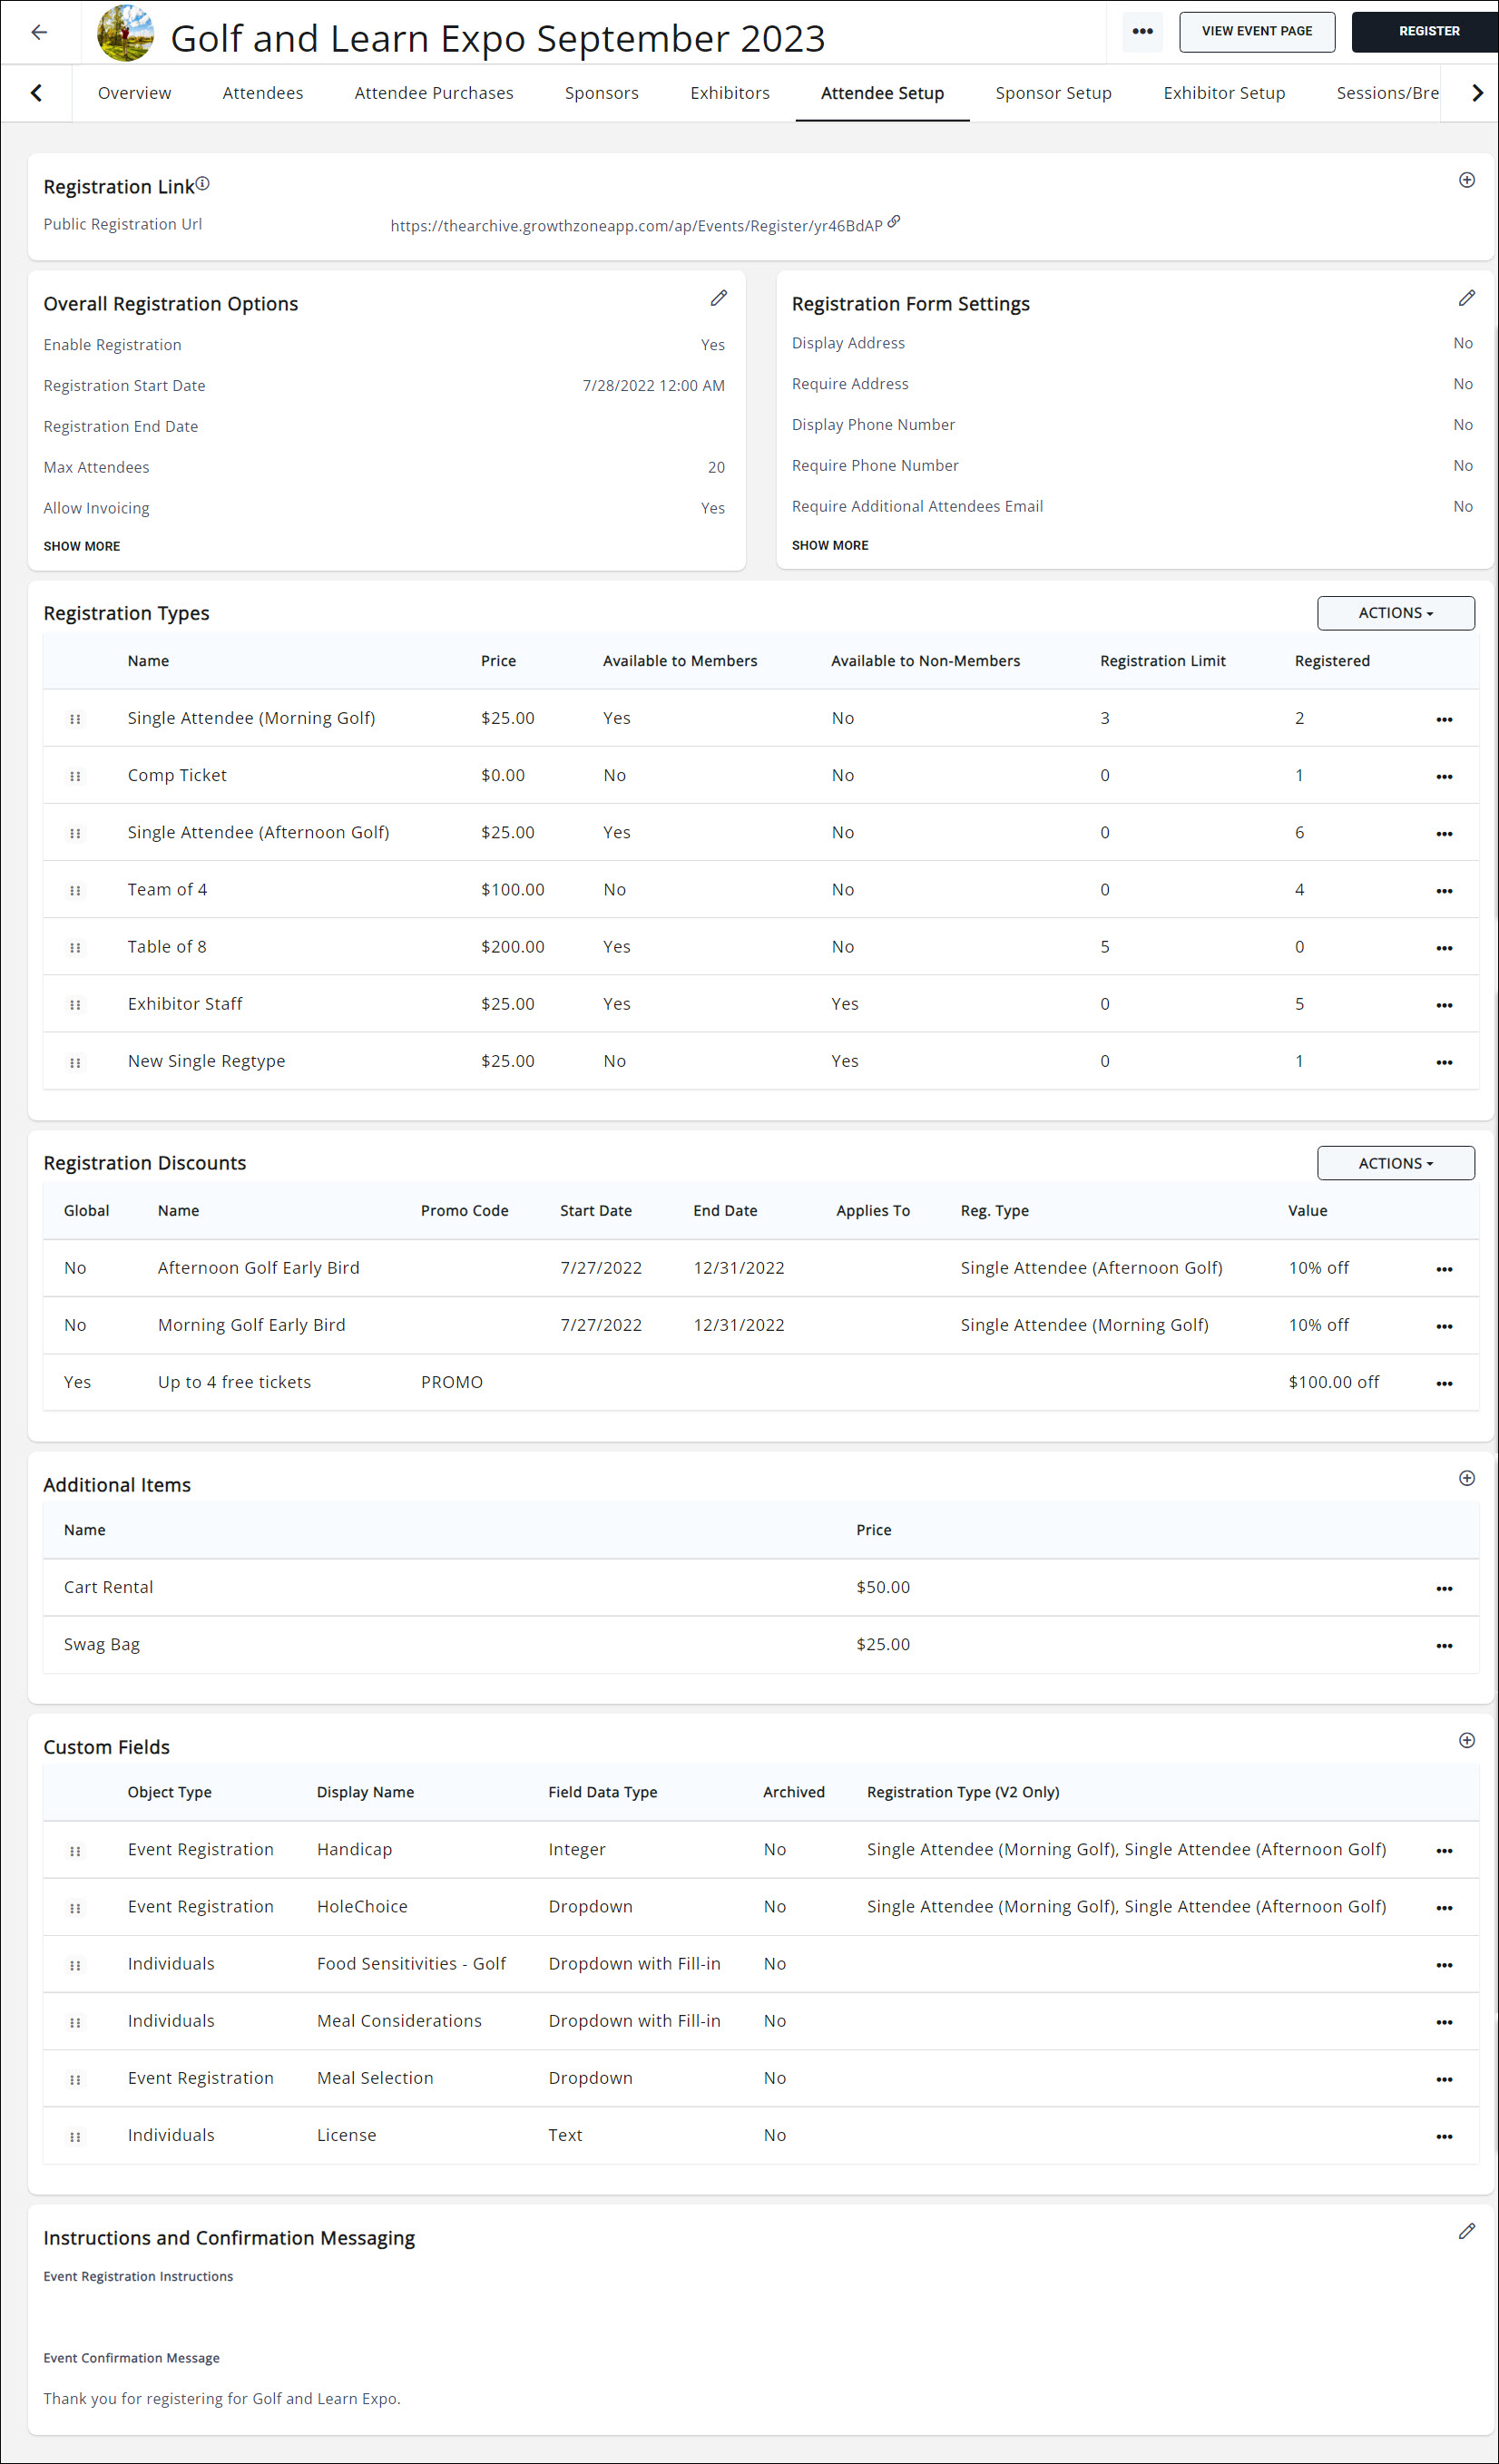
Registration Link
The first section is the Registration Link. You can copy this link to email out or send to someone who wishes to register themselves; it is a direct link to the event registration page. In the upper right corner of this section is a "+" sign; click on that and you will get two options to register someone from the back office: Register (As Staff) and Register (As Non-staff).

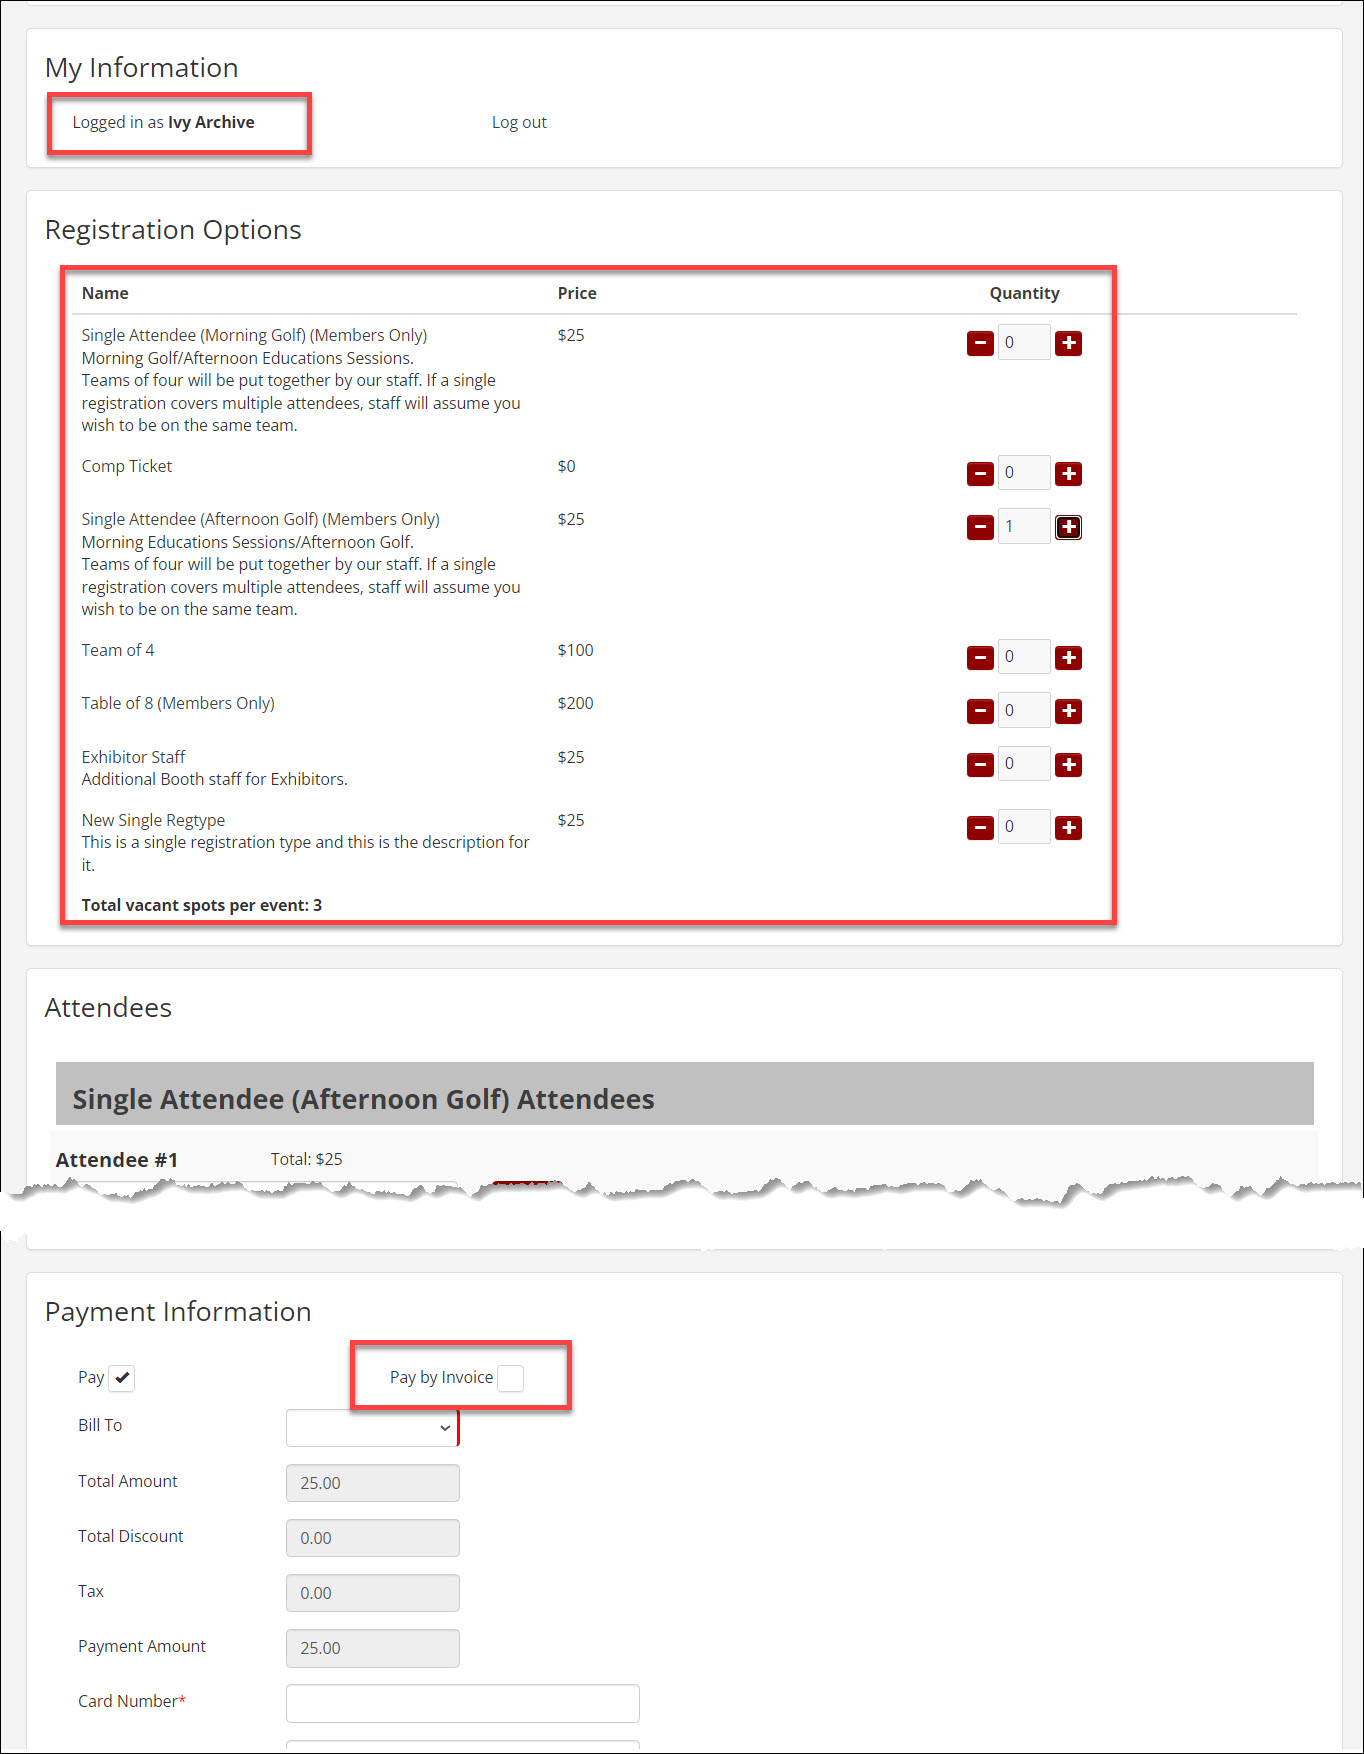
Selecting the "Register (As Staff)" option will open the event registration window with yourself logged in as an administrator; this will override many of the restrictions you may have in place such as member vs nonmember pricing, will display any staff-only registration types, and will allow you invoice an attendee even if invoicing is turned off for your registrants.
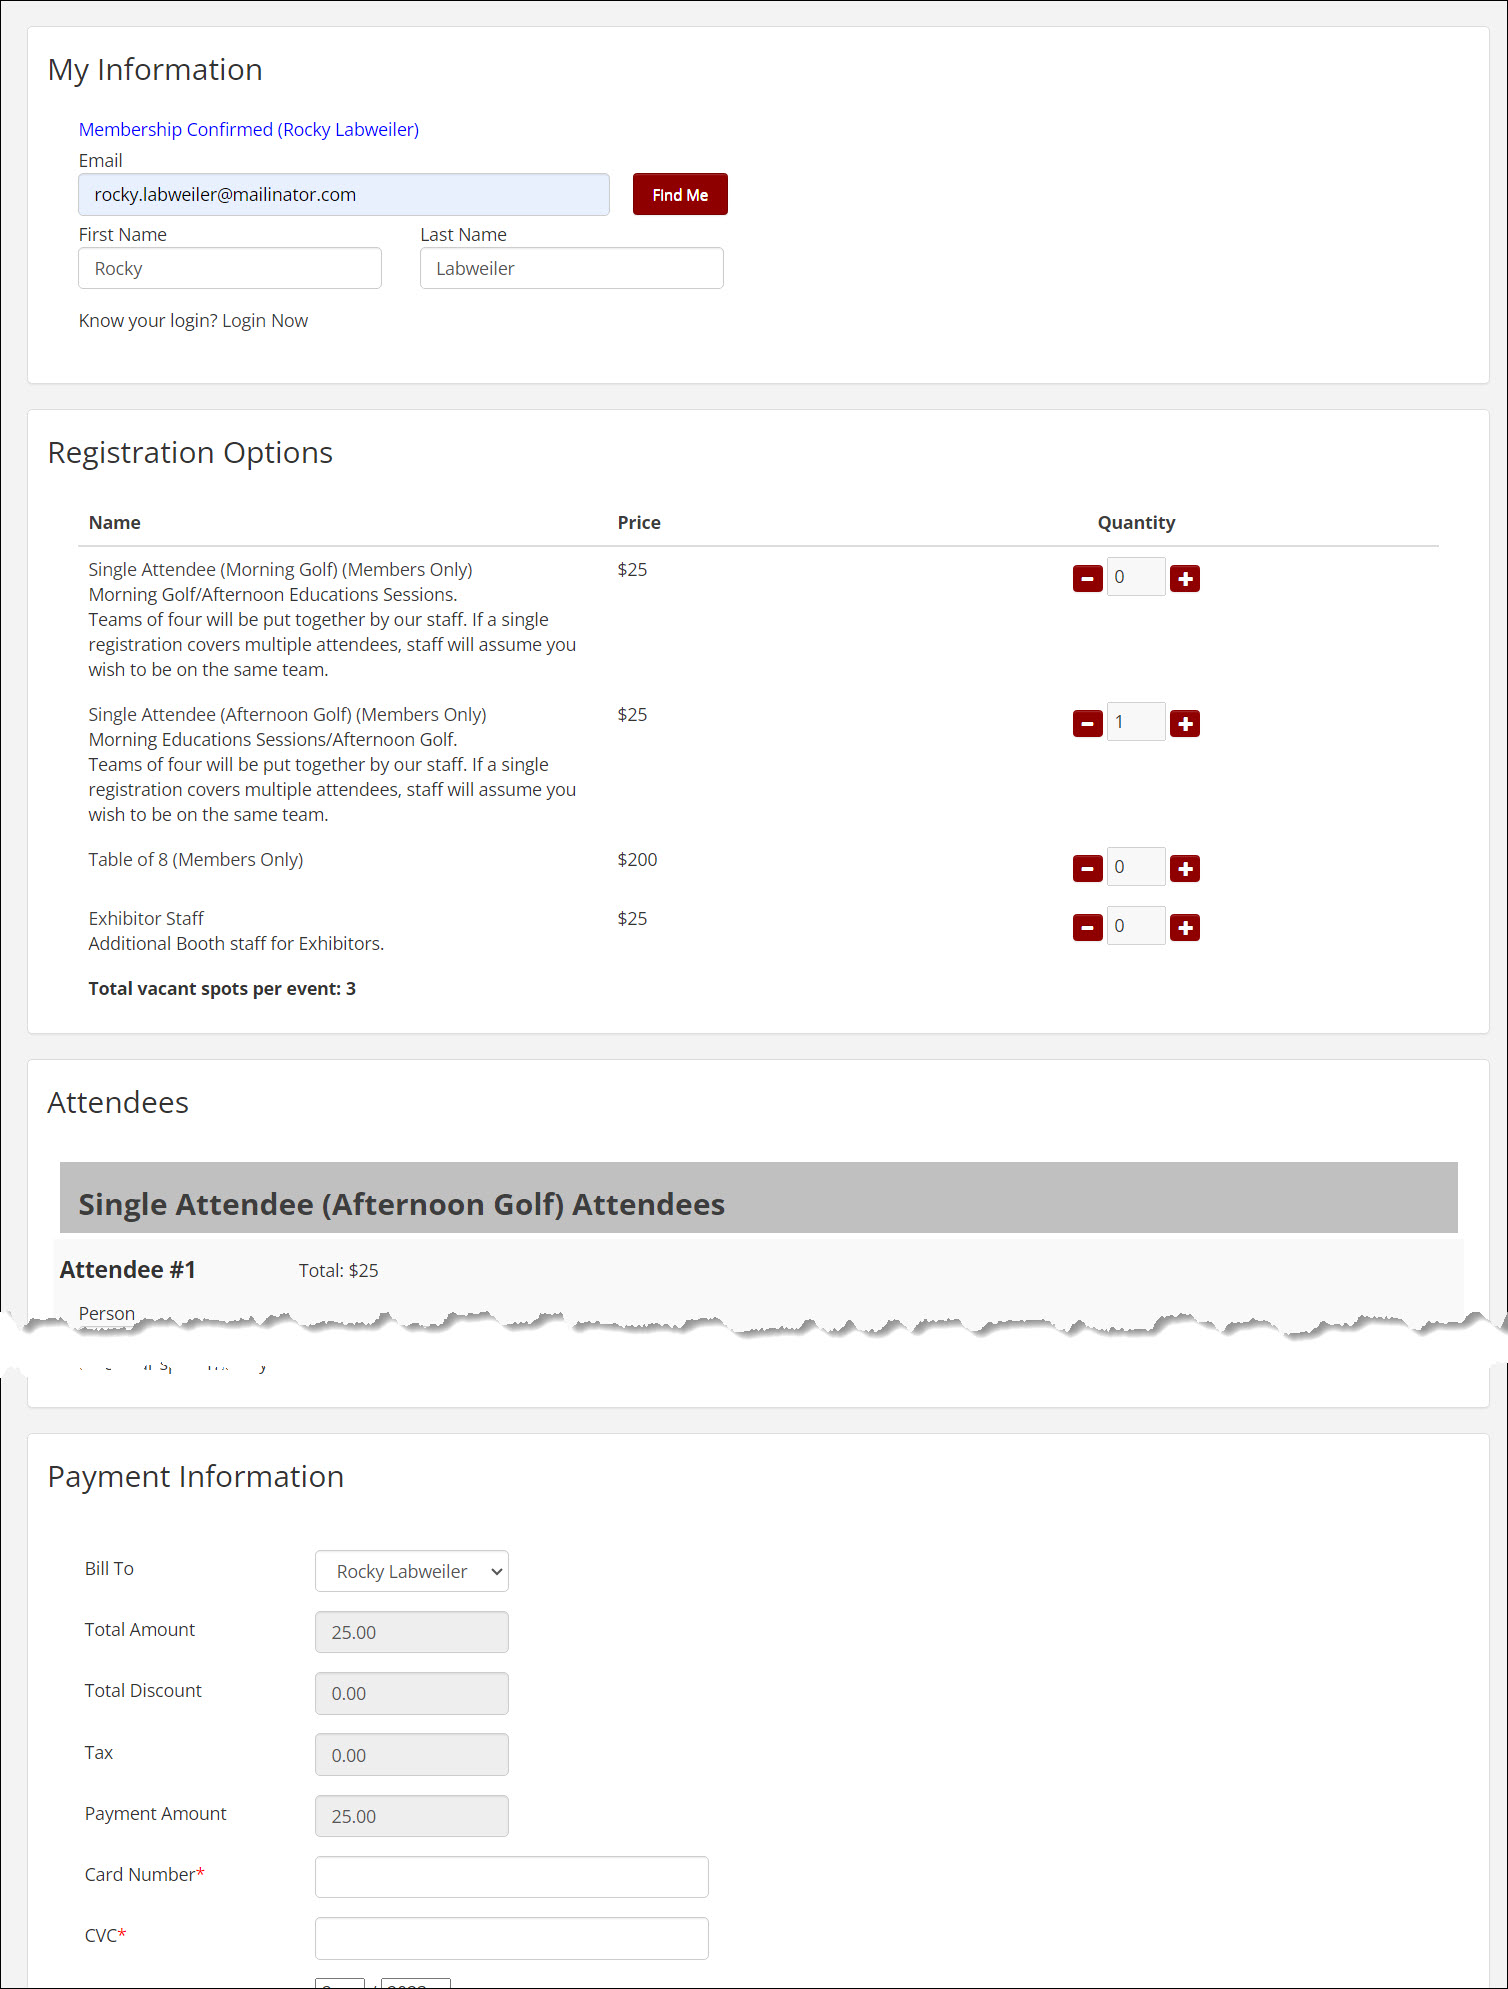
Selecting "Register (As Non-staff)" will open the event registration window and prompt for an email to match, just as any standard registrant would experience. If invoicing is not enabled for the event, only the credit card payment option will display.
The next sections display a variety of configurable options.
Overall Registration Options
These selections will determine when registration becomes available, when registration is closed, how many total attendees are allowed, etc.
See Overall Registration Options for more details.

- Click the pencil icon to edit these options.

- Click the plus icon to register an attendee. You can choose to register on the behalf of an attendee (Register using staff credentials), or register as the attendee themselves (Register with non-staff credentials).

- Click "Show More" to display the full list of options.
Registration Form Settings
These options control what information is gathered in an attendee registration. Click the pencil icon to edit; click "Show More" to display the full list of options.
See Configure Your Registration Form Settings for more details.

Registration Types
All the registration types you have configured for this event will display here.

To add a new registration type, click "Actions" and select the appropriate registration type.
For more instructions, see:
- Add a Free Registration Type
- Add a Simple Paid Registration Type
- Add a Table/Team Registration Type
- Add an Advanced Registration Type

You may also change the order of the registration types by dragging and dropping them into the preferred position in the list. See Change the Order in which Registration Types are Displayed on your Event Page for more information.
Registration Discounts
This section will allow you to create a variety of discounts for your event.

To add a new discount, click "Actions" and select the preferred discount type.
For more instructions, see:
- Add an Early Registration Discount
- Add a Promo Code Discount
- Add a Discount for Membership Type
- Add a Volume Discount

Additional Items
You can include optional additional items for sale in your event. To add an item, click the "Add Item" button.
See Add Additional Items for Sale During Event Registration for more information.

Custom Fields
In addition to the basic information gathered in the Registration Form Settings, you can create and use custom fields for specific data for the attendee and/or for the event. Any Custom Fields you have attached to this event will display here.
For more information, see Add Custom Fields to Event Registration Form.

To add a custom field to your event registration, click the plus icon.
Instructions and Confirmation Messaging
This section allows you to customize registration instructions and the confirmation messaging after an attendee has completed registrations. (The Event Confirmation Message is also included in the confirmation email the attendee will receive.) Click the pencil icon to edit.
For more instructions see Instructions and Confirmation Messaging.


