.png)
Invalid Email Addresses Report

Mar 20, 2023
 2061
2061
When an email is bounced or gets a spam report, it is flagged in your system. The system will prevent you from sending emails to flagged/invalid emails. The Invalid Email Addresses Report provides a list of all emails in your database that have been marked invalid.
- Click Reports in the Navigation Panel
- Use the Quick Filter
 or the Customize Filter
  to apply the Communication category.

Using the Quick Filter option to select the Communication category within the Reports list. - Select Invalid Email Addresses Report.

The Invalid Email Addresses Report - Select your search filtering criteria:
- Email Validity Change Date: If you wish to view results for email addresses based on when they were flagged in your system, select a change date.
- Contact: If you wish to view results for an individual contact, type the name of the contact.
For our example, we know we don't have very many bad emails in our database, so we will leave both these options empty.


Did you know? Unlike most of the Communications reports, the recommendation for THIS report is to run the report first without any additional filters to get a good baseline of results and filter as needed from there!
- (Optional) Enter any Additional Criteria/Filters as needed. Click the small plus
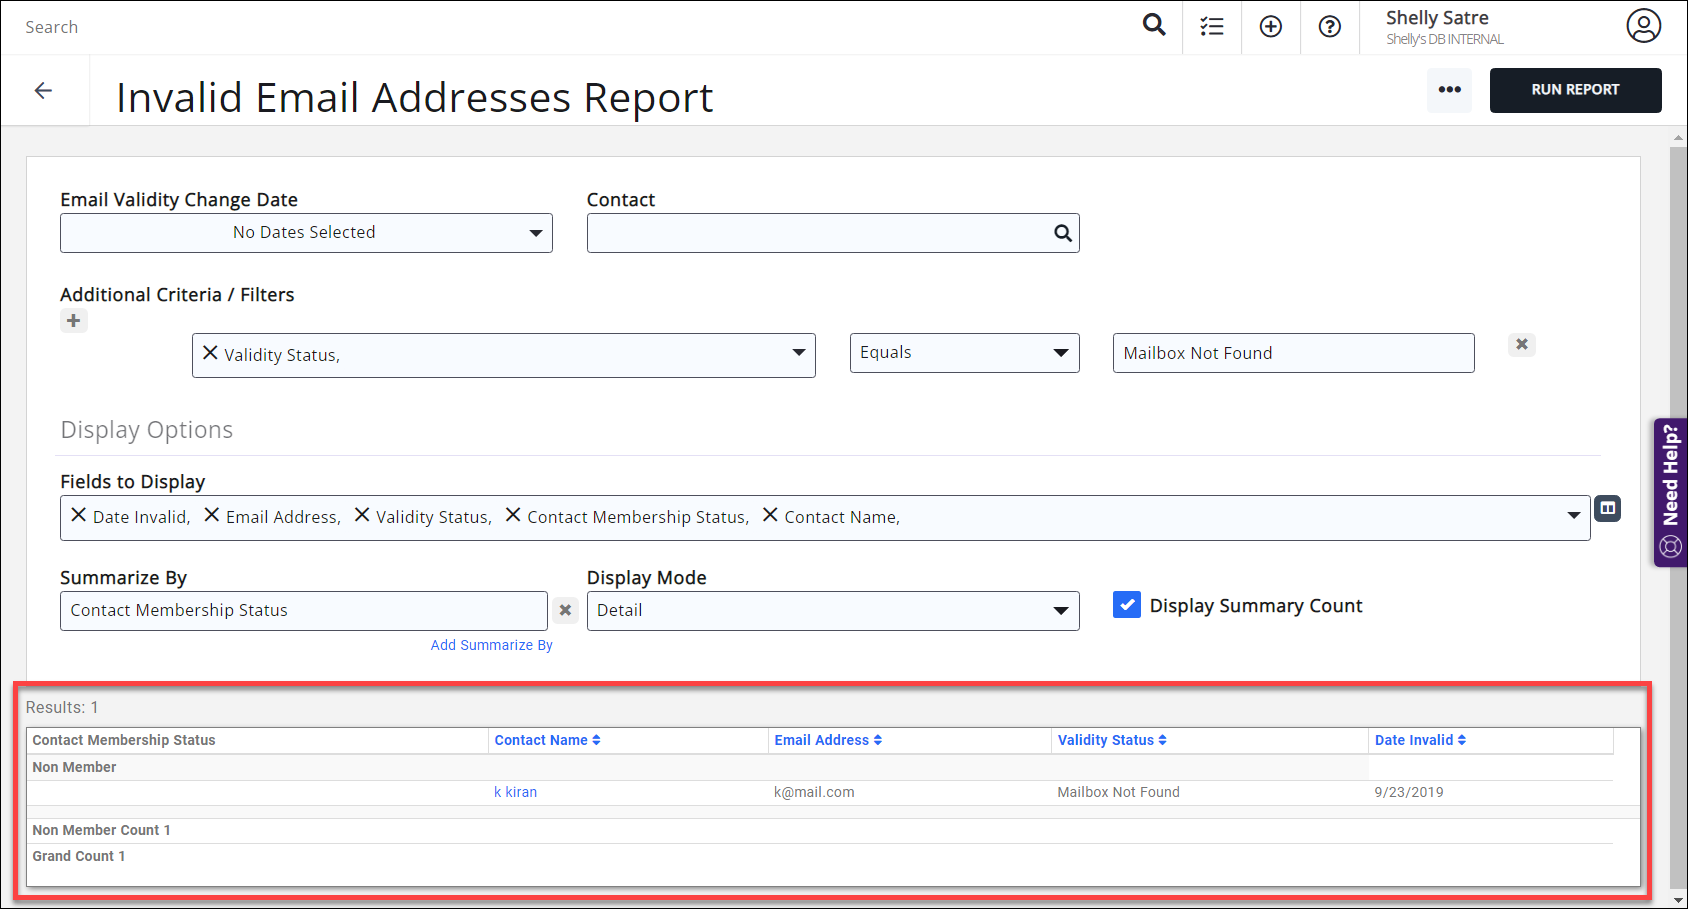
 on the left to add additional criteria/filters. For example: if you wish to view only emails that have been flagged for a specific reason, you would choose Validity Status, then enter the bounce reason. In our example, we have run this report once and found we wanted to filter to a specific status of "Mailbox Not Found", which means an email address simply does not exist.

- (Optional) Select Display Options. The report is set up with default fields to display; you may add or remove fields by clicking on the Fields to Display drop-down arrow and searching or scrolling for the field you want to include. To add a field to the display options, enable the checkbox to the left of the field name. For our report, we want to include the Contact's Membership Status, so we will add that option to our report fields.

Adding the contact membership status field to our report results. - (Optional) Select Summarize by criteria. This optional field allows you to select how you wish report results grouped. (Summarize options are listed alphabetically in the dropdown, but recently/commonly used selections will "stick" to the top of the list.) Since we're including contact membership status in our report, let's group our results into those categories (Active, Non Member, etc.).

- Click Run Report.
From the report, you will be able to click into the name of a contact to access the contact's General Tab. From this tab, you will be able to manage the invalid email. See Managing Invalid Emails for further information.
See the following for Common Report Functions:

