Before You Begin:
- You need an Email Designer message that has been built and is ready to send. Find it in Marketing & Communication, Communication section, under Email Designer.
- Have your sender (From), recipient (To), and Subject information ready — see Send a Mass Email for further instructions.
- Email Designer templates are only deliverable from the Email Designer tab and are not available to select anywhere else in GrowthZone. You can, however, use them for/in Marketing Automation workflows.
Microlearning Overview
*NOTE: This video was recorded with the previous interface. We will be updating videos as quickly as possible.
Step-by-Step Instructions
You have several options when getting ready to send your Email Designer email or newsletter:
- View a Preview of Your Email Designer Newsletter
- Email a Preview of Your Email Designer Newsletter
- Send Your Email Designer Newsletter Immediately
- Schedule Your Email Designer Newsletter to be Sent Later
Option 1: View a Preview of Your Email Designer Newsletter
Prior to sending out your newsletter, you will likely want to preview it. Preview icons are available at the bottom of the screen.
- Click the
icon to view a desktop preview.
- Click the
icon to view a mobile preview.
Option 2: Email a Preview of Your Email Designer Newsletter
-
On the Email Designer tab, click the Actions button.

-
Select Send Preview.

- Enter the recipient email address. You may enter as many email addresses as you like.
- Click Done.
Option 3: Send Your Email Designer Newsletter Immediately
- Complete the edits to your newsletter.
-
Be sure the From, To, and Subject fields are complete (see Send a Mass Email for further instructions), then click the Send button in the upper right corner of the Email Designer.

Option 4: Schedule Your Email Designer Newsletter to be Sent Later
Complete your email design and enter your desired sender and recipient information, then find the Delay Delivery Until field.
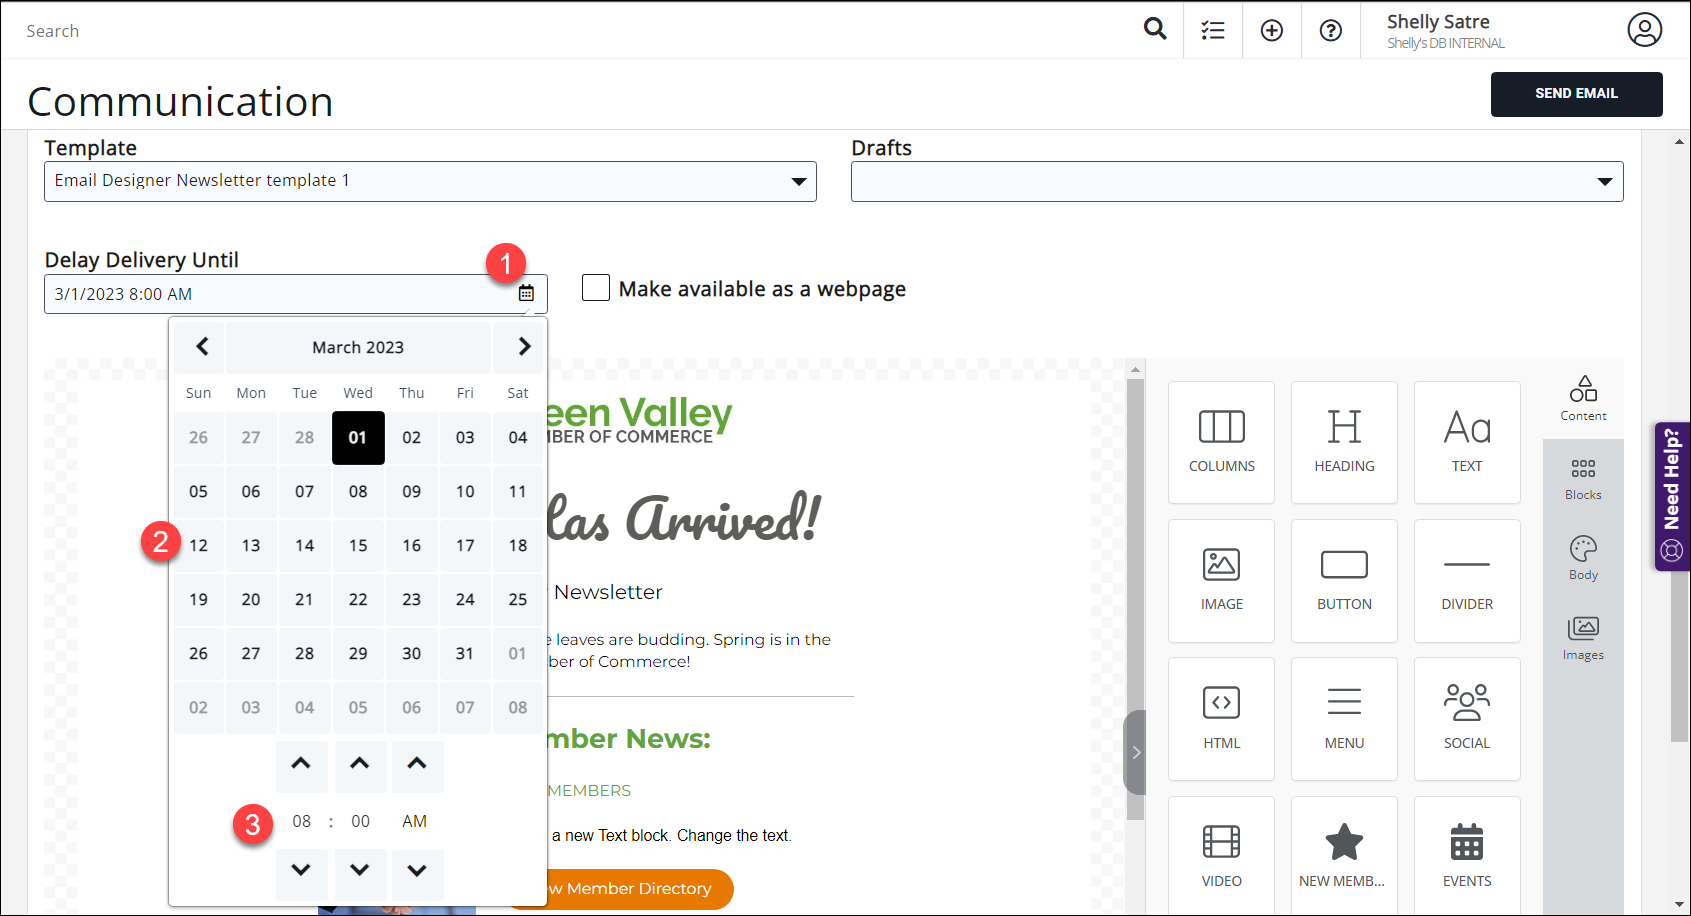
- Click the calendar icon in the Delay Delivery Until field.
- Select a date for the email to be sent.
- Select a time for the email to be sent. This information will now appear in the Delay Delivery Until field.
-
Scroll back to the top of the Email Designer window; the Send button has now become a Schedule button.

- Click the Schedule button; your email is now scheduled for later delivery. See View/Edit/Delete Scheduled Emails for more information.
| WIDGET DATA IN DELAYED DELIVERY EMAILS: If using the widgets (i.e. new members, upcoming events, etc.), the information that was populated upon creation of the email will be sent. The information will not recalculate when scheduled for sending at a later time. |
Forwarding an Email Designer Message
There is a known issue with Email Designer communications where, when using the forwarding option in GrowthZone, the forwarded message displays double-spacing instead of the original spacing. At this time, the workaround is to save your Email Designer message as a template, then send the template out as opposed to forwarding a previously sent Email Designer message.
Common Pitfalls
- Expecting widget data to refresh on scheduled sends: Widget content (new members, upcoming events, etc.) is locked in when the email is created. It will not recalculate at the scheduled send time, so build the email close to when its data should be accurate.
- Sending before required fields are complete: Confirm the From, To, and Subject fields are filled in before clicking Send.